
Image: June Wan/ZDNET.
Let’s say you’re heading to a certain location and want to let a friend, family member, or work colleague know you’ve arrived safely. This is now possible very simply thanks to the new “Accompaniment” functionality on iOS 17.
Thanks to Apple’s Messages application, you can share with the chosen person the location or expected time of arrival. When you reach your destination, it automatically receives a notification confirming your arrival.
If you arrive later than expected, the application will ask you if you wish to extend the accompaniment. If you don’t respond, it will alert you that you haven’t arrived yet, sharing your location, route, and other information so your chosen person can contact you.
We’ll explain how it works.
1. Update your devices
First, you and your recipient must have iOS 17 (or iPadOS 17 on iPad). The functionality also exists on Mac, starting with the MacOS Sonoma version.
To update your iPhone or iPad, go to Settings > General > Software Updateselect Upgrade to iOS 17then click Download and install. To update your Mac, click on the apple, go to System Settings > General > Software Updatethen select Upgrade next to the presentation of macOS Sonoma.

2. Allow location sharing
Next, you need to enable location sharing. To do this, go to Settings > Privacy & Security > Location Services. Go to the bottom of the list, select System services then activate Share my location.

3. Choose how much data to share
You now need to determine what data you want to share with the person you choose. Go to Settings > Messages. Scroll down until you see Support data.
Two choices are then available to you:
- When I arrive : This limited option shares your most recent location and information about your battery and network signal.
- Integrals: the full option shares all the data from the limited option as well as the route you took and the location of your iPhone the last time it was unlocked.

Choose the option you prefer.
4. Select your recipient
Now that you’ve set up the Accompaniment option, it’s time to try it out. Open the Messages app and select a trusted person you want to share your location with. Only contacts with whom you have a history will be eligible. Tap the icon + at the bottom left to display iMessage services. Swipe down to view all apps. If the person meets the required conditions, you will see appear Accompaniement in the list. If so, click on it. The message is then generated on your side. Push the button To modify which appears below the message to adjust the different parameters.

5. Configure your Support
You now have two options to choose from to set your ETA: “When I arrive” and “After a timer”.
To set the time you will physically arrive at the location, select the tab When I arrive. A map appears. Click on To modify, then type the start of your destination address in the search box. Select the correct address from the list. Zooming in on the map shows you the location more precisely. You can then restrict or expand the area included in your destination by selecting “Small”, “Medium” or “Large” at the bottom of the page. When everything is configured, click OK.

6. Choose your means of transport
Next, choose the means of transport you will use: car, public transport or walking. If you plan to take breaks along the way, click Extend and select Extend by 15 minutes/30 minutes/1 hour. Click on OK.

7. Schedule your support
If, on the other hand, you want to schedule a specific time for your arrival, go to the tab After a timer.
Change the hours and minutes in the timer to set your arrival time. For example, if you expect your trip to last two hours, you would set “2 hours 0 mins”. When the timer is set, press OK.

8. Send the message
Press again OK. Back in the conversation, tap the blue arrow to send your message to your recipient.

9. The other person is alerted
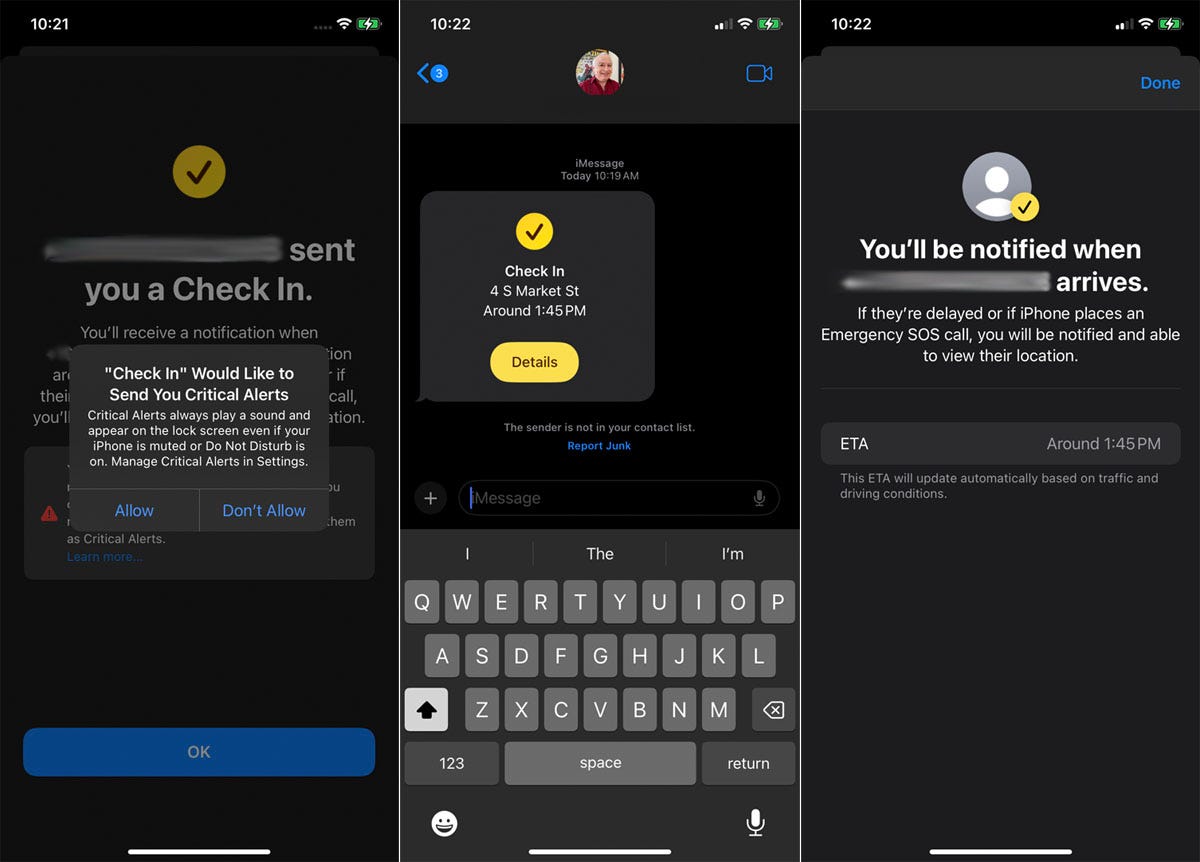
Your recipient receives a notification explaining how the process works. She then presses OK and chooses to allow Escort to send her critical alerts if she wishes. These alerts can be delivered even if the phone is on silent or do not disturb mode. Accompaniment messages appear in the recipient’s Messages app. If you click on Detailsyou will see your expected arrival time and a message indicating that the person will be informed of your arrival.
Screenshot by Lance Whitney/ZDNET.
10. Change your arrival time
If you chose the “After a timer” option, you can add a specific duration to increase your travel time. Open the message and press the button Details. Then press Extendthen select Add 15 minutes/30 minutes/1 hour. Click on OK once you are finished.

11. Cancel the accompaniment
To cancel your request, open the message and click Details. Then click on Cancel support. Confirm by clicking again Cancel support.

12. Receive notification
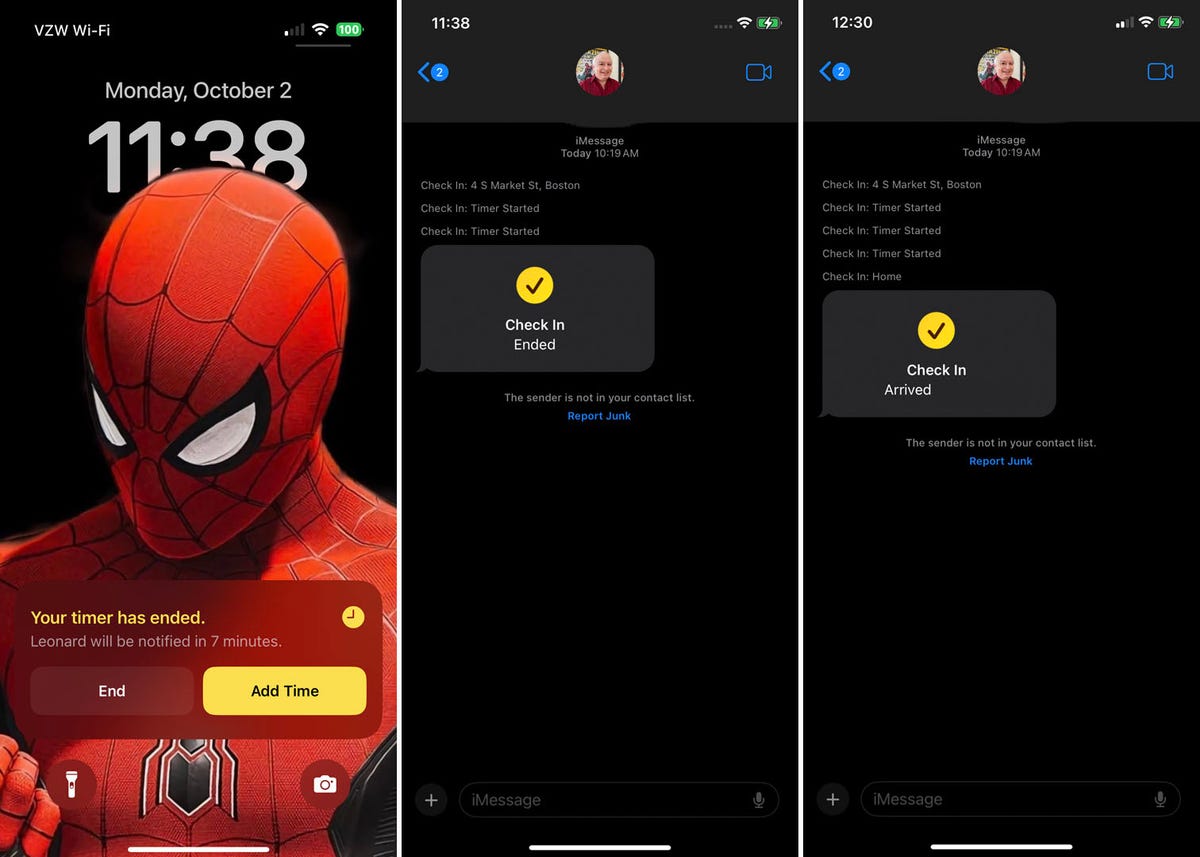
If you have not canceled, the timer will continue. At the end of the timer, you can click on End the support.
Otherwise, the recipient will receive a notification informing them that the support has ended.
Screenshot by Lance Whitney/ZDNET.
13. An alert is sent if Check In fails
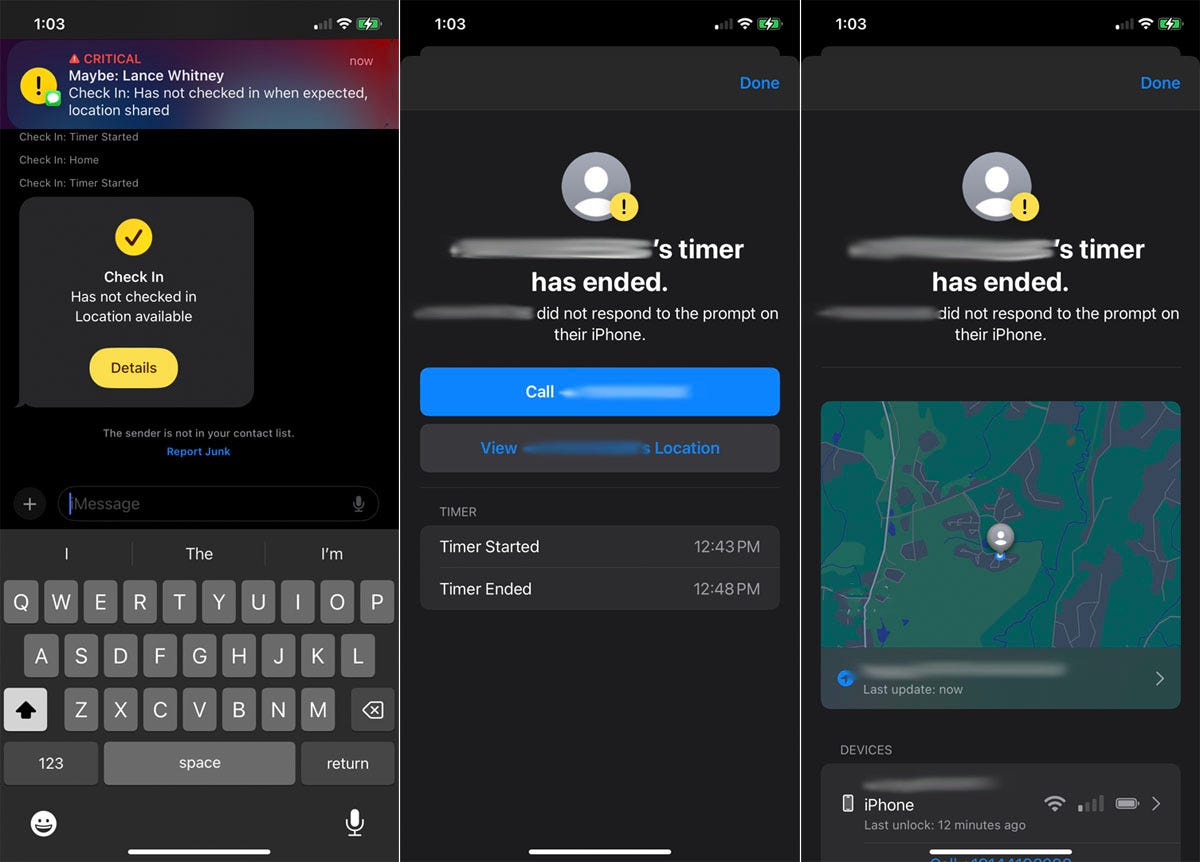
If you do not end the coaching or if a certain amount of time has passed after the timer ends, the recipient will receive a critical notification. Tapping the notification takes the recipient to the original text message. From there, by pressing the button Detailshe or she can call you or check your location on a map.
Screenshot by Lance Whitney/ZDNET.
Source: ZDNet.com