Batiks
DIY technology works that easy
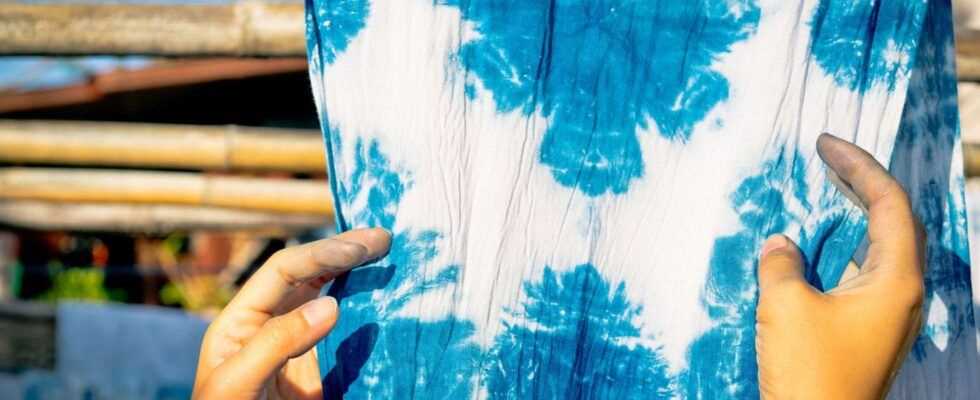
© Pichit Tongma / Shutterstock

Batik remains very popular. Because instead of buying a finished tie-dye shirt, you can do something yourself. And best of all: Batik can also be an ideal activity for your child.
We originally know batik from the 90s. Then tie-dye shirts and co. Disappeared from the scene and from our wardrobes for many years. But for some time now, DIY dyeing technology has been back in high demand. Of course, you can also simply buy an assortment of batik wardrobes. But Doing batik yourself combines many advantages:
- It does fun.
- One can be his creativity let free rein.
- You create Unique pieces according to your wishes.
- It’s pretty easy and therefore also for children (under supervision) suitable.
- Old clothes can become new favorites. (sustainability!)
- It is ideal for killing time and yourself makes sense to employ.
Which fabrics are suitable for batik?
Whether old or new – your item of clothing or textile that you want to embellish with batik should come from one Natural material be. Cotton, linen, silk, or wool are ideal. Mixed fabrics are also possible to a certain extent. However, synthetic materials such as polyamide, polyacrylic or polyester may not make up more than 50 percent.
You need these materials for the dyeing technique
One advantage of batik is that Clear number of products required. You probably already have one or the other at home. To get you started, here is a short list:
- a vessel (depending on the size of the garment, a bowl, a bucket, etc.)
- a measuring cup
- Textile color of your choice
- Fixing salt / Color fixer
- Tape, cords, or rubber bands
- rubber gloves
- a clothing material / textile of your choice
optional: a tarpaulin to protect the floor, additional containers for color combinations and for washing out
Instructions: Here’s how
Before you start, we recommend that you get everything ready. In this way, you will avoid being in a time of distress later if you are looking for the other utensils that you need for the next steps during the process.
- Grab a T-shirt, top, etc. and tie it: Tie cords, tape off parts with adhesive tape (ideally masking tape), form a ball out of the item of clothing and wrap it so that it fits into Shape remains.
- Mix your textile or batik paint with water according to the instructions on the package.
- Now put your batik object in the container. If you want to tie several textiles at the same time – no problem, just put them in!
- Now it is a question of being patient and watching his work develop. Stir occasionally.
- While your work draws color, you can – if you use separate vessels – that Fixer prepare. Here, too, simply follow the instructions on the package and put your batik piece in the fixer after the dye; stir regularly.
- Now remove all adhesive strips, cords and the like.
- Then just wash your work in clear water until it no longer loses any color. If necessary, change the water in between.
- Let it dry completely – and you’re done!
Helpful tips and tricks for successful batik
- Make sure your Garment always enough space Has.
- It shouldn’t look out of the top of the jar. In a pinch, use a few stones to weigh down your clothes and keep them underwater.
- Always take a look at your work while you are “pulling” it. The longer it stays in the batik color, the more intense the result will be.
- Consider it: The tighter you tie, the less paint will get to the covered part of the textile and the stronger the contrast can be later.
- You can also use multiple colors. Then you should always start with the lightest color and Let the garment dry completely between the individual batik processes.
- A cool, subtle tie-dye look can also be created, for example, if you tie only the sleeves or only the lower section of a T-shirt. To do this, simply tie / knot the object accordingly and do not place the object completely in the vessel, but only the sleeves or the lower part.
- If you are only concerned with the employment of your child or children, but you do not want to “sacrifice” any clothing, you can also use an (old) Cotton towel, bed linen or similar batik. You can just let off steam there.
- If you do not want a two-dimensional result and perhaps want to save yourself the hassle of dye baths, you can also click Textile spray paint To fall back on. You can knot, tie and co. As usual with tie-dyeing. You can then spray the paint onto the textile using an appropriate paint bottle with an atomizer.
These batik patterns are easy to achieve
The bulls eye
The classic of batik is the so-called “Bulls Eye”. Similar to a target, colored rings are lined up around a center. To do this, simply grab the area of the textile in which the center will later be located, i.e. the point around which the rings are to be distributed afterwards. Then you repeatedly tie a cord or tape around the piece of fabric at a distance you specify, so that something sausage-like is created.
Transverse or longitudinal stripes
A stripe pattern is very easy to make with batiks. For this simply lMake a roll of your textile lengthways or across and bind repeatedly at the required intervals.
Ombré
So far, you’ve only known ombré from the field of hairstyles? But it means exactly the same thing when dyeing laundry. Because who says you always have to create wild patterns with batik paint? T-shirts, but also blouses, can be given a great color gradient with tie-dye. For that simply Put the desired object piece by piece and always a little further into the dye bath. Of course, it also works the other way around – depending on the effect you want to create.
Tip: You can find great inspiration and other folding and binding techniques on Pinterest. We have picked out an example for you here.
Batik for advanced users
Do you want to go one step further and get the traditional batik art approach, then do not tie off, but rather use candle wax. Either you drip wax onto your fabric in a pattern to prevent the batik paint from penetrating, or you take a brush and use the hot wax to draw a beautiful pattern by hand. After batik, carefully scrape off the wax and, if necessary, go over your new masterpiece with blotting paper and a low-set iron.
Batik: A fashion trend that doesn’t just concern children
With the 90s fashion revival batik is also experiencing its second spring. The nice thing about the trend is that it can make pretty much anyone happy. Because while you can keep your children busy with a batik session, you can also get creative yourself and proceed according to your own taste. Take the chance to give your not so bright white t-shirt a second life. Or grab a white or very light blouse that somehow seems too boring and transform it into a fashion highlight that no other person in this world has. If you do it right and stay true to your style, nothing can go wrong.
Make batik yourself – the full range of possibilities
Because tie-dye shirts are not only popular with hippies and Caribbean fans with a penchant for brightly colored colors. Even fashionistas who prefer the more reserved, monochrome style can bring a breath of fresh air into their wardrobe with a batik pattern. After all, in your DIY project, no one can tell you which color to use. So if you prefer something more subtle, you might start with a black and white combination or tie a white T-shirt with a pastel shade such as light blue, a delicate rose shade or classic Light gray.
Also the You can determine the number of samples individually and design everything according to your wishes, from wild patterns to a single batik highlight. If you are still unsure whether the tie-dye look is right for you, you might start with a tank top, which you can then wear under a blouse with a neckline or an open cardigan. An all-over tie-dye outfit can also look very stylish, but it is more for “tie-dye professionals”.