Build your own raised bed
In seven easy steps to the DIY bed
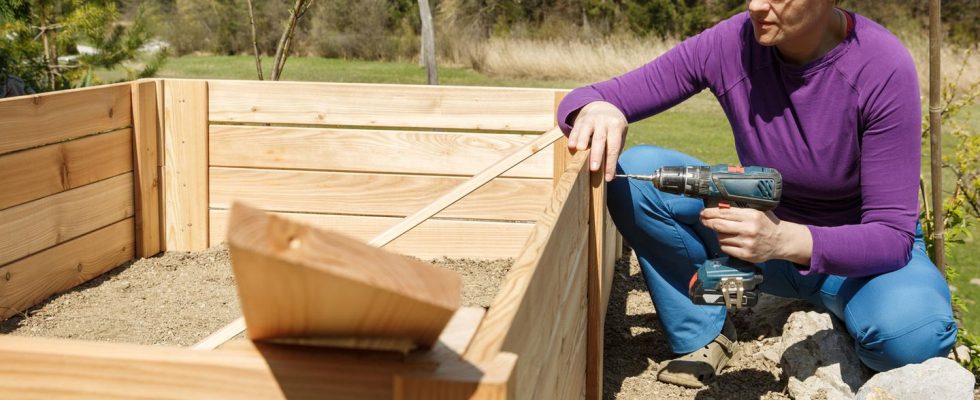
© zlikovec / Shutterstock

Would you like to build a raised bed yourself? Good idea! With our instructions and many useful tips, your DIY project will be child’s play.
If you want to build a raised bed yourself, you have a variety of options. From plug-in systems, pallet constructions to the individual 100 percent self-made version, there is a suitable variant for every requirement. One thing they have in common is that they are relatively easy to implement – even for inexperienced young DIY enthusiasts. We will now tell you what other reasons speak for a self-made raised bed, a simple step-by-step guide and many other tips.
Build a raised bed yourself: that speaks for itself
Raised beds have been a big trend for some time. No wonder they offer some advantages compared to conventional beds.
- Gentle on the joints: Instead of having to get on your knees in front of your bed, you can cultivate your raised bed while standing.
- Higher temperature: When growing vegetables and fruit, a raised bed is placed on a layer of compost that generates heat through the natural process. Among other things, this means that you can bring in an earlier, more productive harvest.
- Independent: For conventional beds you need an appropriate subsoil, i.e. soil. Raised beds, on the other hand, can also be placed on balconies and terraces (possibly in small format).
- Naturally: The rotting of the organic components serves as a natural fertilizer. A supply of chemical fertilizers is often not necessary.
Building a raised bed yourself also has important advantages compared to bought specimens. The decisive things that speak for the self-construction of a raised bedwe briefly summarized.
- Perfect fit: your raised bed, your rules. Or rather: your measurements. Both in terms of size and the height of the bed, you can set everything up according to your needs. Depending on the space, you can determine the area that the self-built raised bed should later occupy. Are you particularly tall and want to protect your back by not having to bend down all the time? Then simply build your raised bed higher and adjust it to your height.
- Individually: When designing your raised bed, you are the boss. You want to use an otherwise unusable corner? Goes! Would you like to work on several levels? Goes! Do you want to make the best use of your elongated but very narrow balcony? Goes! Goes! Goes!
- Cheaper: Finished raised beds are often quite expensive. If you want to build your raised bed yourself, you can do it much cheaper.
Tip: If you like one middle ground between individuality and little effort wish when assembling are so-called connector systems perfect for you You save yourself sawing, drilling, etc. and can still assemble them according to your own wishes.
Just 7 steps: It’s that easy to build your own raised bed
First you need a few materials and of course the right tools to build your raised bed yourself. Tip: You can find countless in the hardware store borrow tools, if you only need them very rarely or only once. This saves money that you could rather invest in great plants.
You need these materials:
- wooden slatsideally made of larch or Douglas fir: At least 4 – depending on the width and depth of your raised bed
- 4 cornerstone and possibly 2 center post
- pond liner or bubble wrap – important: non-toxic!
- Countersunk Wood Screws (stainless steel, 5mmx60mm)
- garden fleece or weed fleece as desired
Tip:Decking boards are idealto build a raised bed yourself. They are weatherproof and therefore durable.
If you don’t want to build your raised bed on the balcony or terrace, but rather on a natural surface, you will need a few additional things:
Of course, muscle power alone is not enough to build a raised bed. You will need one or the other tool. The good thing: the hobby craftsman has a large part of it in the house anyway.
You need these tools:
Simple instructions: build a raised bed yourself step by step
preparations
- Take measure: Think about where you want your raised bed to be, how much space you have available and what size of raised bed you need to grow your desired fruit, vegetables, herbs or ornamental plants.
- Get materials and tools: You collect your materials according to your ideas and see which devices you may need to buy or borrow. Put everything ready to hand – then everything goes a little faster during implementation.
- Tip: If you don’t want to use standard dimensions, have your boards and posts cut to size at the hardware store. This saves you time and other tools, i.e. saws.
- Prepare floor: Depending on the surface on which your raised bed is to stand, different aspects fall under this point. A so-called garden fleece can protect both your balcony floor and your raised bed itself. Uneven, natural surfaces may need to be leveled. Stone slabs are also often laid specially for a raised bed (time-consuming).
Build a raised bed on solid ground (e.g. balcony, terrace)
- It is best to start with a side part, i.e. one short wooden slat, and a corner post. First draw and pre-drill the holes and then screw both parts square together. Tip: Ideally, the drill holes are a little smaller than the following screws. Pre-drilling is all about avoiding splintering of the slats.
- You now attach your first side part to a second corner post. Make sure that the side part protrudes over the corner post. How far it sticks out depends on the thickness of your slats. If they are two centimeters thick, the side part must protrude by two centimeters accordingly. This will later result in a flush corner.
- If you have connected your first side part with two corner posts at right angles, you can first attach a longitudinal part, i.e. a longer wooden slat, according to the same scheme and continue accordingly with another side and longitudinal part.
- Depending on how high you want your self-built raised bed to be, add wooden boards row by row. A small gap between the levels is importantso that there is good ventilation.
- Check again and again whether you are working at right angles. The spirit level should be your constant companion, especially at the beginning. This is the only way to prevent the water from always flowing into a lower-lying area and your raised bed from being moistened unevenly.
- An alternative would be to assemble the side and longitudinal walls separately. That means: You can first attach the desired number of side boards to the two corner posts. This is how a side wall is created first. The longitudinal boards are now gradually attached to these.
- If you have decided on a very wide raised bed, we recommend that you use the stabilize long sides with two center posts.
Sink the raised bed in the natural subsoil
If you want to set up your self-built raised bed on a lawn or similar and let the corner pillars and middle posts sink into the ground, you must first position them accordingly before actually building the raised bed. For that you can Simply sharpen posts and then drive them into the ground with a sledgehammer.
Or you use so-called ground sockets, which are thrown in instead. The corner posts and, if necessary, the middle post are then inserted into these ground sockets – which you ram into the ground with a dropping wood (important!) and a sledgehammer. Here too it says: The ends of the posts that come into the ground sockets must be made thinner so that there is a smooth transition.
Once the ground sockets are in the ground and the posts are in the ground sockets, they only have to be connected with screws. Then you can attach the wooden slats as described above.
Important: Before you put another level on top after the first row of boards, first add a length of chicken wire. Fasten them thoroughly with the staple gun and make sure that there are no loopholes for voles or moles.
Finish raised bed
- When the raised bed has taken its shape and become a kind of big box, all you have to do is build it line with a pond or dimpled foil. In this way, the wood does not unnecessarily remove moisture from the soil – good for your cultivation AND the durability of the raised bed.
- Fasten the film with the tacker. The knobs point outwards, i.e. towards the wood.
Now you can already fill your self-built raised bed. If you have any questions, we have a lot of information and tips for you here. You may also be interested in the following questions:
How much does it cost to build a raised bed yourself?
Unfortunately, there is no concrete answer to the question of costs. Your costs depend on many factors, such as the size of your raised bed and the tools you have. Nevertheless, to give you an indication of what costs you could incur, here are some price examples:
- Terrace boards (Douglas fir) cost between 2 euros and 25 euros per meter.
- Garden or weed fleece costs between 70 cents and 3.80 euros per square meter.
- Bubble wrap costs between EUR 1.90 and EUR 2.50 per square meter.
- Impact ground sockets are already available for around 3 euros each.
- Wire mesh costs less than 2 euros per meter.
Which wood is suitable for a raised bed?
If you want to build your raised bed yourself, you should pay attention to weather-resistant wood. This will ensure that you get something out of it for a long time. are particularly suitable Larch, oak or Douglas fir boards; but also tropical woods such as teak, ebony or meranti are excellent due to their natural resilience. When it comes to tropical woods, you should pay attention to certified dealers. You can usually recognize these by the FSC seal.
Which location is best?
Of course, where you set up your raised bed depends on your individual circumstances. If you want to grow fruit and vegetables, however, you should – if possible – on one Square in north-south orientation regard. Then the plants get the maximum amount of sun. Depending on the size of your property, it is advisable to think about watering for a moment. You probably don’t want to lug around an unnecessarily large number of watering cans when you could place your raised bed right next to a water source.
Which is better: a raised bed made of wood or metal?
In this article we have dealt with wooden structures. There are also numerous metal raised beds on the market. However, these have one disadvantage: metal is a good conductor of heat. With a raised bed, however, this can have undesirable consequences. At both very high and very low temperatures, the conductivity of the metal can be rather harmful to your plants.