Screenshot by Lance Whitney/ZDNET.
With the rise of generative AI, many artificial intelligence image generators have emerged this year. Among them, we find Dall-E, created by OpenAI, but also Leonardo, a little less known.
Also named after a famous artist, Leonardo offers a multitude of options to generate the images you want. In particular, it is possible to control the size and dimensions of the image, to specify the number of images desired or to choose a photorealistic rendering.
Leonardo offers a limited free version that works with a certain number of tokens per day. These tokens run out quickly, so you can choose to purchase a subscription starting at $10 per month. Whatever your choice, here’s how to generate images using Leonardo.
1. Create an account
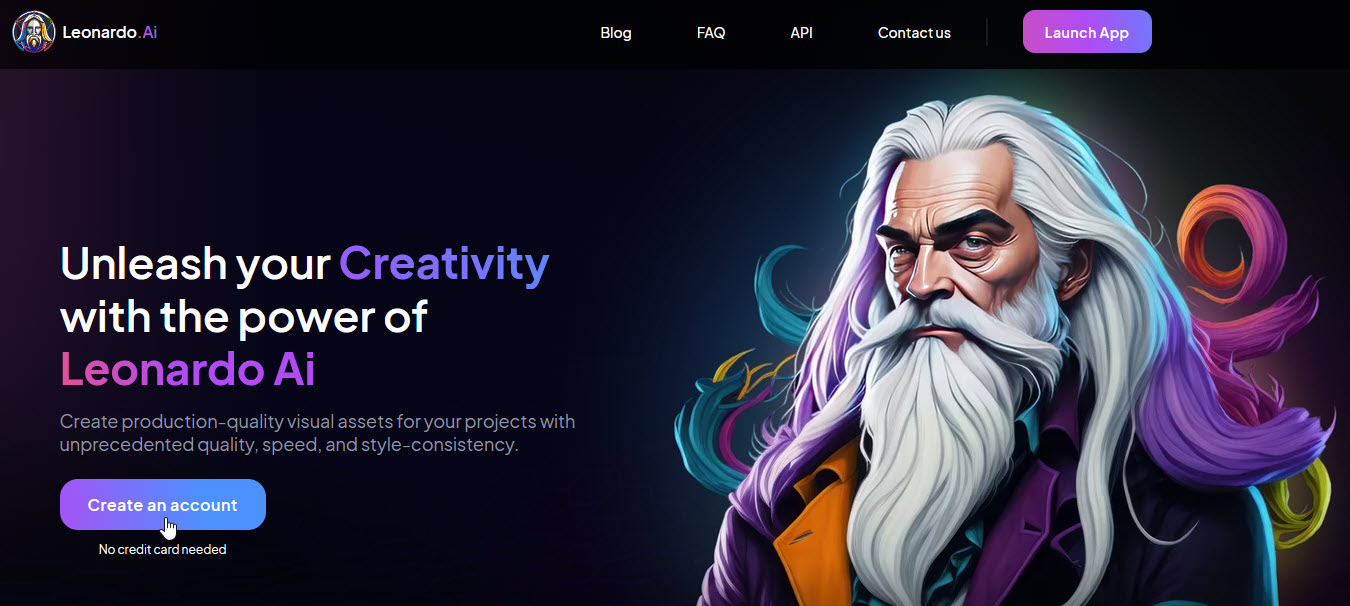
To get started, go to the Leonardo website. Click on Create an account to register. Please note, the entire site is in English! You can choose to sign in with your Apple, Google, or Microsoft account, or use another email address to create an account.
Screenshot by Lance Whitney/ZDNET.
2. Go to Image Builder
To generate an image, you have three options:
- click on Image generation in the center of the page;
- click on Image generation in the left panel;
- click on Create New Image top right.

Screenshot by Lance Whitney/ZDNET.
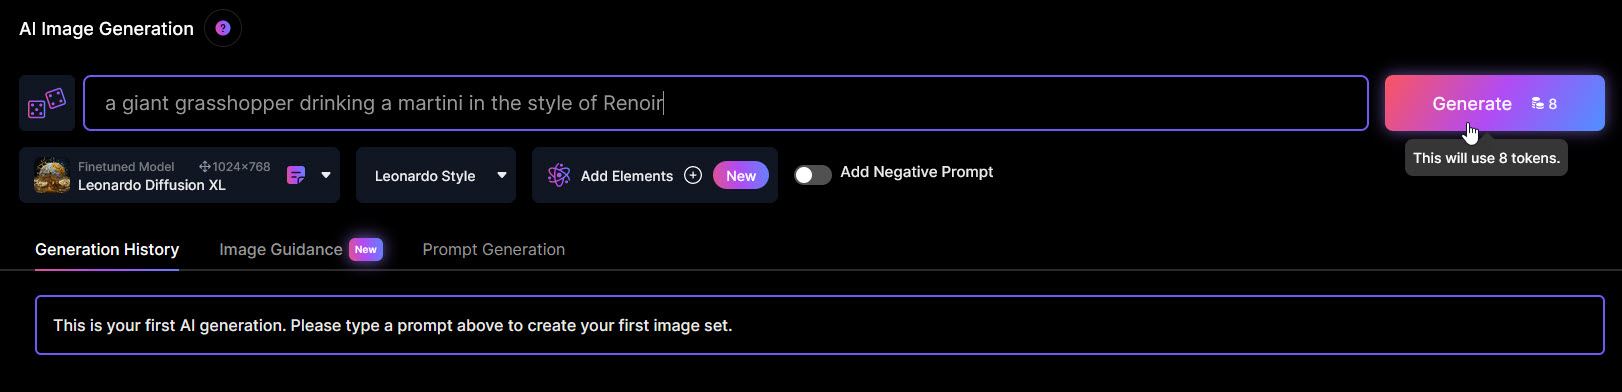
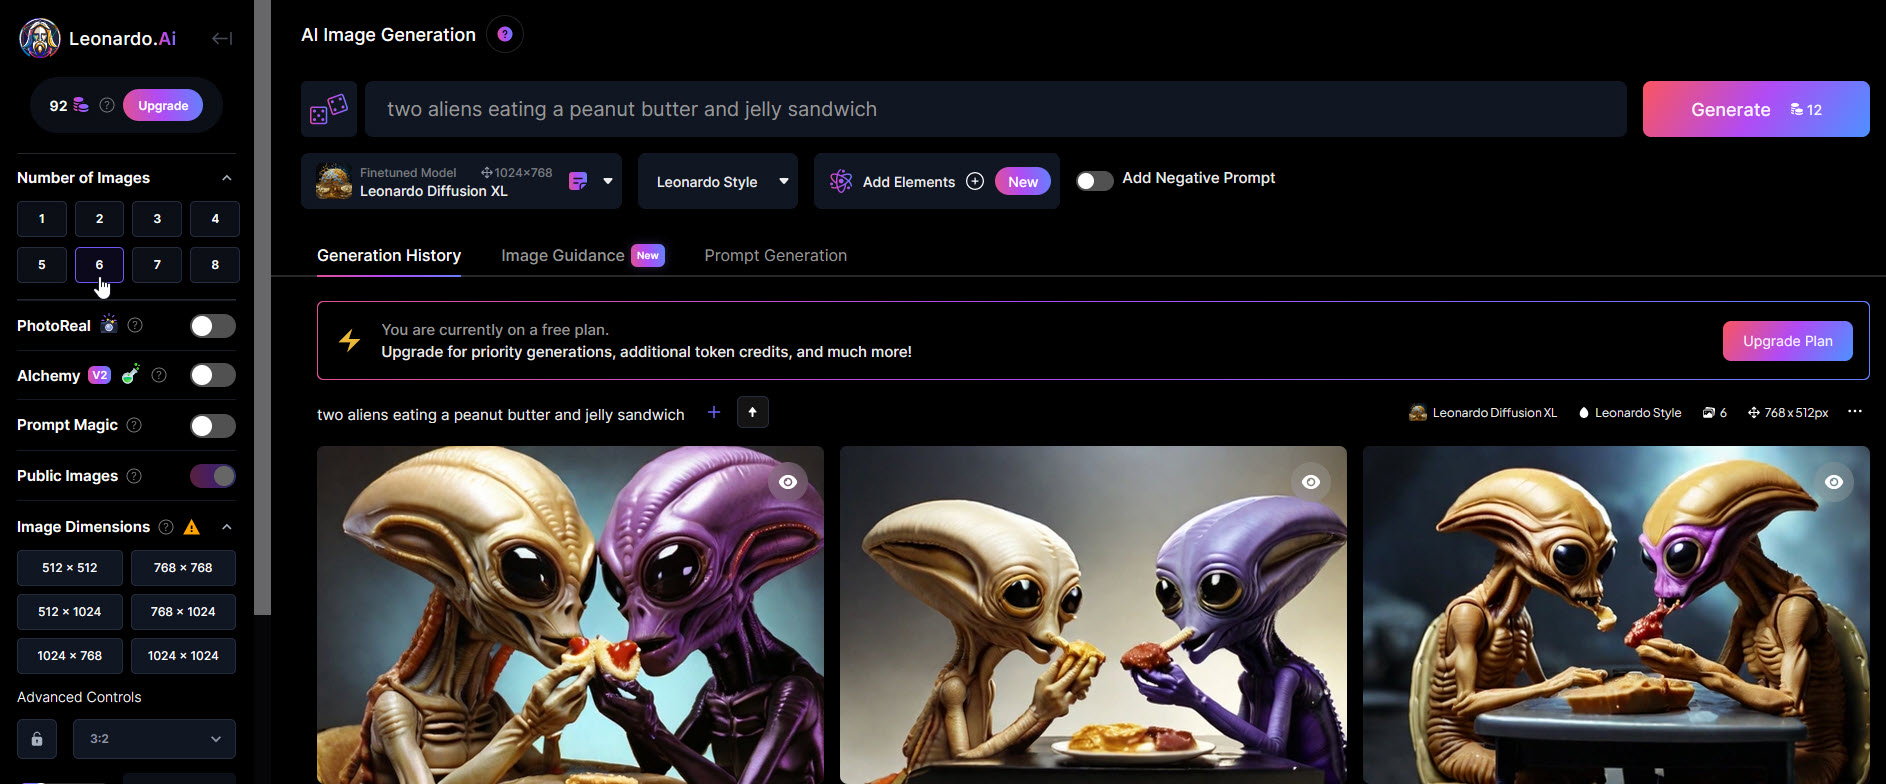
3. Generate a simple image
To begin, describe the image you want to generate in the text box where is indicated Guy promptly…. You can specify the artistic style you want in your description. Please note, you must write your query in English – the generator does not understand French. Once you have completed your description, click on Generate. This button shows the number of chips remaining. Something to watch out for, especially if you use the free version.
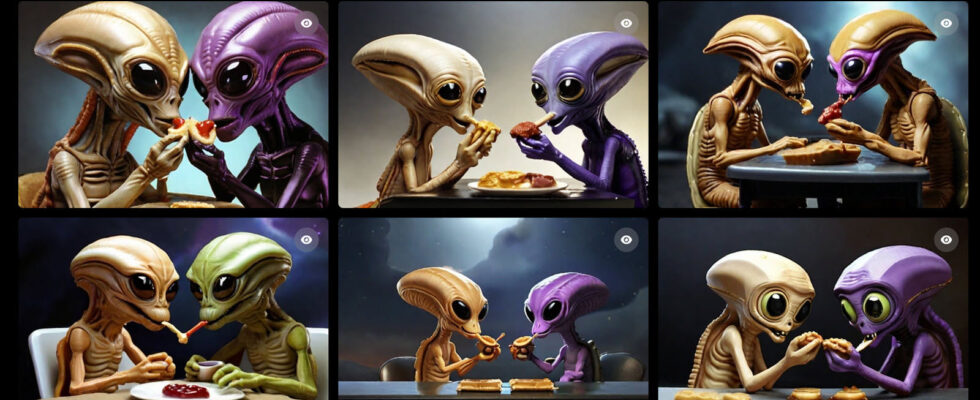
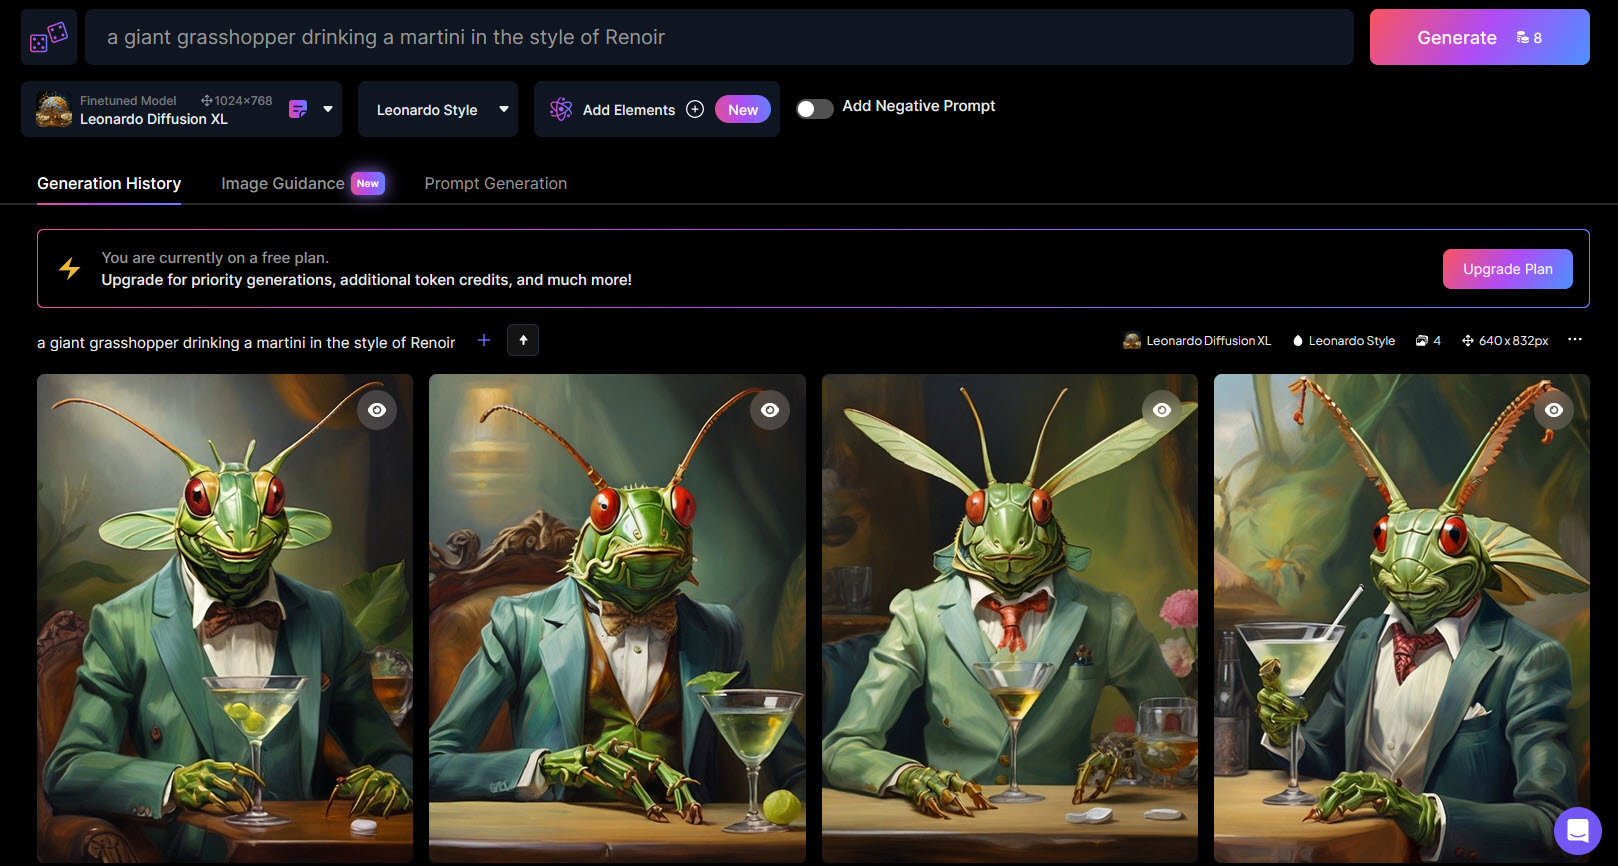
In the following example, the query was: “a giant grasshopper drinking a martini in the style of Renoir”:
Screenshot by Lance Whitney/ZDNET.
Leonardo created four different images following this description:
Screenshot by Lance Whitney/ZDNET.
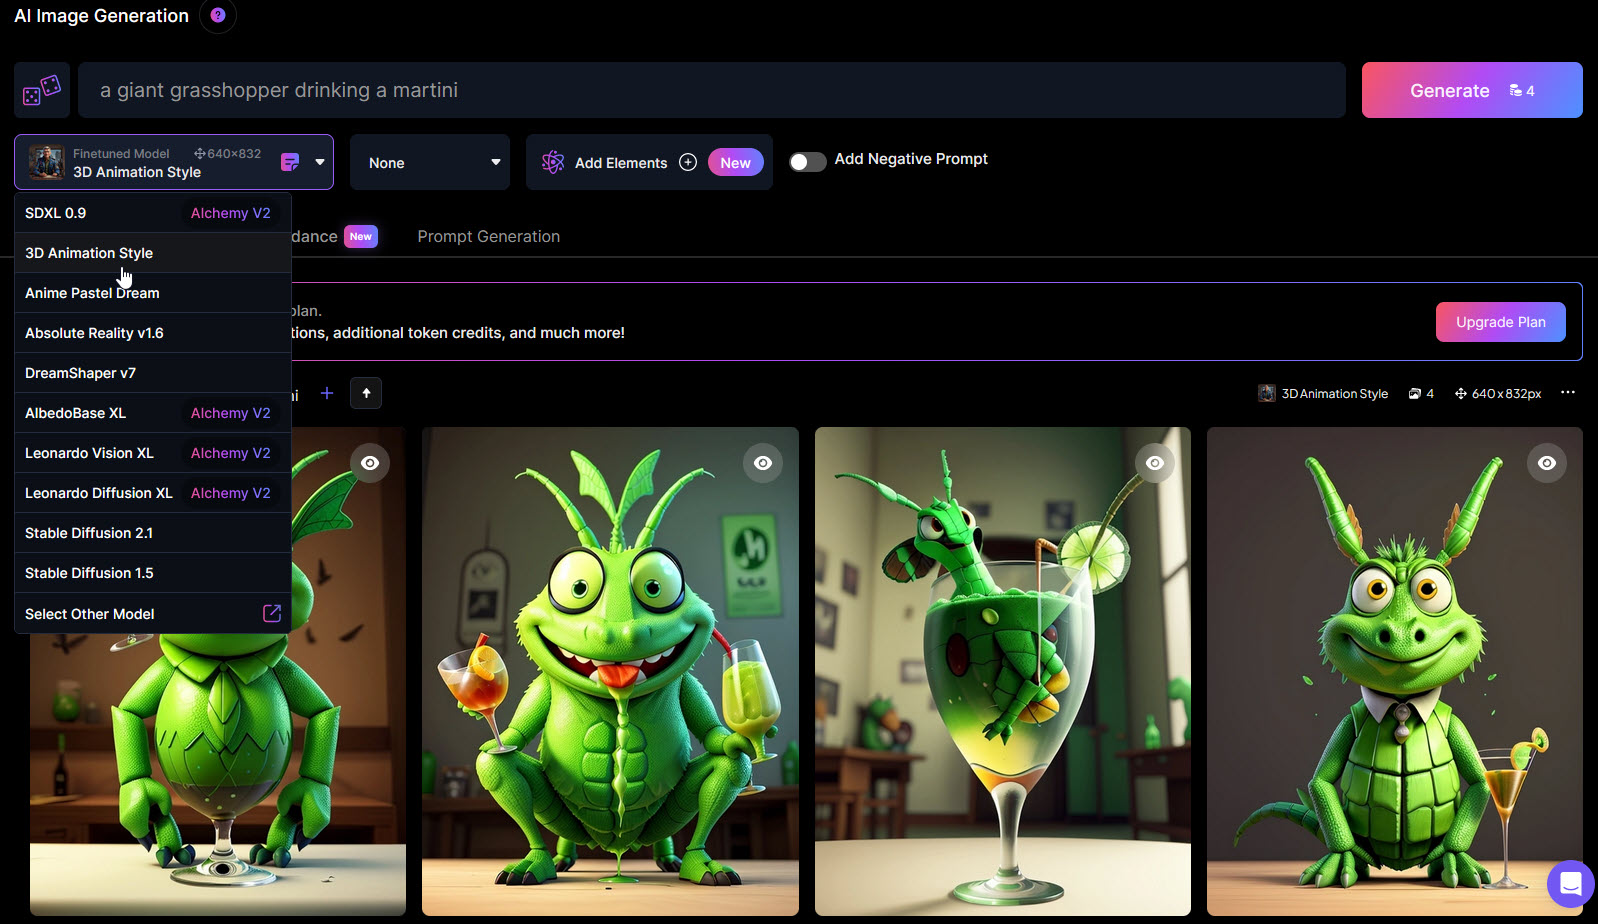
4. Generate an image with a particular style
When you type a query, you can choose to change the style using the drop-down menu Finetuned modelwhich presents by default Leonardo Diffusion XL. The menu is located just below the text box used to type your query. Some models on the list have self-explanatory names – 3D Animation Style, for example, or Anime Pastel Dream. For others, it’s more abstract. The best thing is to test all the possibilities to determine which one best suits your needs.
The drop-down menu located just to the right then allows you to choose between Leonardo Style And None (none). Once again, try both options to see which one works best for you.
Once you have chosen your options, click Generate.
Screenshot by Lance Whitney/ZDNET.
5. Generate an image in a specific universe
To add elements corresponding to a particular mood, click Add Elements. You can then choose between styles as different as Baroque, Coloring Book, Kids Illustration, Pirate Punk or Vintage Christmas Illustration. You can select several options, but Leonardo warns you that in this case the results may be unexpected. Above the styles, the box Show compatible only (show only what is compatible) is checked by default.
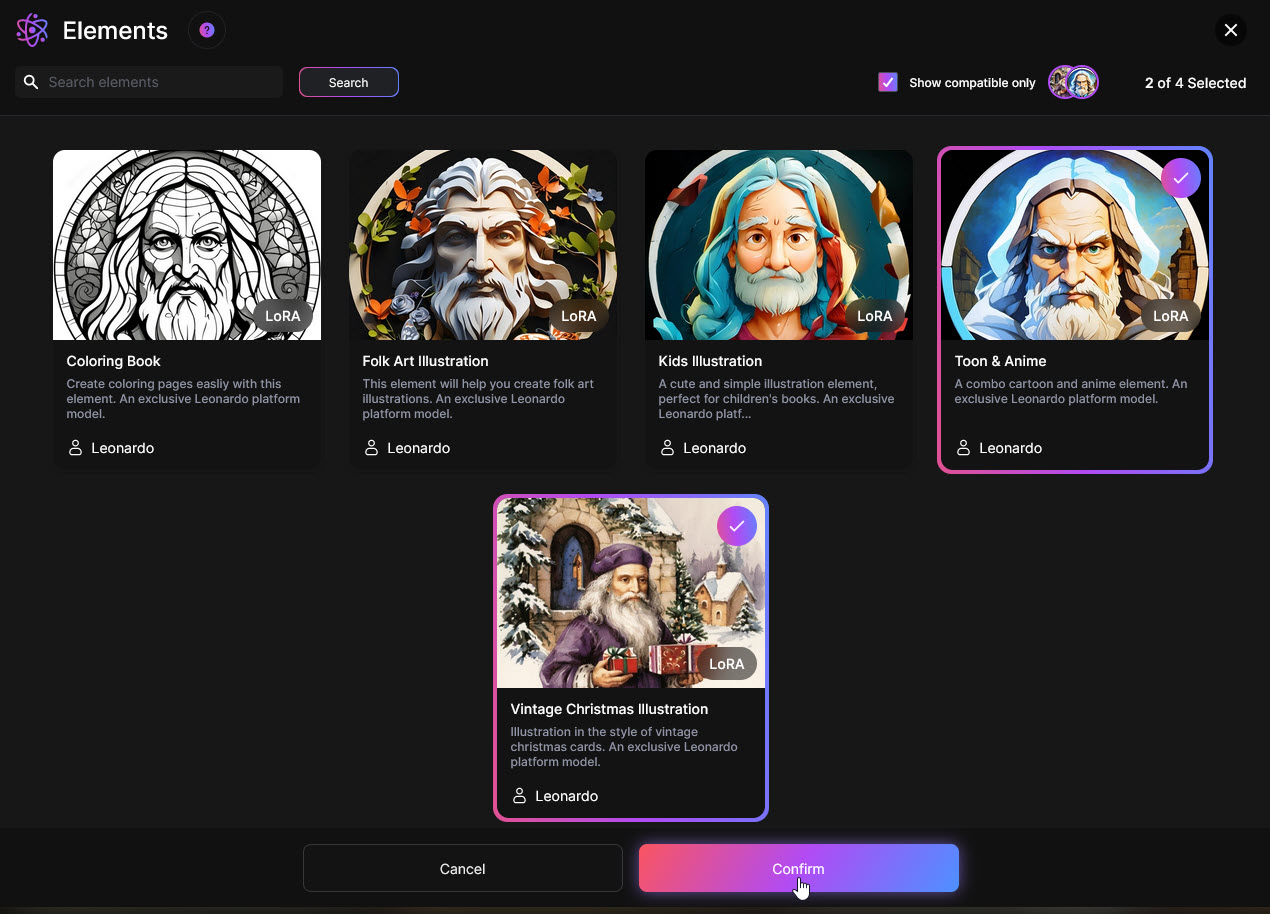
Screenshot by Lance Whitney/ZDNET.
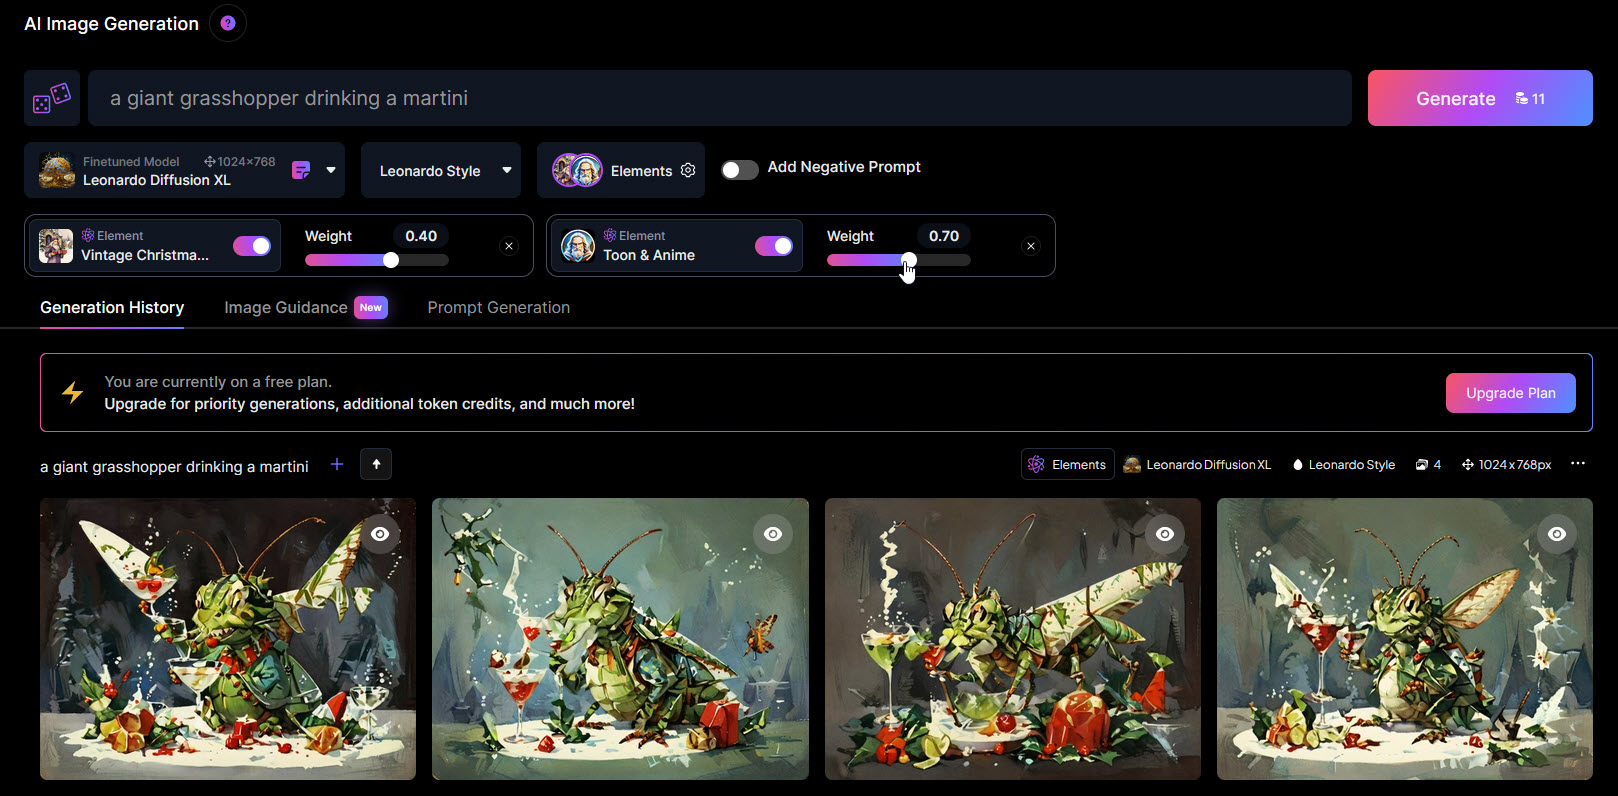
Once you have selected the items to add, click Confirm. You can choose the intensity of your option using the slider located to the right of the menu. Once you are satisfied with the setting, click Generate.
Screenshot by Lance Whitney/ZDNET.
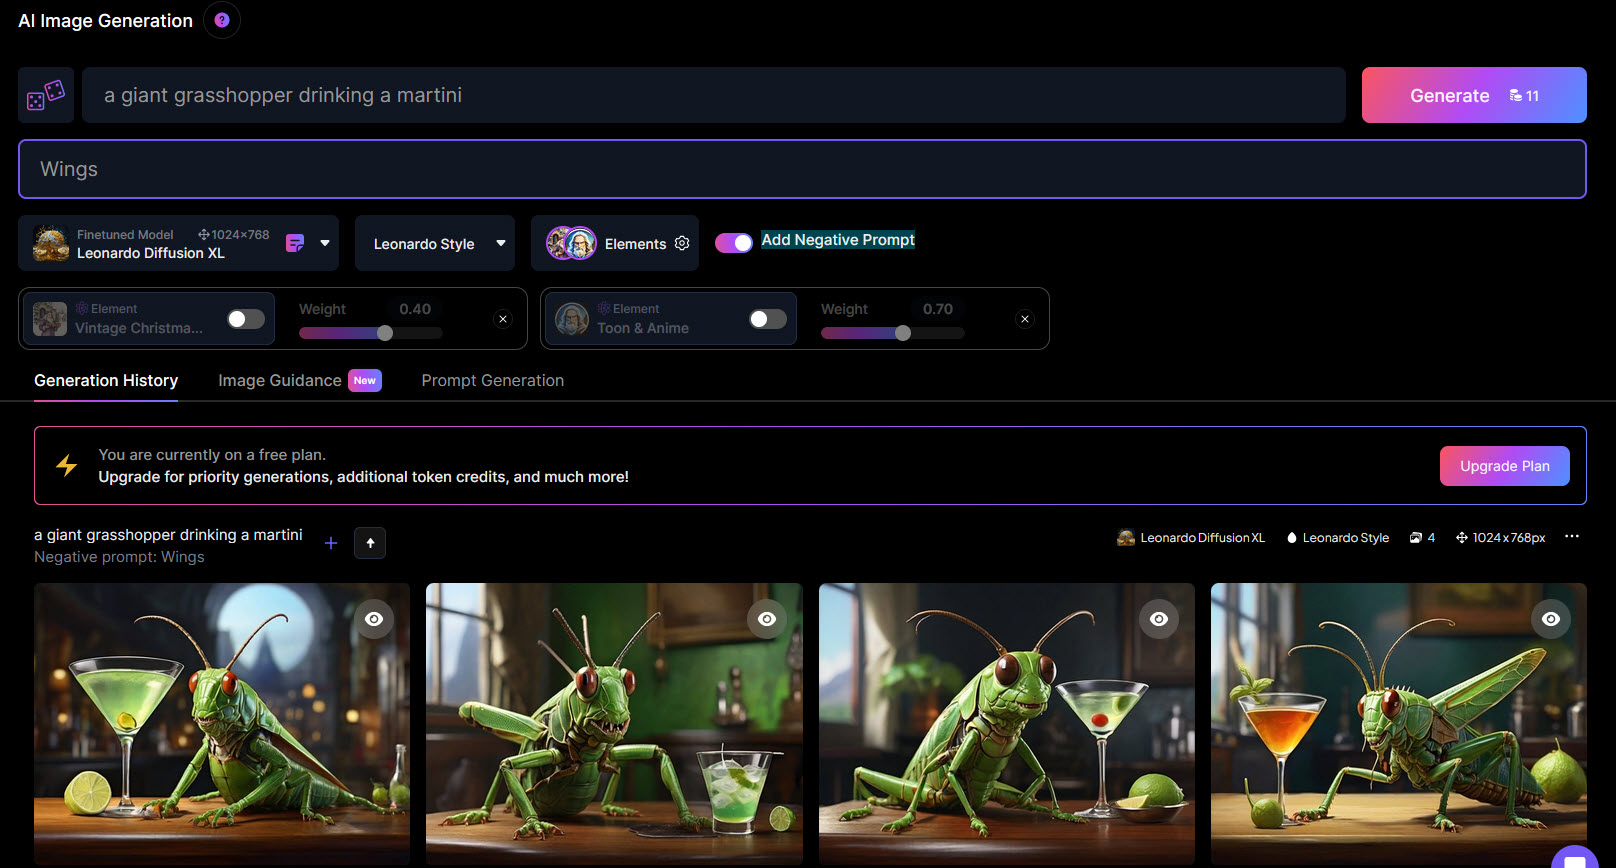
6. Generate an image by specifying what should not be there
In generative AI models, it is sometimes possible to add a “negative prompt”. This is a special request by which you specify to the AI which elements you do not want to see. For example, if you don’t want your martini-drinking grasshopper to have wings, specify “wings” in the box provided for negative prompts.
On Leonardo, you must activate the option Add Negative Prompt (add negative prompt). In the new text box that appears, write what you want to exclude from your image. In the previous example, write “wings”. Then click Generate.
Screenshot by Lance Whitney/ZDNET.
7. Choose how many images you want to generate
In the left panel you can choose how many images you want Leonardo to offer you for this query. This menu can help you save tokens if you are using the free version. Once the number of images is selected, click Generate.
Screenshot by Lance Whitney/ZDNET.
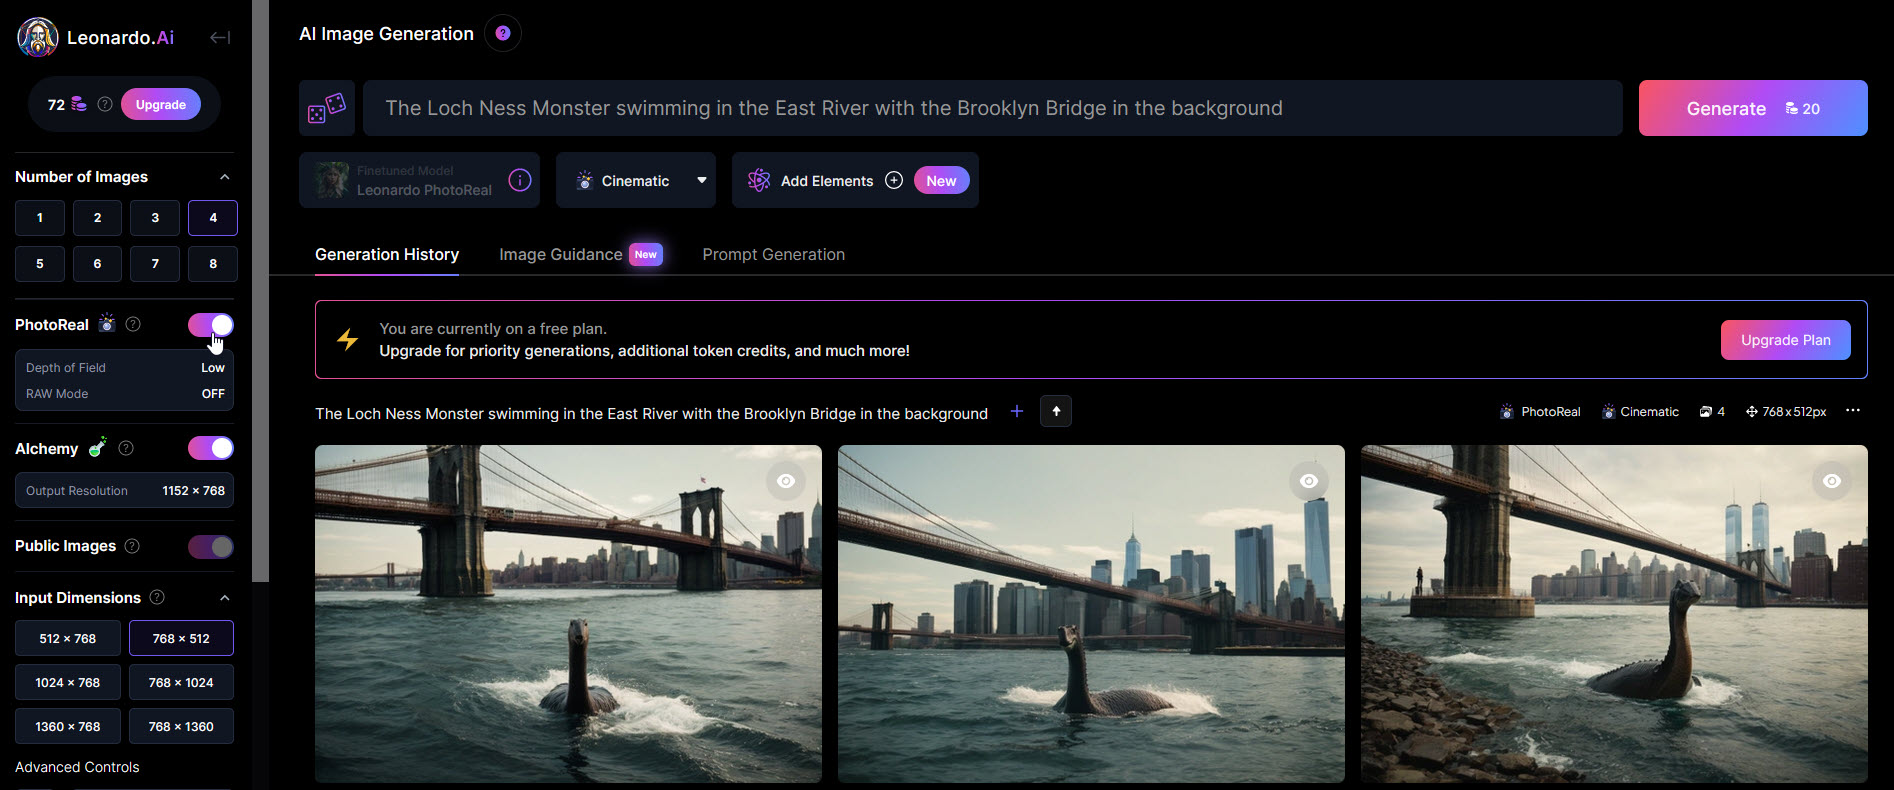
8. Generate photorealistic images
To generate photorealistic images, select from the left panel PhotoReal. You can then adjust the Depth of Field between low, medium and high or activate RAW mode to create a more detailed and larger image. Then click Generate.
Screenshot by Lance Whitney/ZDNET.
9. Set image dimensions
In the section Input Dimensions, click on the definition you want to apply to the images to be generated. In Advanced Controls, you can also choose the image ratio – 4:3 or 16:9 for example – or move the sliders to manually define the image dimensions. Then click Generate.

Screenshot by Lance Whitney/ZDNET.
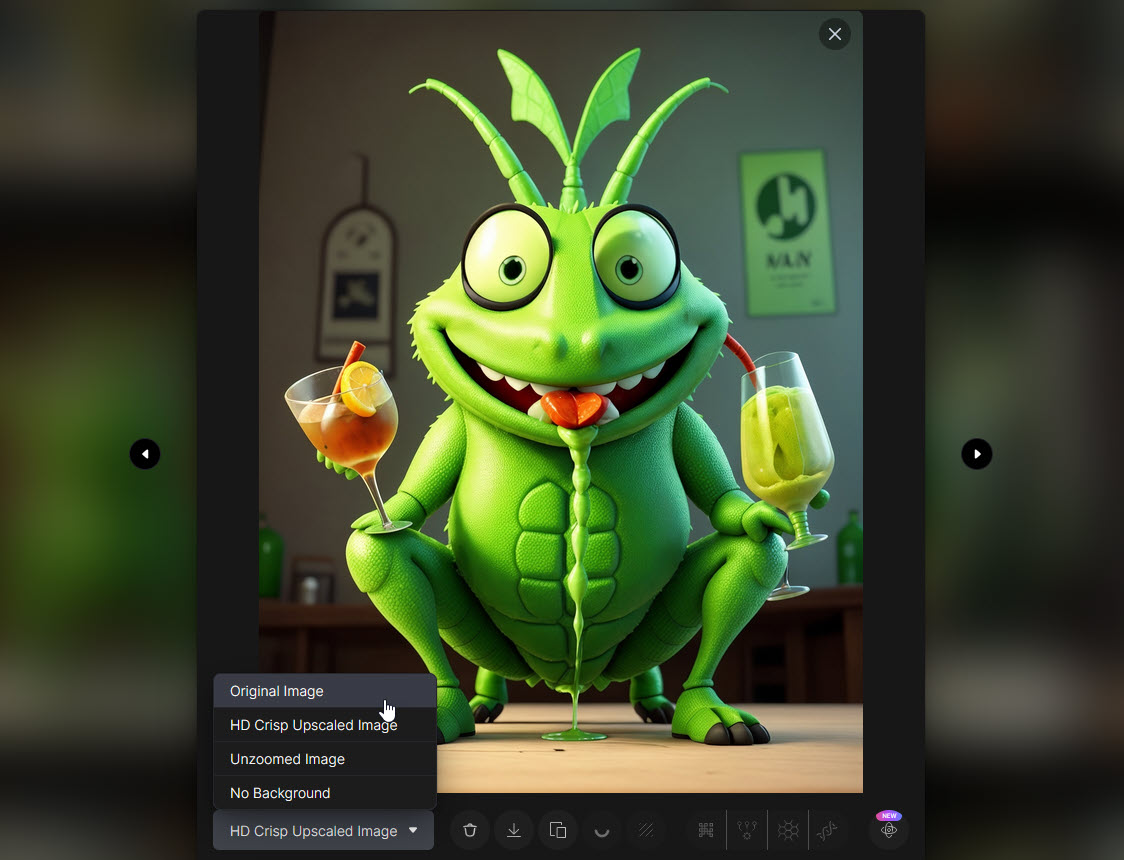
10. Select your favorite image and edit it
When you have made your choice among the images generated by Leonardo, click on them. Below the image, a new menu offers you editing options.
Unzoom image will allow you to zoom out, Remove Background to remove the background and Alchemy Upscaler to increase the definition of the image.
Screenshot by Lance Whitney/ZDNET.
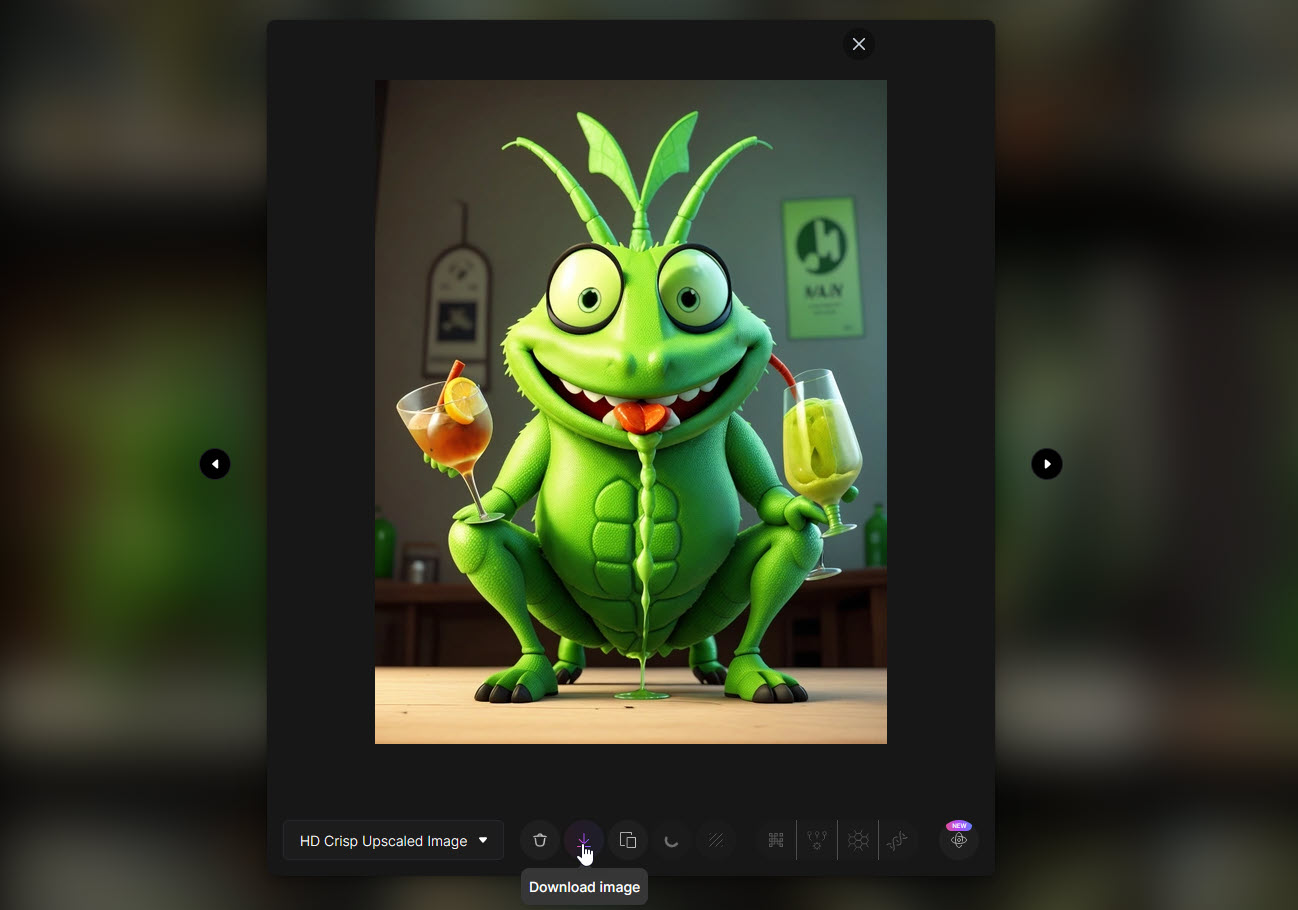
13. Upload the image
You can now copy the image to paste it elsewhere – with the button Copy to clipboard – or download it to your computer – with the button Download image.
Screenshot by Lance Whitney/ZDNET.
Source: ZDNet.com