
If you have saved your pictures in Google Photos, snapshots are still available even if you lose your cell phone or camera. The backup and sync function will help you with this.
Setting up Google Photos on Android and iOS
Installation on Windows and on Mac
Synchronization via Google Photos on the computer
The Google Photos service allows you to access your own photos and videos anytime, anywhere. You use Microsoft’s photo cloud to save and synchronize your snapshots from iPhone and Android smartphones with online storage.
Synchronization can suitably take place from multiple devices. In this guide you will learn what you should consider when setting up the Google Photos application and how you can save your snapshots online using the backup and sync function.
Note that synchronization consumes a large amount of data, so you should manually set the time when the images are backed up.
Setting up Google Photos on Android and iOS
Change settings and Google account
 1
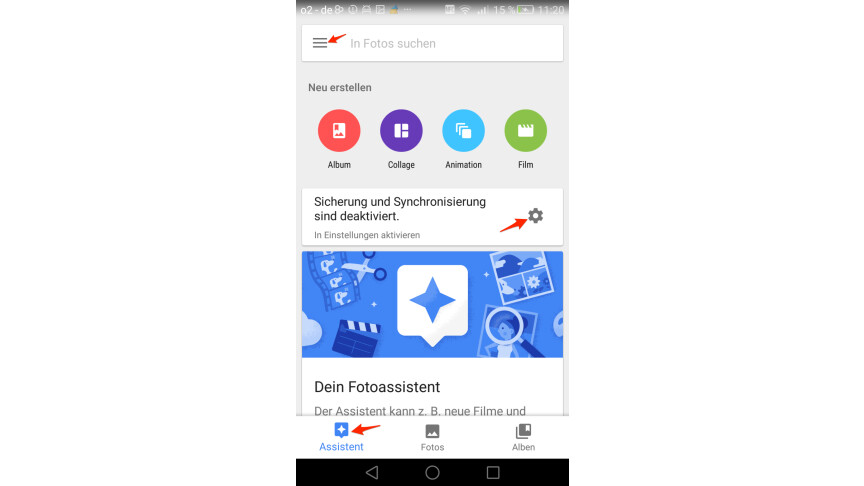
1To change the settings after opening the app for the first time, switch to the “Assistant” tab and tap the gear icon behind “Backup and synchronization are disabled”. Alternatively, you can use the menu (three horizontal lines) to select the “Settings” sub-item. Then select “Backup and sync”.
 2
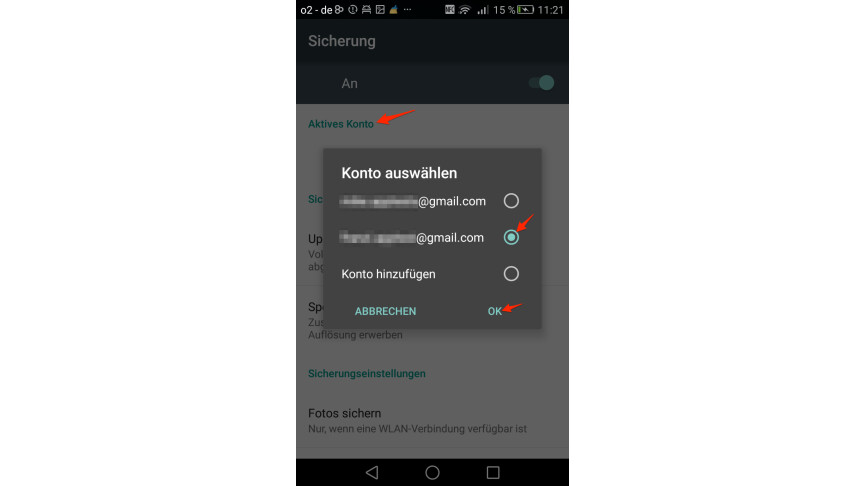
2If you want to change the account that is to be synchronized again, go to “Active account” under Android and select the appropriate account. Confirmed with “OK”. On iOS you tap on the displayed account and then have the option to choose from the available accounts.
Set photo quality and background synchronization
 1
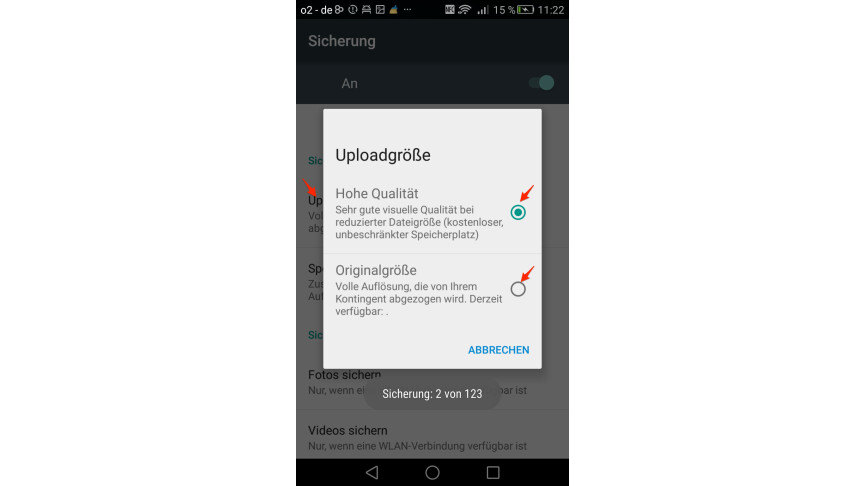
1You determine the photo quality in the settings via the “Upload size”. You choose between “High Quality” and “Original”.
 2
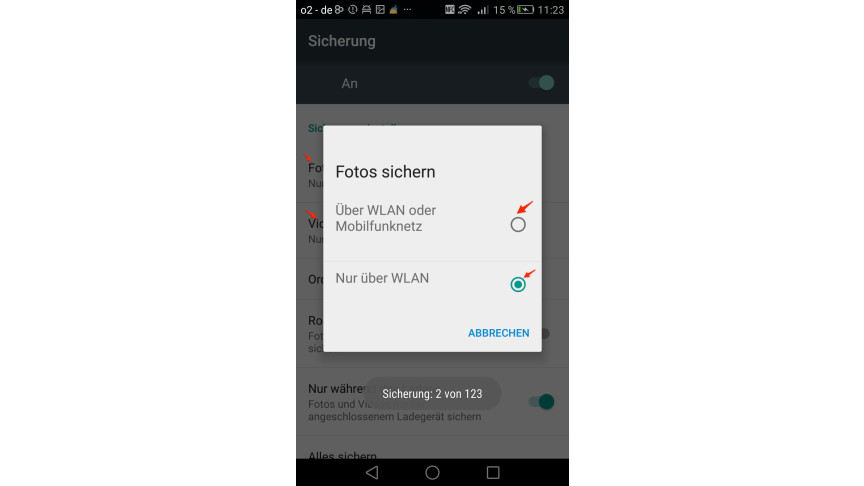
2You should also specify when your images should be backed up. Under Android you select the respective option and then determine in the submenu whether the photos and videos should only be saved via WLAN or via WLAN and mobile network. On iOS, Wi-Fi backup is enabled by default and you only decide if you want cellular backup too.
On Android, you have the option to set even more options: You can increase the storage space, select folders for backup, specify whether photos and videos should be backed up when data roaming and define whether photos and videos should only be backed up when the charger is connected.
Make further settings
 1
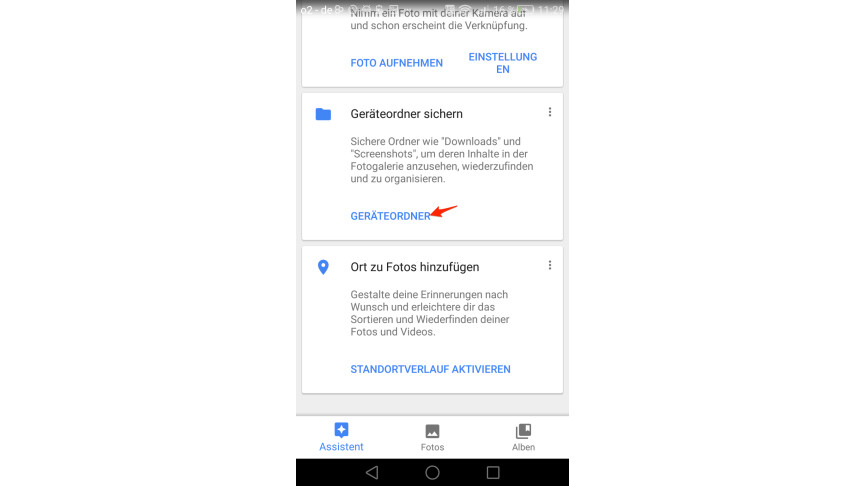
1You can also back up device folders from the Assistant tab. To do this, tap on the blue word “Device folders” and then on the crossed-out cloud of folders that you want to back up.
 2
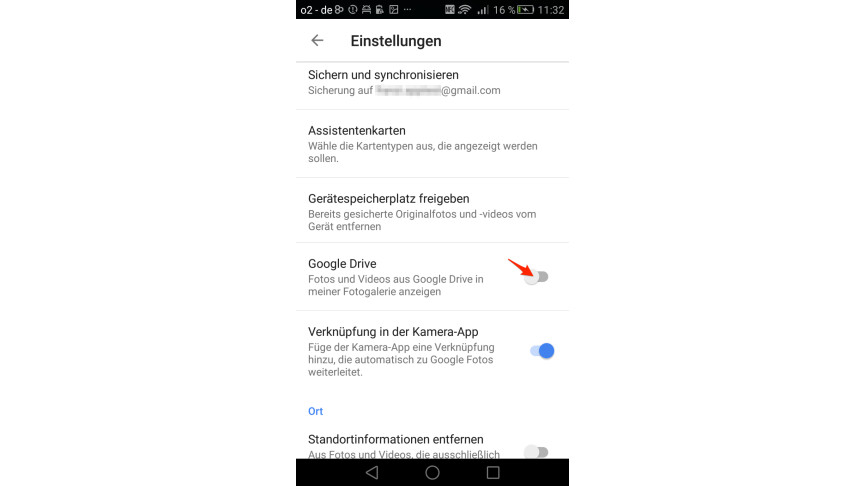
2In the menu under “Settings” you can also determine whether the videos and photos stored in Google Drive are displayed in your photo gallery.
Installation on Windows and on Mac
The installation and setup of the backup software under Windows differs only slightly from the app for OS X shown in this guide. To do this, download the PC software Google Drive – Backup & Sync from Netzwelt.
Synchronization via Google Photos on the computer
If you also want access to saved photos from other devices such as smartphones, tablet PCs or other computers from your computer, regardless of the web browser, then you always need Google Drive.
You can find more useful tips and tricks for the Microsoft service in our overview of editing and managing images via Google Photos.
Don’t miss anything with the NETWORK-Newsletter
Every Friday: The most informative and entertaining summary from the world of technology!