Hair bow
3 festive hairstyle ideas from beginners to professionals
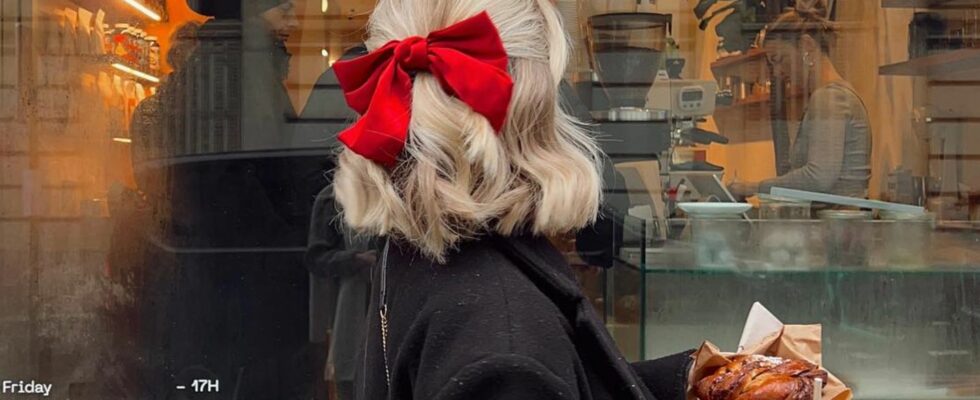
It looks easy – and it is! Hairstyles with hair bows are not complicated, just beautiful.
© instagram.com/indiaamoon

Bows are THE trend accessory for 2023. Of course, we wear them not only on our clothes, but also in our hair. With these three festive hairstyle ideas with hair bows, there is something for everyone! No matter whether you are a beginner, advanced or professional.
It got us! No, we’re not in love or have a cold, we’re just passionate about the idea of wearing bows for every appropriate occasion (i.e. always). One reason we love the hair bow so much is probably its simplicity. With just a few simple steps you can have a hairstyle that is impressive! So for anyone who doesn’t like investing time in hair styling, the bow is that perfect trend accessory. But don’t worry, the beauty professionals among you won’t be left behind either, because these three festive hairstyle ideas with a hair bow have something for every skill level.
Hair bow with clip for beginners
In case you were wondering whether the first level might overwhelm you: For this one You don’t even have to be able to tie a bow in your hairstyle. Because there are hair bows that are already attached to clips – theoretically you just have to clip them into your hair. The whole thing looks even more festive if you wear a half-open hairstyle, i.e. section the hair on the top of your head and tie it in a ponytail at the back of your head, for example. If you have bangs or layers, you can remove a few strands that frame your face from the braid.
Tip: First attach your half-open hairstyle with a normal elastic band before attaching the hair bow with clip over it. So the result looks more directed.
If you don’t have a clip with a hair bow at home, you can easily make one yourself. All you need is one Claw clip (this is a large hair clip with spikes) and a Gift ribbon.
- Cut the gift ribbon about 60 centimeters long.
- Grab the band in the middle with the hair clip so that it is inside the claws.
- Now tie a double knot towards the handle to secure the ribbon.
- Now tie a (nice) bow, which you can also secure with a knot if necessary.
- Leave the remaining ribbon long enough before cutting off the excess at an angle.
Advanced: 3 loops for Santa
If you can’t get enough of the hair bow trend (completely understandable), you might like this version, which includes three of the cute it pieces. With this hairstyle you will three braids braided on top of each other and each secured with a hair bow. However, it’s easier if you fix it with a small, transparent hair tie beforehand – this way you have both hands free to tie beautiful bows. This hairstyle is particularly suitable for long, layered hair. If your hair is less long, you can also style the hairstyle with two bows; if your hair is thinner, simply separate fewer sections per braid. A thinner band looks better with this look, if it is thicker it can quickly look too lush.
- Separate a smaller section of hair at the front of the head and secure it at the back of the head with an elastic band, then with a bow.
- Now divide another slightly larger section from the front and tie another braid over the existing one and secure it with a bow.
- You know the game: grab a little more hair above the previous ponytail and tie it together. Finished with a bow.
Beauty professional: tie a bow from your own hair
Have the previous hairstyles not challenged you? But we don’t want to be told that! Now we’ll show you another variant that beauty professionals can be happy about. But pssst: with a little practice, anyone can do it. You will need three elastic bands and hairpins in your hair color.
- Tie a braid on the top of your head so that you have one half-open hairstyle have. Feel free to section off enough hair for this, you’ll need it straight away.
- Now divide this braid into two parts: a lower and an upper one.
- Grab the upper part and carry it with you another rubber band fasten a little deeper. Let’s do it seven centimeters apart between the two rubbers.
- Divide the top braid between the two hair ties so that one tab arises.
- Pass the same braid through this tab, i.e. once go berserk.
- You now guide the bottom braid completely through the twisted tab. Now the original bottom braid hangs over the other one.
- Now comes the crucial step: grab the first braid of the second hair tie under the other one and pushes him up. This creates a bow that you attach with hair clips.
- If you want, you can now remove a narrow strand from the front braid and use a long hair clip to guide it over the bow and then let it disappear behind it. Without additional tools, this step is difficult and it could ruin your beautiful hairstyle if you do it with your finger.
Sources used: Instagram.com