
Microsoft recently dropped Calibri as the default font in its Office suite, aka Microsoft 365. When you try to create something in Word, Excel, PowerPoint, or Outlook, Aptos is the new font that appears.
I’m not too fond of Aptos and I still find Calibri more readable and more attractive. If you feel the same way, don’t worry. You can easily change the default font in all four apps back to Calibri or any other font you prefer. Here’s how to do it.
The steps outlined here should be sufficient regardless of which version of Microsoft Office or Microsoft 365 you’re using, as long as it’s not an older edition from a bygone era. Furthermore, there are several ways to change the default font, but I will focus on one or two methods for each application.
How to Change the Default Font in Microsoft Word
1. Change the font in the Font dialog box
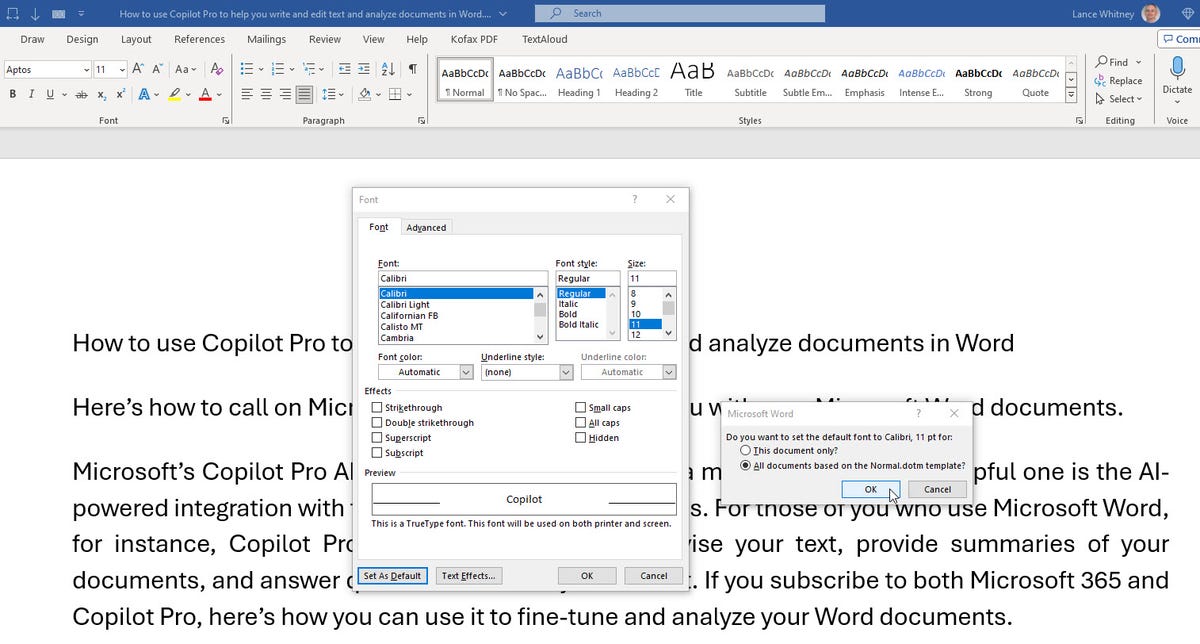
In any Word document or blank document, click the small arrow in the lower left corner of the Font section of the Home ribbon, or right-click anywhere and select Font from the context menu . In the Font dialog box, select the font you want to set as default.
You can also confirm or change the size. Click the Set as Default button. You will be asked if you want to set the new font for this document only or for all documents based on the Normal.dotm template. Choose the option for all documents and click OK. Any new document based on the Normal template will use the chosen font.
Screenshot by Lance Whitney/ZDNET
2. Update Normal.dotm template
Here is a more complex but effective method to change the default font. This method is useful for setting specific defaults for elements other than the font, such as line spacing, paragraph formatting, and text alignment.
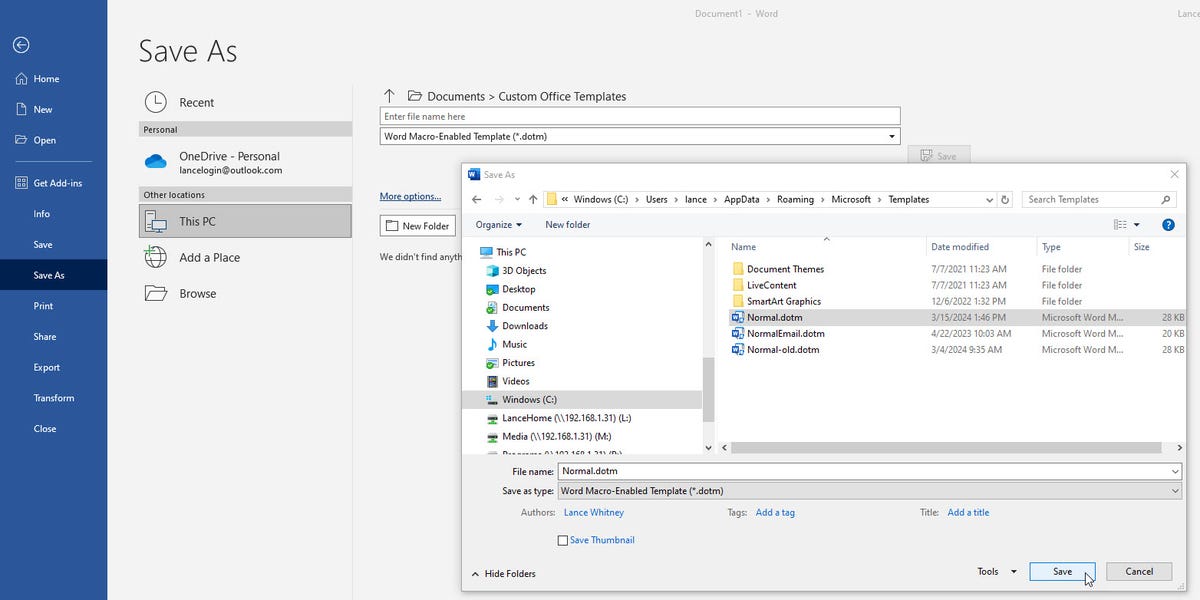
Create a blank document with the default font and size you want. Edit other items that you want to set as defaults. Click the File menu and select Save As. Change the file type from Word document with a docx extension to macro-friendly Word template with a dotm extension.
Change the destination folder to C:NUsersN[votre nom d’utilisateur]NAppDataNRoamingNMicrosoftNTemplates. Save the file as Normal.dotm, replacing the existing version.
Screenshot by Lance Whitney/ZDNET
How to Change the Default Font in Microsoft Excel
3. Change the font in the Options window
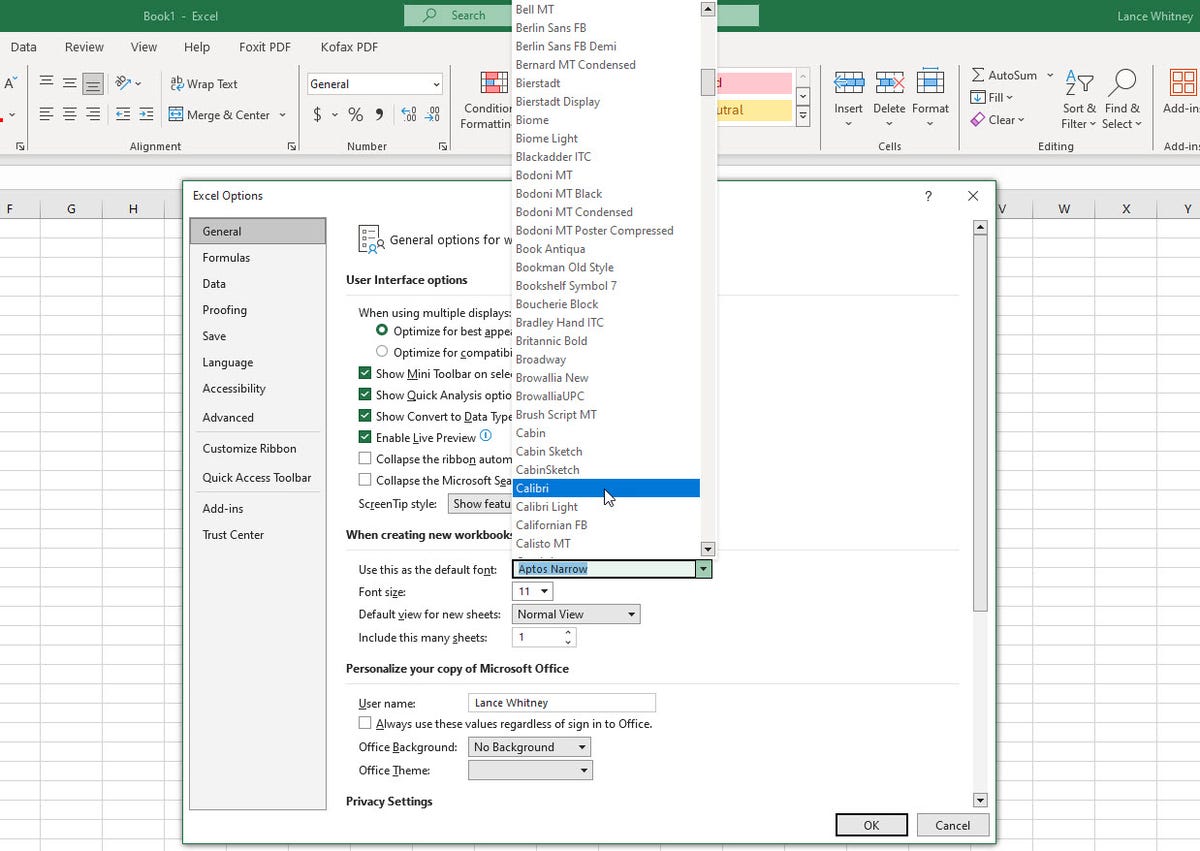
In an existing or blank workbook, click the File menu and select Options. In the Excel Options window, make sure you are in the General tab. In the “When creating new workbooks” section, click the “Use this default font” drop-down box and change it to your preferred font.
Then change the font size, if desired. When finished, click OK to close the Options window. Close and reopen Excel for the change to take effect.
Screenshot by Lance Whitney/ZDNET
How to Change the Default Font in Microsoft PowerPoint
4. Change Font in Slide Master
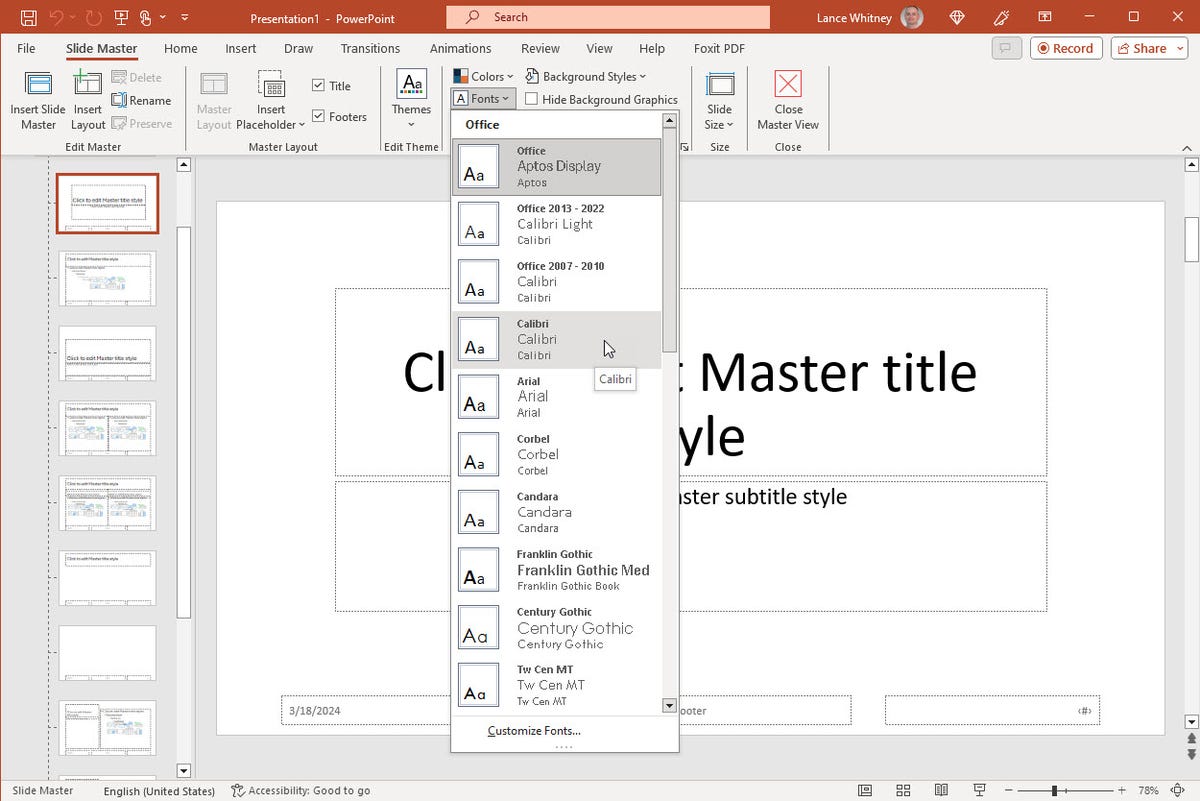
Launch PowerPoint with a blank presentation. Click the View ribbon and select Slide Master. In the Slide Master view, click the Fonts icon on the ribbon and select the font you want to use as default. If the font does not appear, click the Customize Font option, choose the correct font from the Body Font drop-down menu, and then click OK.
Screenshot by Lance Whitney/ZDNET
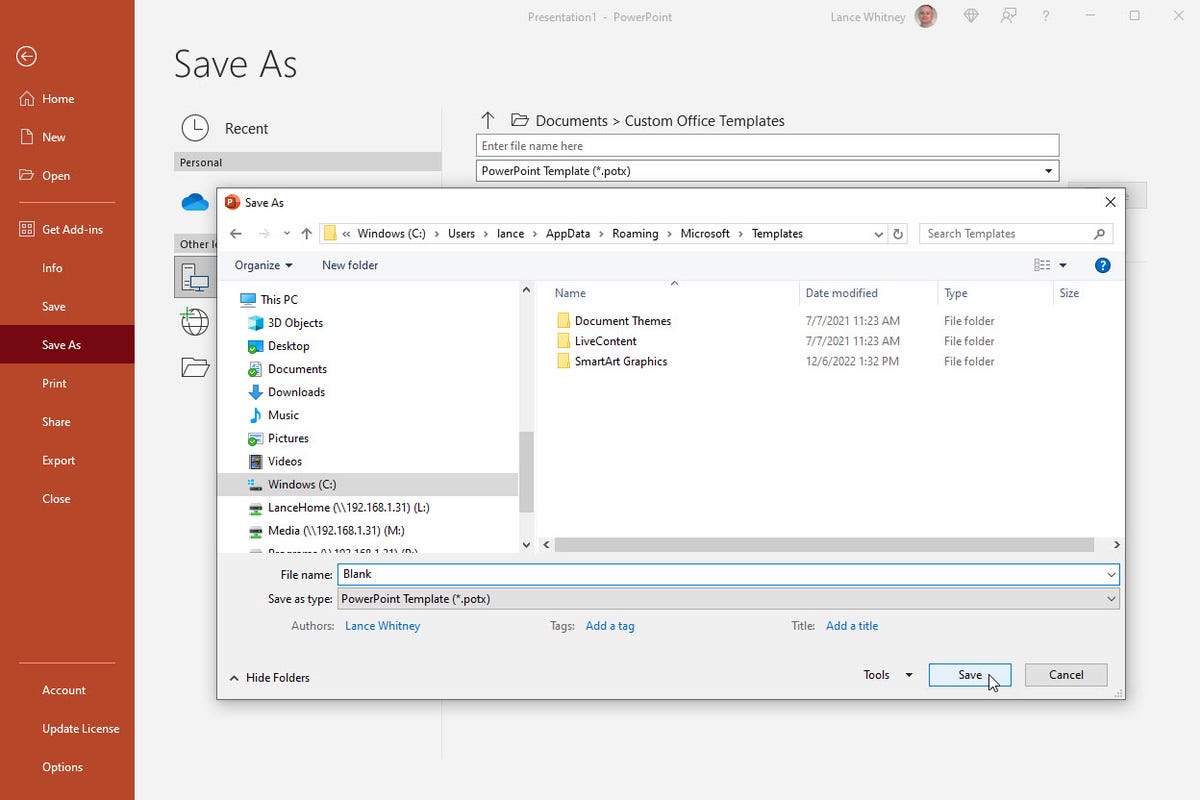
Click on the Slide Master tab and select Close Master View. Click the File tab and select Save As. Click the file type drop-down field and choose PowerPoint Template (*.potx). Click on the link More options.
In the Save As dialog box, move to the folder C:NUsersN[Votre nom d’utilisateur]NAppDataNRoamingNMicrosoftNTemplates. In the File Name text box, type Blank as the name to make this template the default startup template, and then click Save.
Screenshot by Lance Whitney/ZDNET
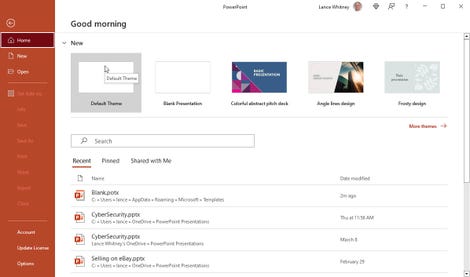
Close and reopen PowerPoint. From the Start screen, select Default theme as a template and confirm that the font you chose is now the default font.
Screenshot by Lance Whitney/ZDNET
How to Change the Default Font in Microsoft Outlook
5. Change the font in the Options window
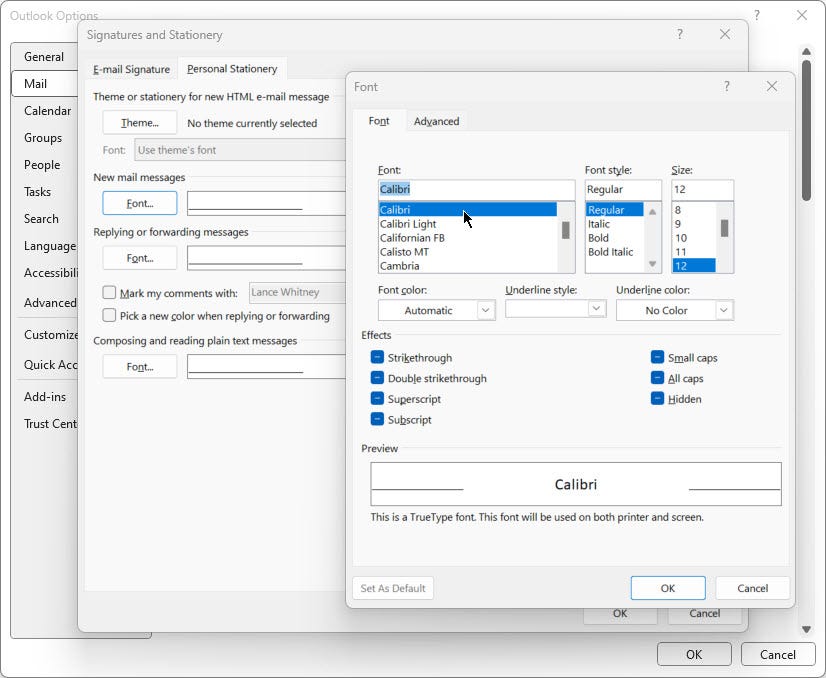
With Outlook, you can change the default font for new messages, message replies or forwards, and plain text messages. In Outlook, click the File menu and select Options. In the Options window, select the Mail tab and click the Stationery & Fonts button. Click the Font for New Messages button and choose the font and size that will appear when you create a new email. Click OK.
Click the Font button to Reply or forward messages. Choose the default font and size that will appear when you reply to or forward an existing email, then click OK.
Click the Font button to compose and read messages in plain text. Choose the font that appears when writing a plain text message and click OK. Click OK to close the Signatures and Stationery window, then click OK again to close the Outlook Options window. Try composing a new email. Additionally, try replying to or forwarding an existing message to confirm that your new policy is in effect.
Screenshot by Lance Whitney/ZDNET