Lenovo Chromebook Duet. Image: June Wan/ZDNET.
The Chromebook has evolved far beyond its original purpose. It’s not just a “boxed browser” anymore: ChromeOS effectively works as a full-fledged operating system that can do almost anything you need. For example, adding a printer to a Chromebook is much easier than you might imagine.
However, there is a downside. If you want to maximize your chance of printing from ChromeOS, you’ll need to add a printer that’s already attached to another machine on your network. So if you have a desktop computer running Linux, macOS, or Windows, connect your printer to that machine via network sharing. Once that’s done, adding the printer to your Chromebook is easy.
Required configuration
To add a printer to your Chromebook, you need the following:
- a Chromebook;
- a printer already connected to a machine via your local network;
- the Chromebook and the other computer hosting the printer must be on the same network;
- the IP address of the computer to which the printer is already attached.
Once all of these requirements are met, it’s time to add the printer to your Chromebook.
Adding the Network Printer to Your Chromebook
- Open the Settings panel
On Chromebook, open the panel Settings from the gear icon in the notification window, or from the launcher.
- Locate Printer Settings
When the panel Settings openstype “printer” in the search field to bring up the section Printers.
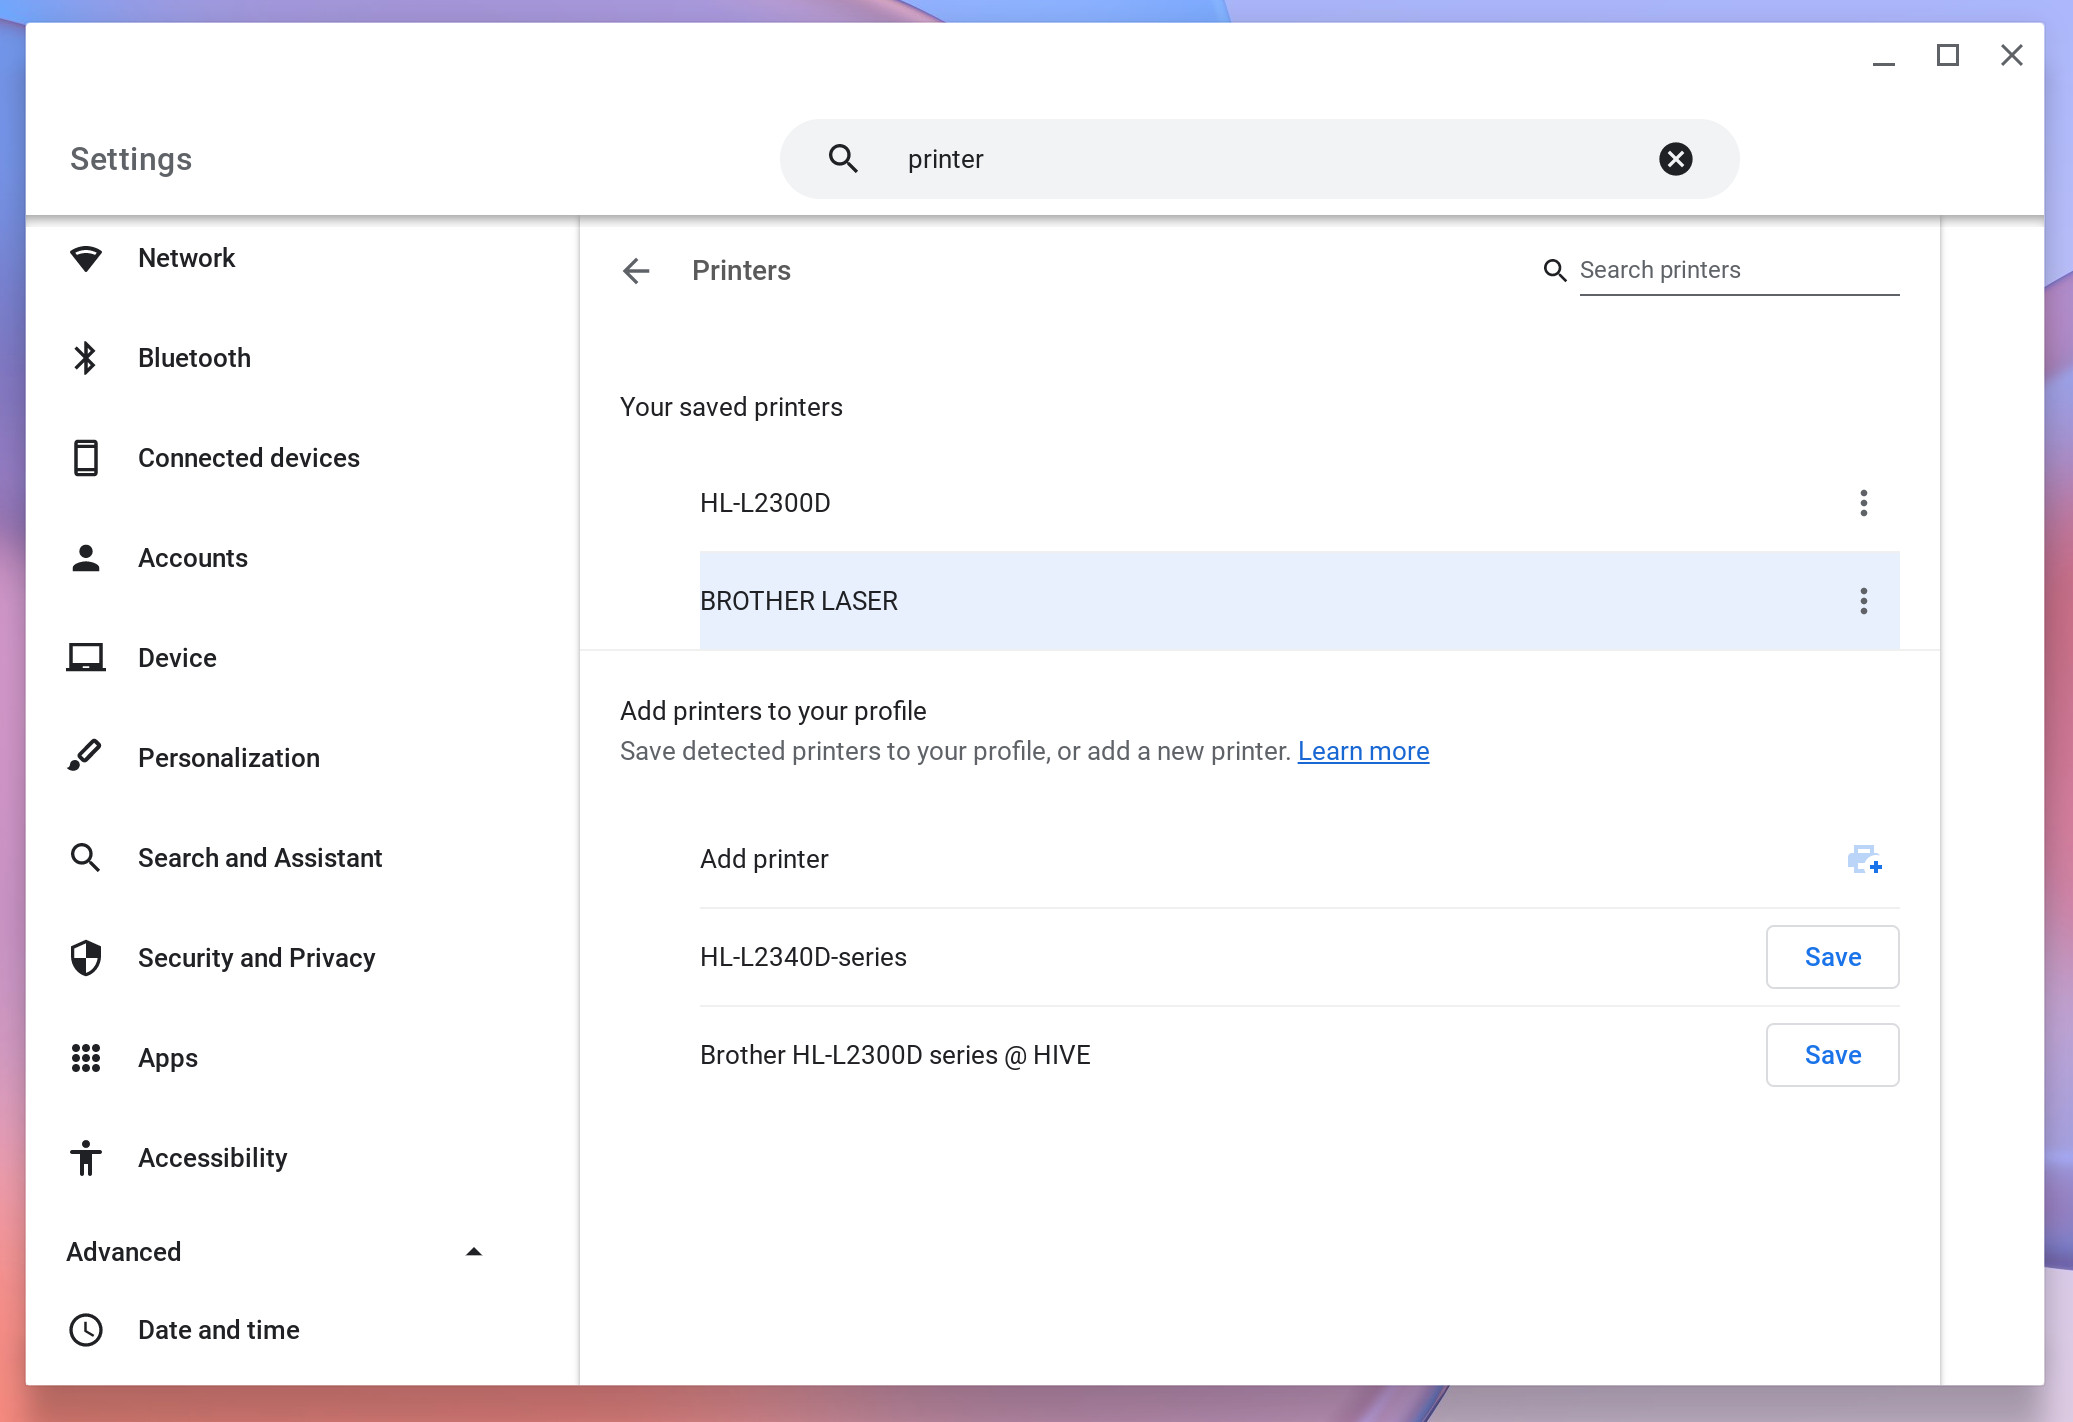
Image: Jack Wallen/ZDNET.
- Add printer
Click on Add a printer. In the next window, click Printserver (Print Server) in the lower left corner.
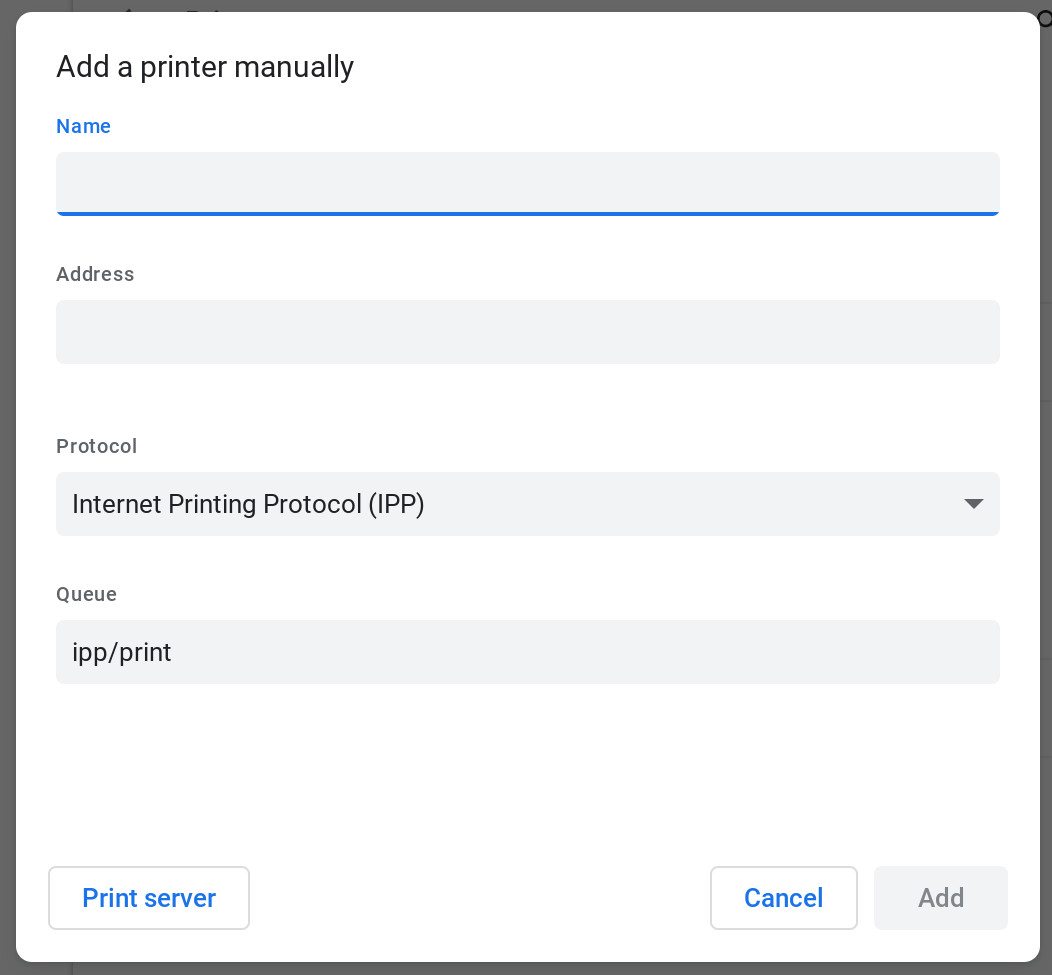
Image: Jack Wallen/ZDNET.
- Locate Printer
In the next window, type the IP address of the machine to which the printer is connected and click on Add.
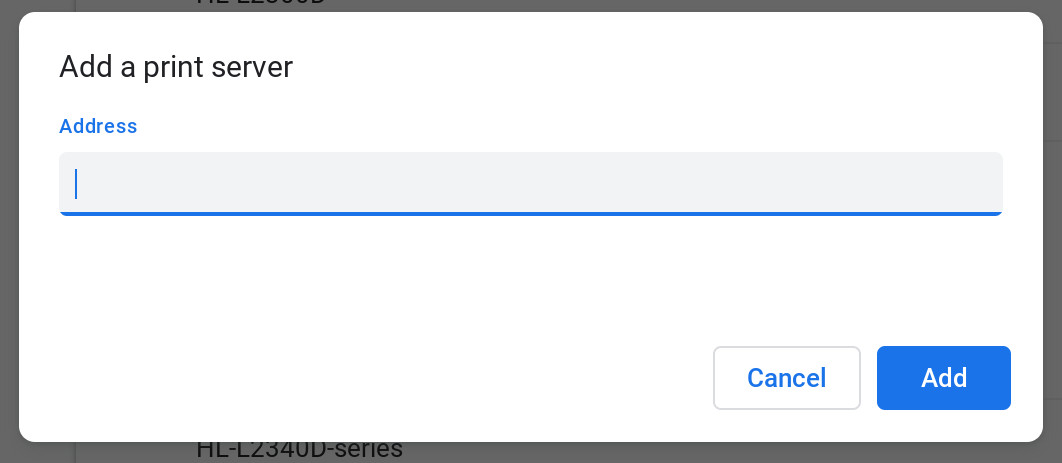
To locate the printer, type the IP address of the machine hosting it. Image: Jack Wallen/ZDNET.
- Back up the printer
ChromeOS will automatically locate the printer connected to the server and list it in the window Add a printer. Locate the printer you want to add and click Save to complete the process.

Image: Jack Wallen/ZDNET.
Your printer has been successfully linked to your Chromebook. If you have multiple printers on your server, you can still register as many as you want. For example, you may have a monochrome laser printer and a color printer associated with your server. Add them both, then print on the one you need.
Once your printer is added to ChromeOS, you can use it as if it were directly connected to your computer. You have just extended the possibilities of using your Chromebook!
Source: ZDNet.com