
Andriy Onufriyenko/Getty Images
I regularly have to send confidential information to clients. It can be a contract, information under embargo or any other type of data reserved for third parties. And sometimes I need to be able to pass that information on knowing that only the intended recipient can open the document.
When such an opportunity arises, I usually turn to LibreOffice. With the free office suite, I can add information to a document, save it as a PDF, and attach a password to it so that the only way to open the file is to type it.
To double the security, I’ll send the password-protected file to the recipient via email, then the password in another email. If I sent the file and the password in a single email, it would only take someone intercepting that email to have everything needed to open the file, and that is certainly not secure.
If this level of protection seems useful to you in your life, read on.
How to Password Protect a PDF in LibreOffice
What you will need: To do this, you will need to install the LibreOffice office suite. I strongly recommend that you make sure that you are using the most recent version of LibreOffice, in order to benefit from the latest security patches, bug fixes and new features. You can download and install LibreOffice for Linux, MacOS and Windows.
1. Open LibreOffice Document Writer
I will demonstrate with the Document Writer component of LibreOffice. The first thing to do is to open Document Writer.
If you are using LibreOffice on MacOS or Windows, you need to open the main LibreOffice window and click on File > New > Text document. If you want to create a PDF from an existing document, open it from the main window or click File > Open Or Open a file in the left bar.
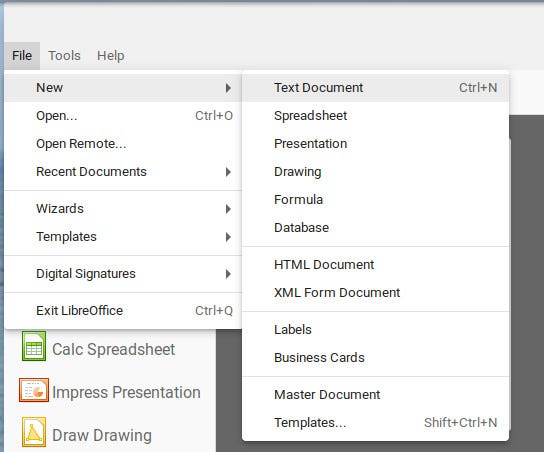
Create a new document from the main LibreOffice window in the File menu. Screenshot by Jack Wallen/ZDNET
2. Create your document
Add the content you need to the document. If this is a document you want to save to your local drive, be sure to save it before continuing.
Once the document is exactly how you want it, you can export it to PDF and protect it with a password.
3. Open the Export to PDF window
When the document is ready to be exported, click File > Export to > Export to PDF.
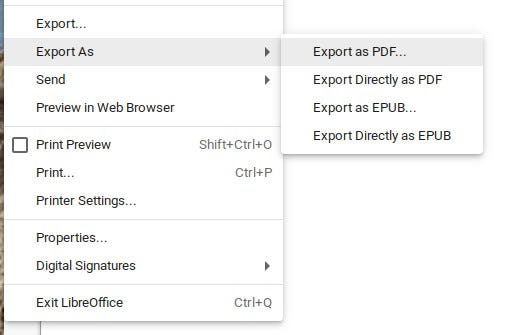
Be sure to select Export to and not “Export”. Screenshot by Jack Wallen/ZDNET
4. Add password
In the pop-up window that appears, click the tab Securitythen on Set passwords. A new pop-up window appears, where you can set the open or permission password.
You want to set a password for opening, so type and verify the password in the section Set open password. Be sure to use a strong and unique password. When you’re done, click OK to save the password.
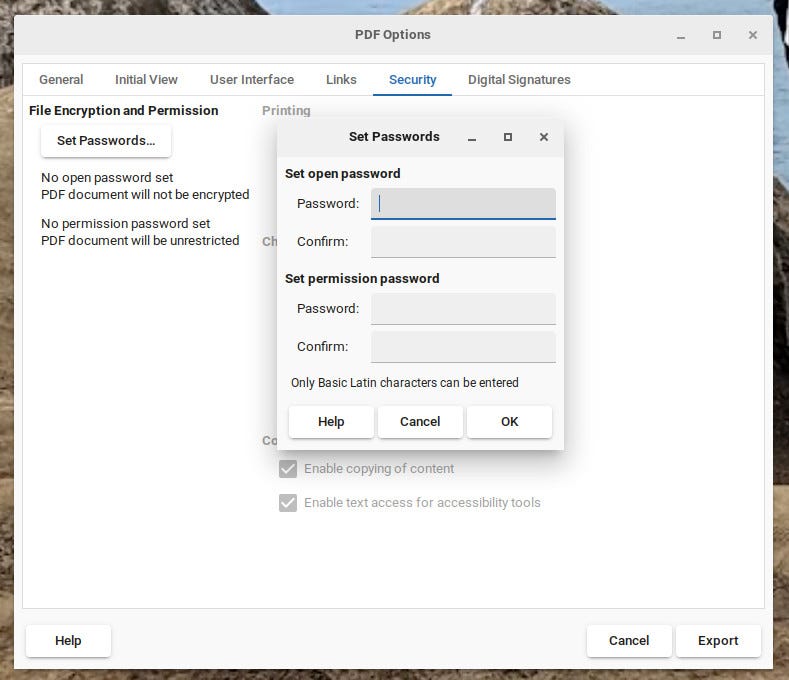
Be sure to set the open password and not the authorization password. Screenshot by Jack Wallen/ZDNET
5. Name the PDF
When the following window appears, give the PDF a name, select a directory for the file and click Export. The PDF will be created and saved in the directory you chose.
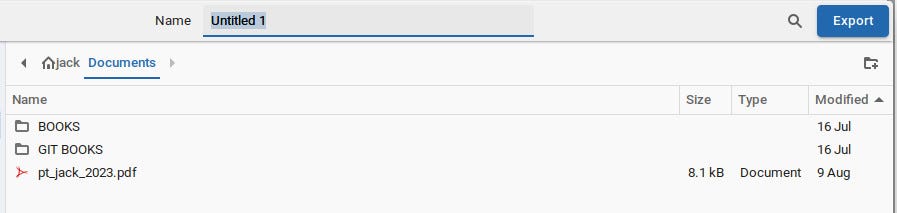
Be sure to remember where you save the PDF. Screenshot by Jack Wallen/ZDNET
You can now send the PDF file to the recipient and tell them the password via another email, text or phone call. Without this password, the file cannot be opened.
Congratulations, you have just created your first password-protected PDF file with the open and free office suite LibreOffice.
Source: “ZDNet.com”