
You probably have sensitive data on your MacBook or iMac. This data may be in a folder that contains various files containing trade secrets or your personal information. Unencrypted, this folder can be viewed by anyone with access to your computer.
However, if you encrypt this folder, only people with the decryption password can access its contents.
You can encrypt a folder with a third-party application, but there is also a built-in tool that can do this for you. This tool is called Disk Utility and makes it very easy to encrypt existing folders on your macOS machine.
The downside of the method I’m going to describe is that it creates an encrypted image of the folder and leaves the original untouched. Also, once you have created the encrypted image, you cannot add new items to it. For this reason, this method is best suited for encrypted backups or for encrypting folders that do not need to be modified.
How to encrypt a folder on macOS?
Prerequisites
The only thing you’ll need is an up-to-date version of macOS running on a MacBook or iMac. I will be demonstrating on a MacBook with an Apple Silicone M1 chip and MacOS Monterey 12.6. I strongly recommend that you test this process on a folder that does not contain important documents. Once you know how to successfully encrypt folders, then you can do it with folders that contain important information.
1. Open Disk Utility
Click the Launchpad icon in your Dock and type disk utility. When the shortcut appears, click on it.
2. Create a new image
When Disk Utility is open, click File > New picture > Image from folder. When the pop-up window appears, navigate to the folder you want to encrypt, select it and click Picking out.

Image: Jack Wallen/ZDNET
3. Configure encryption
In the pop-up window that appears, do the following:
- Name the encrypted folder.
- Add the tags you want to include.
- Select 128-bit or 256-bit encryption (the latter is stronger).
- Click on To register.
When you select the encryption type, you are prompted to enter an encryption password twice. Make sure this password is strong and distinctive (and not the same as your user password).
Disk Utility then encrypts the folder. When finished, click Ended.
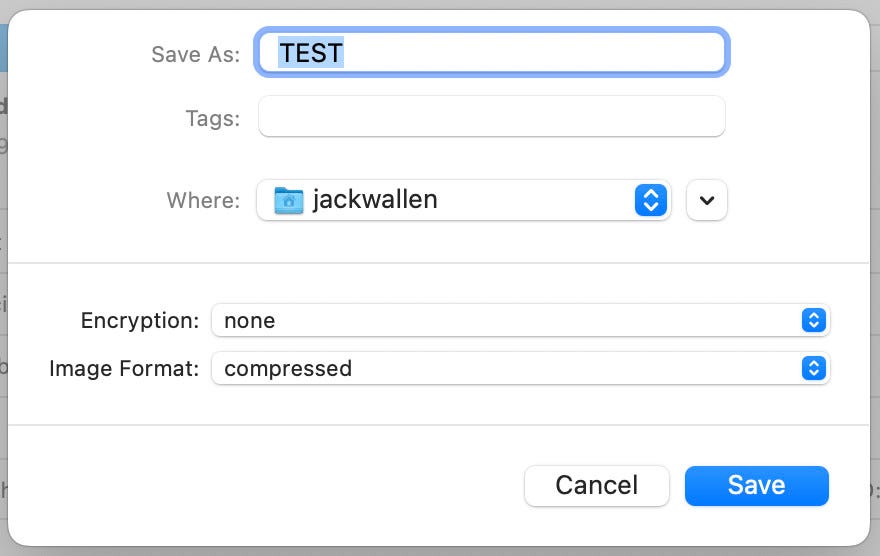
Image: Jack Wallen/ZDNET
How to access files in the encrypted image
Open Finder and navigate to the folder containing the encrypted image. If you double-click on this image (it ends in .img), you will be prompted for the password you added when creating the image. After successful authentication, Finder will open the image and you will be able to access its contents.
That’s all there is to creating an encrypted folder in macOS with Disk Utility. Although this option is somewhat limited, it is a good way to protect sensitive information from prying eyes. And if you don’t need to add new files and folders to the encrypted image, you can delete the original folder, so that the data it contains is no longer easily accessible.
Source: “ZDNet.com”