
LibreOffice has been my go-to office suite for a very long time. And it’s not just because it’s readily available on Linux. LibreOffice offers tons of features, is compatible with Microsoft Office documents and is relatively easy to use.
On LibreOffice, you can also easily password protect a document. Thus, only people with sesame can open it. This feature is essential when working on documents containing sensitive information.
Let me show you how.
How to password protect a document with LibreOffice?
Prerequisites
The only thing you will need is an up-to-date LibreOffice installation on your computer – the password protection feature is built into LibreOffice.
If this feature has been around for a while, I highly recommend updating LibreOffice to the latest version available. Thus, you are sure to have access to all the functionalities, but also that all the vulnerabilities are corrected.
1. Create a new document
Although you can protect any document using this method, I advise you to try it with a test document first, to be sure that the tool works as expected. You don’t want to lock an existing file while testing this feature.
So open LibreOffice and create a new text document.
2. Save the document
Before typing anything in the document, save it by clicking File > Save As. In the lower left corner of the window, check the box Save with password. Give the file a name, then click Save at the top right of the window.

Image: Jack Wallen/ZDNET.
3. Add a password
After clicking on Save, you will be prompted to enter and verify the document password. Be sure to use a strong and memorable password. After adding the password, click okay. Save the document again and close the window.
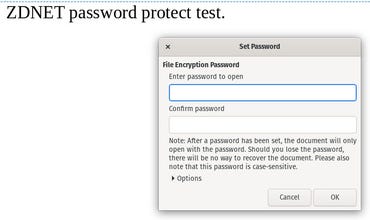
Image: Jack Wallen/ZDNET.
4. Password Protect Editing
If you want, you can also set a read-only password for file sharing. So, if someone wants to modify the document, LibreOffice will ask for a second password. Without it, only the consultation will be authorized.
To do this, in the add password window, click Optionsthen check the box Open file as read-only.
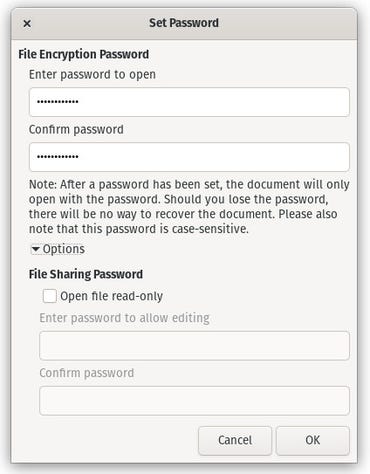
Image: Jack Wallen/ZDNET.
The next time you want to open the file, you will be prompted for the password. If you don’t type the correct password, the file will not open. Don’t forget your password! Keep in mind, however, that if you save the file in another directory or under another name, you will have to repeat this operation.
Source: ZDNet.com