
Size matters – at least when it comes to your photos and other images. Larger files can result in higher quality photos, but an image that’s larger than necessary consumes disk space and can clutter up inboxes when you email it. This is why it is often useful to reduce the size of your photos and other images. One tool that can help with this is Image Resizer, which is one of the free utilities included in Microsoft’s PowerToys suite.
Set of utilities for Windows 95 and NT.
- Downloads: 13
- Release date : 06/09/2022
- Author : Microsoft
- Licence : Free license
- Categories:
Utilities - Operating system : Windows 10/11
With Image Resizer, you can change the size of an image, control the image quality and level of compression when reducing it, and specify a certain file name for the resized image.
Here’s how it works.
Install Power Toys
If you don’t have PowerToys yet, download and install PowerToysSetup.exe from the [page GitHub] of the program (https://github.com/microsoft/PowerToys/releases/). You can install and use it on Windows 10 or 11, it works the same on both versions of the OS.
Using Image Resizer
Open the PowerToys settings window by double-clicking its icon in the system tray. Select entry Image Resizer and make sure the option is enabled. The tool comes with several presets so you can change the size without having to worry about specific dimensions.
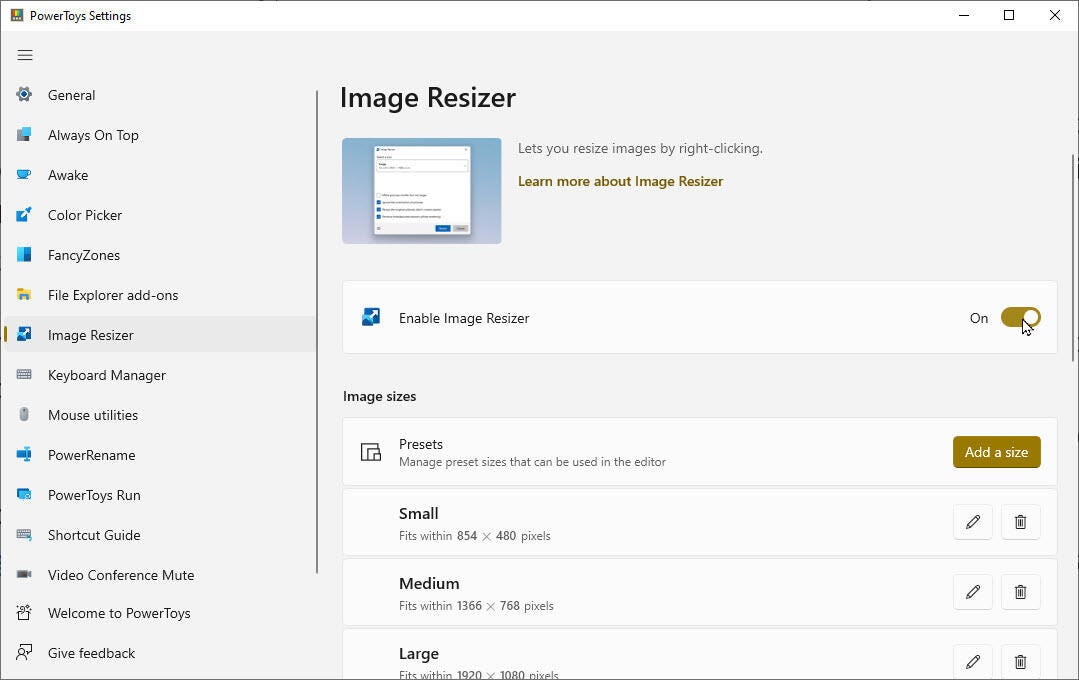
Screenshot: Lance Whitney.
To see this tool in action, open File Explorer and right-click on an image you want to resize. Select option Resize images.
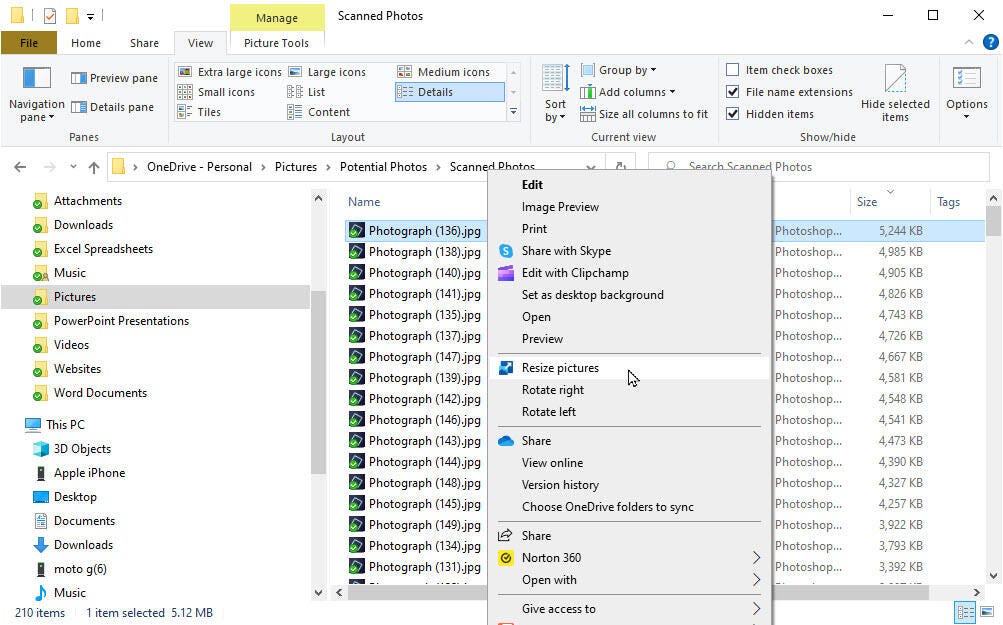
Screenshot: Lance Whitney.
The image resizing window is then displayed. Click on the current preset and you can change it in size Small, Medium, LargeWhere Telephone. Each preset displays the specific number of pixels corresponding to height and width. Select the preset you want to use.
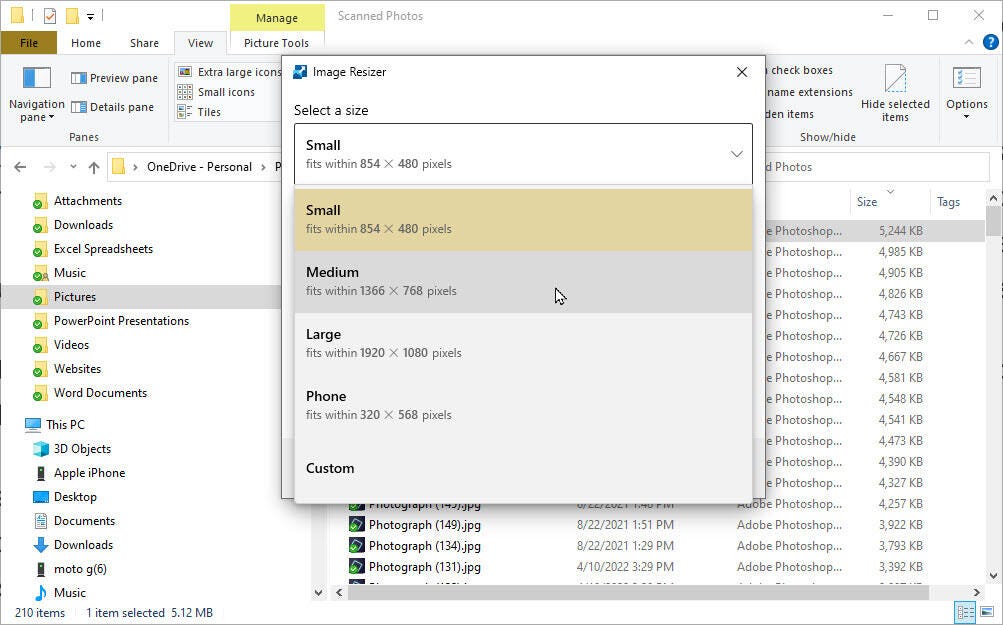
Screenshot: Lance Whitney.
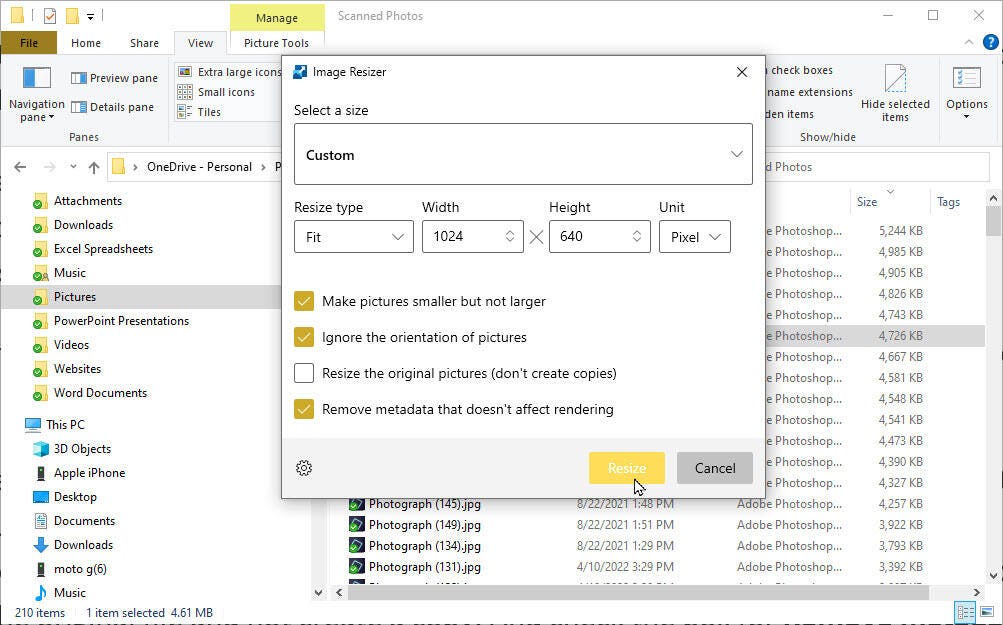
You can also select Custom. In the Custom window, you can choose the type of resizing (Fill, Fit, or Stretch), width and height, and unit of measurement (Centimeter, Inch, Percent, or Pixel).
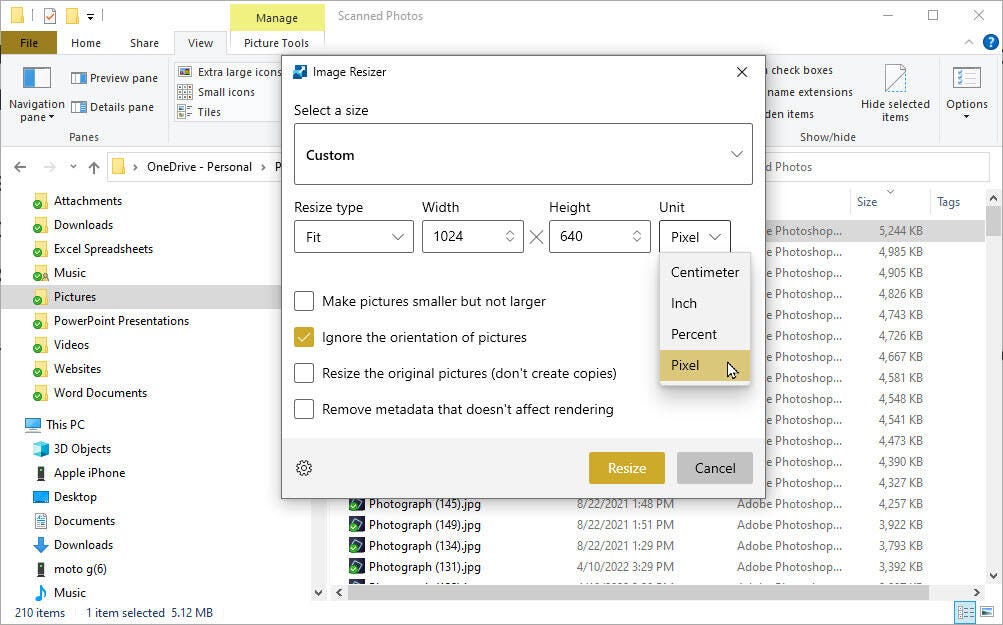
Screenshot: Lance Whitney.
Advanced options
Next, review the different options. Check the box Make photos smaller, but not bigger if you want to make sure you don’t accidentally enlarge photos. Check the box Ignore photo orientation to resize them regardless of their orientation. Check the box Resize original photos if you want to resize the original file and not create a copy. And check the box Remove metadata that does not affect rendering to remove any non-essential metadata that can be discarded.
When you’re ready, click Resize.
Screenshot: Lance Whitney.
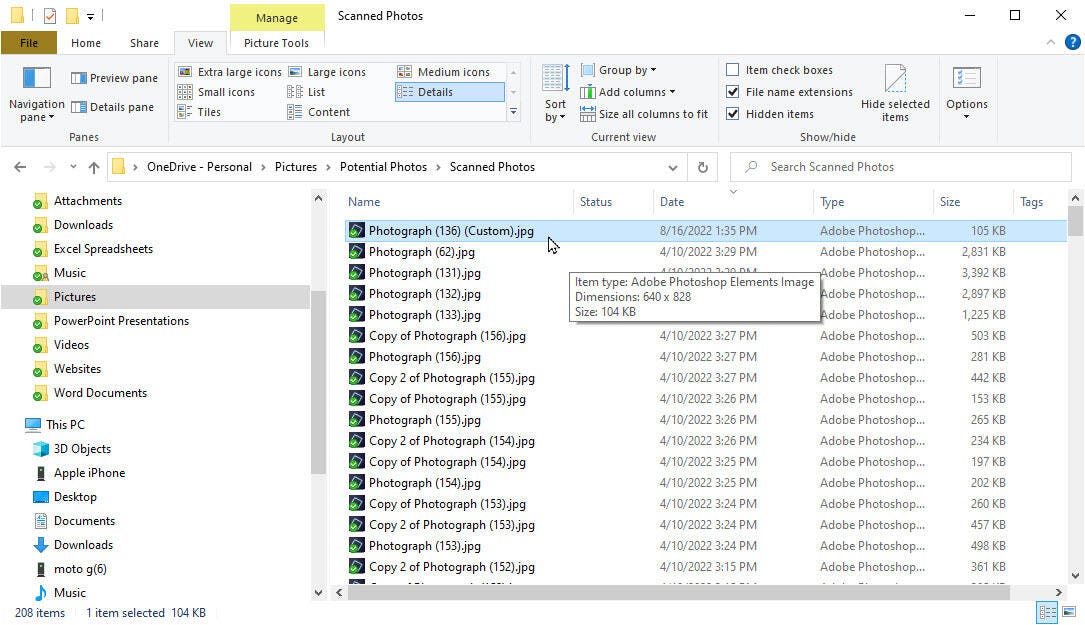
If you chose not to resize the original image, the resized copy will contain the title of the chosen preset (eg, Small, Medium, Large, or Custom) in the filename. If you chose to resize the original, the resized image retains the original name. Find the resized file in File Explorer to see its new size. You should also open it to make sure the image quality is still okay.
Screenshot: Lance Whitney.
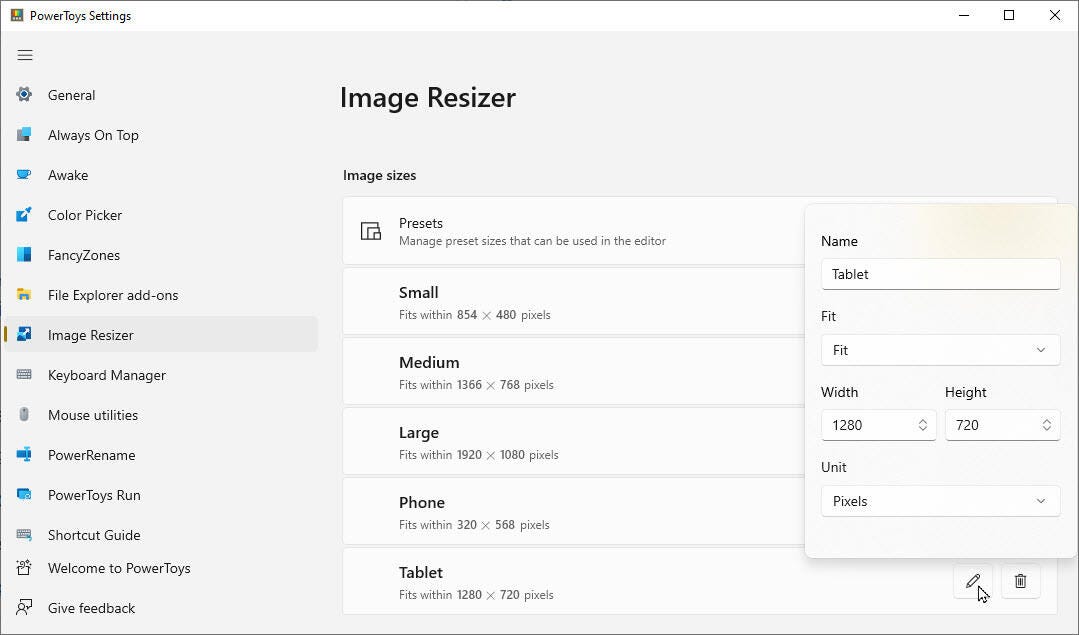
To configure Image Resizer beyond the default settings, return to its dedicated screen in PowerToys. To add a new predefined size, click the button Add size. A new preset appears at the bottom of the list. Click the pencil icon to edit it. Give it a name, select the fit type, then enter the width and height. Click anywhere outside the edit window to finish. To delete presets you don’t need, click the trash can icon next to the desired entry.
Screenshot: Lance Whitney.
Encoding and compression
The fallback encoder parameter determines the format the tool will use if the original image format cannot be encoded to create a new image. The default setting is JPEG encoder, which means the resized image will be saved as a JPG file. This should be fine in most cases. But if you want to use another format, click on the drop-down menu and you can choose PNG, BMP, TIFF, WMP or GIF.
The following three options define the level of compression used to reduce the file in the different formats. For JPG format, you can move the slider left or right if the resized files are still too large or the image quality is not properly preserved. You can also enable or disable PNG interlacing and TIFF compression if you have selected either format.

Screenshot: Lance Whitney.
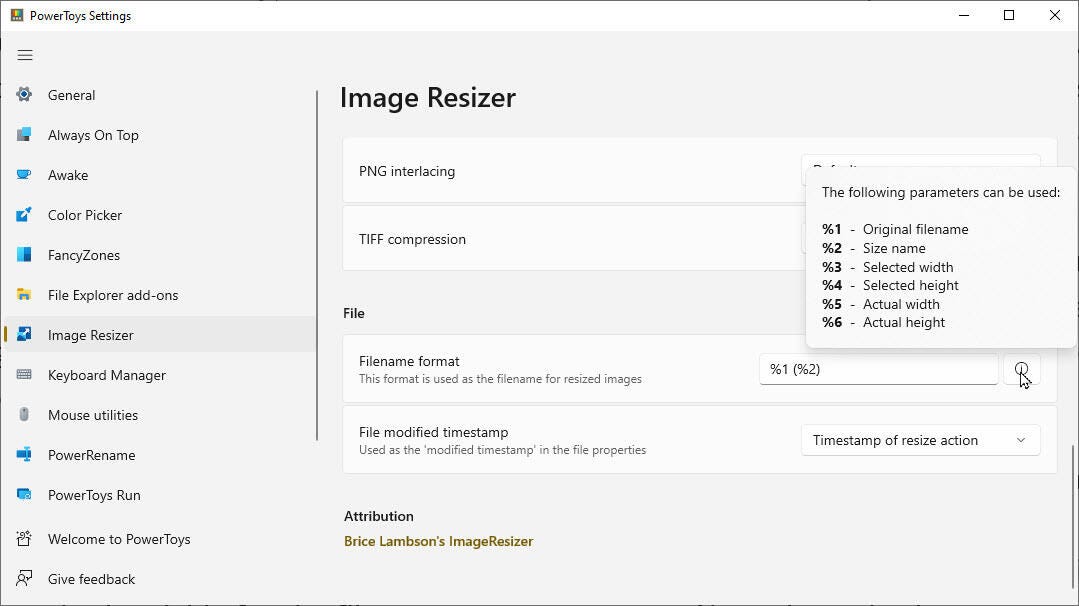
Finally, scroll down to the File section. Here you can specify the filename format to use for the resized copy. By default, Image Resizer keeps the original filename, but adds the title of the preset you used. To switch to a different file naming scheme, click the Info circle next to this setting. You will see the different variables and can incorporate the appropriate one.
Finally, the resized copy is automatically timestamped from when it was created. If you prefer to use the timestamp of the original file, click the drop-down menu here and change the option to Timestamp of the original file.
Screenshot: Lance Whitney.
Source: ZDNet.com