
Do you have a multitude of files on your computer that you want to rename at once and according to a certain logic? Windows natively allows you to rename multiple files by applying the same name followed by sequential numbers. But to give your file renaming more power, Microsoft offers a tool called PowerRename.
Accessible from the context menu in File Explorer, the PowerRename command allows you to rename files using variables. Just select the files you want to rename, trigger the command, then choose the filename and variables you want to use.
Set of utilities for Windows 95 and NT.
- Downloads: 35
- Release date : 09/15/2022
- Author : Microsoft
- Licence : Free license
- Categories:
Utilities - Operating system : Windows 10/11
If you just need to add sequential numbers to a group of files, just open File Explorer, select the files you want to rename, and press F2. Then type the name you want to use and press Enter. All of the files you selected are given the same name with numbers in parentheses.
PowerRename is able to do the same and more. If you don’t have PowerToys on your PC yet, download and install the PowerToysSetup.exe file from the program’s GitHub page. PowerToys and its programs work the same on Windows 10 and 11.
How to Rename Multiple Files in Windows with PowerRename
1. Enable PowerRename
Open the window PowerToys Settings by double-clicking its icon in the system tray. Select the PowerRename entry. Enable the option if it is disabled.
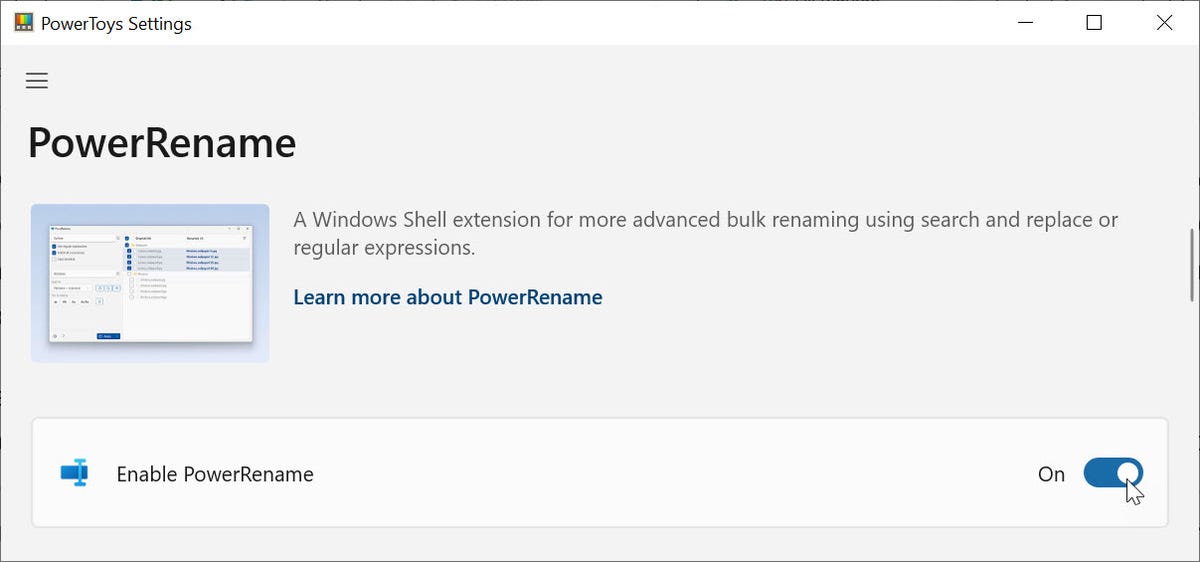
Screenshot by Lance Whitney.
2. Click on Show PowerRename and set it to Default and extended context menu
Next, click the drop-down menu for Show PowerRename and choose Default and extended context menu. This will ensure that the command appears in the Windows 10 context menu and Windows 11 context menus. Leave the checkbox unchecked Hide in context Menu.
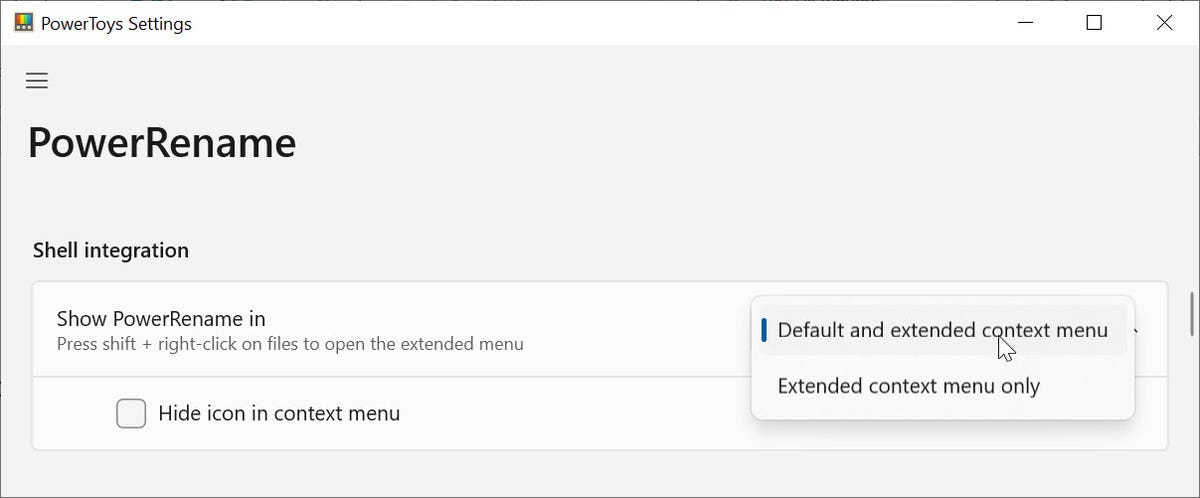
Screenshot by Lance Whitney.
3. Enable search and replace filename options
To receive suggested names when finding and replacing existing files, ensure that the option Enable auto-complete for the search and replace fields is activated. To control the number of suggestions you can receive when searching and replacing filenames, set the maximum number of items. If you are unsure, leave the default at 10.
To see the character strings used for search and replace, activate the option Show recently used strings. Finally, if you think you need more than the regular expressions used, enable the option Use Boost library. Otherwise, leave this option disabled; you can always enable it if needed.
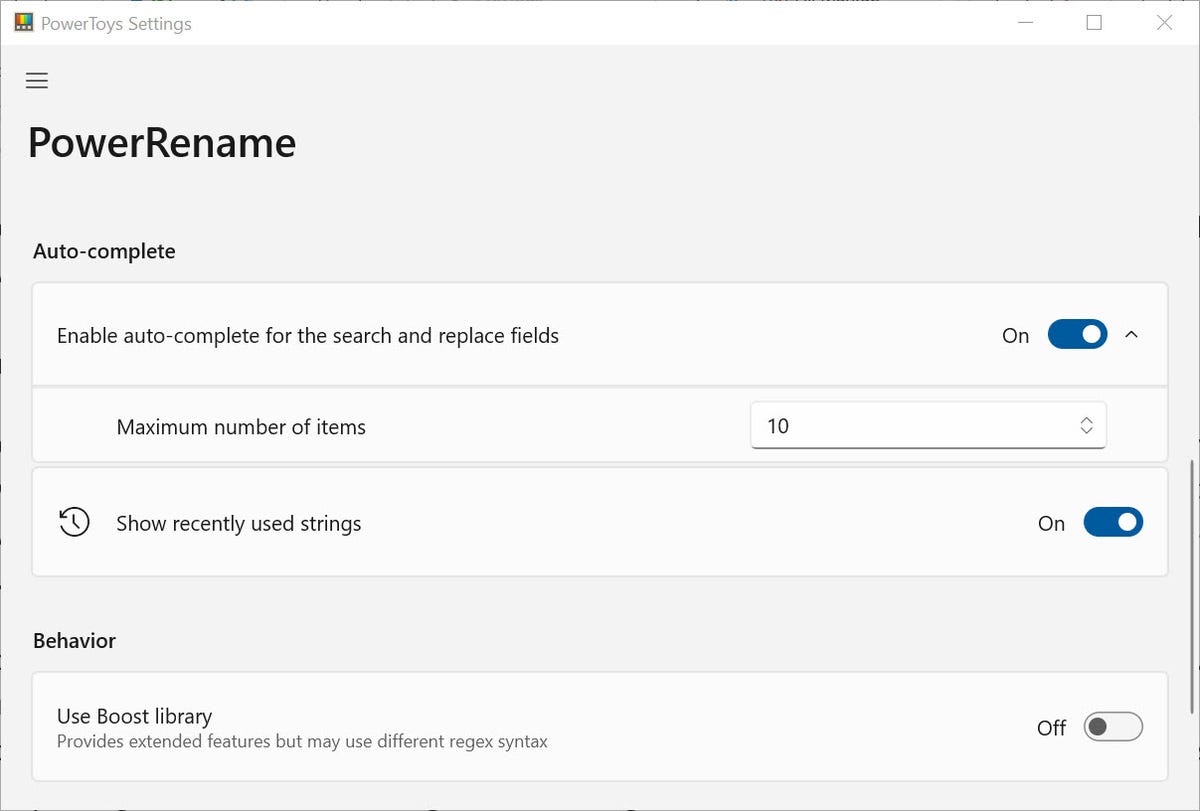
Screenshot by Lance Whitney
4. Open File Explorer and select the files you want to edit
Now that you’ve set up the software, it’s time to try PowerRename. Open File Explorer. Select multiple files whose name you want to change. Photos imported from your phone are a good option, as they are given generic designations that you’ll probably want to replace with more meaningful names. Right-click anywhere in the selection and select PowerRename in the context menu.
In the right pane, confirm that these are the files you want to rename and make sure each one is checked.
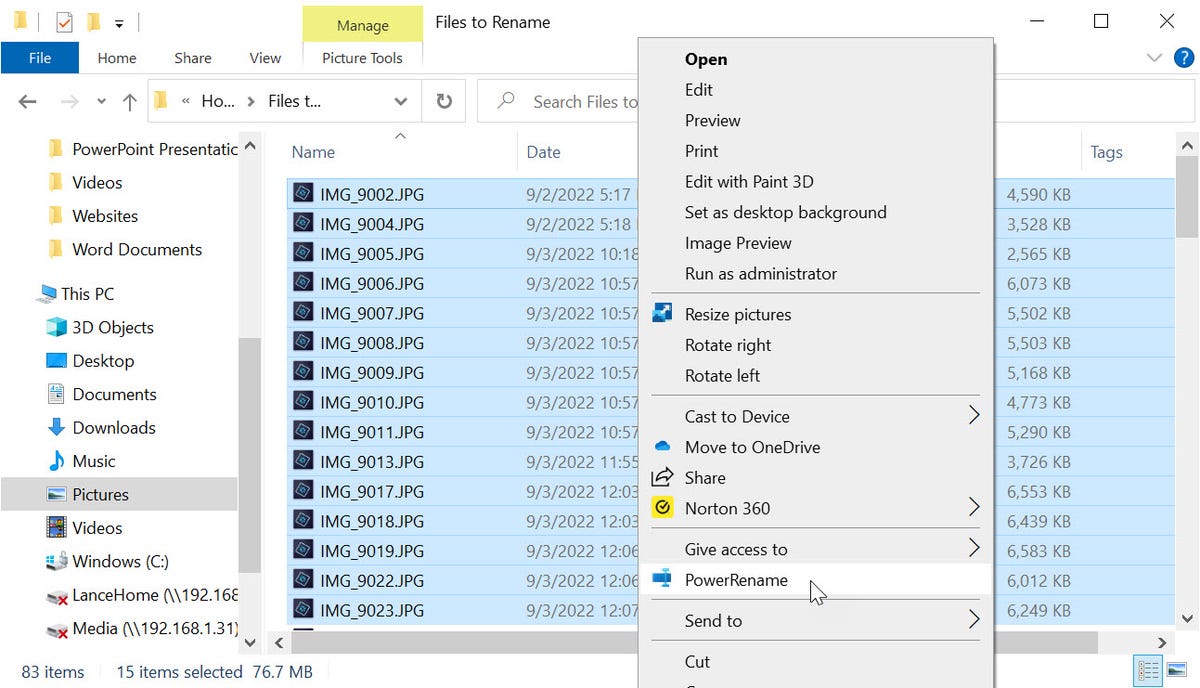
Screenshot by Lance Whitney.
5. Configure your search and replace strings
Next, it’s time to configure your renaming rules. To do this, I will use a concrete example. My wife and I recently took a trip to London where I took hundreds of photos. At the end of the trip, I had a bunch of photos with generic names that I wanted to rename. For the first part of this process, I wanted to rename each of them “Trip to London”, then add a sequential number to the end of each filename, starting with 1 and so on.
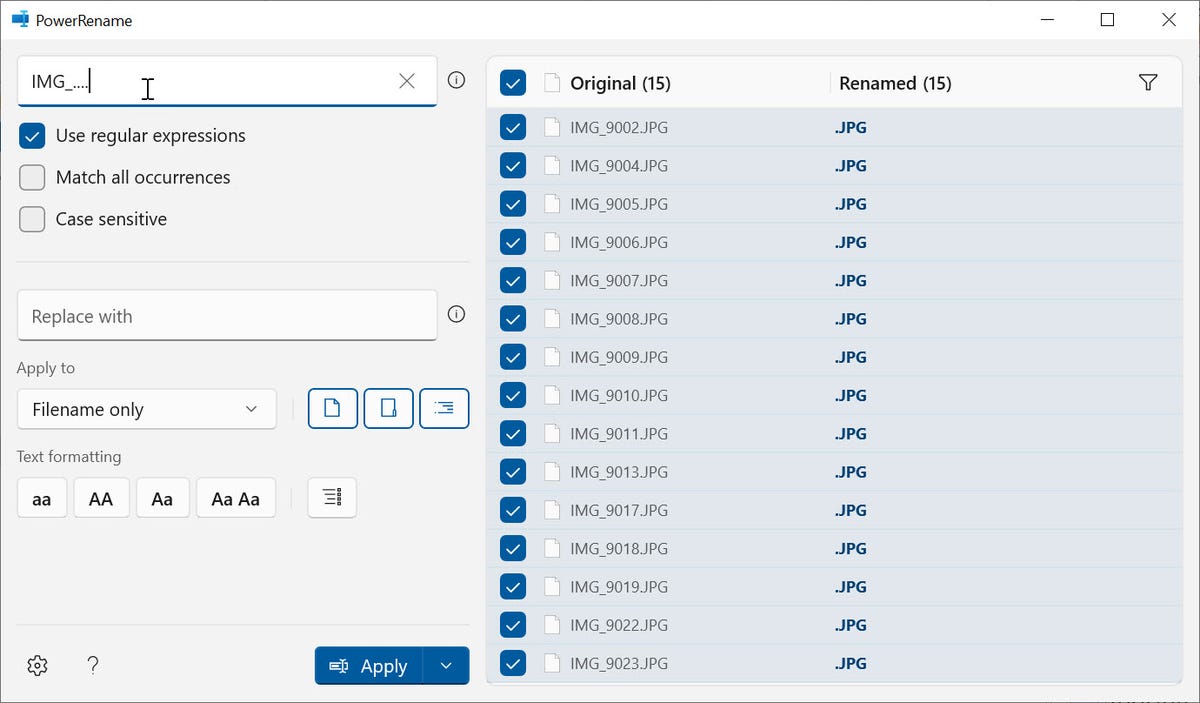
Initially, the files all had the name IMG_ followed by a four-digit number and JPG as the extension (IMG_1001, IMG1002, etc.) In the search box, I typed IMG. In PowerRename, the symbol “.” is used as a variable representing a single character. So I typed four dots after IMG (IMG….) and then nothing for the extension, because I wanted to leave the JPG as is.
Screenshot by Lance Whitney.
6. Select Enumerate Items
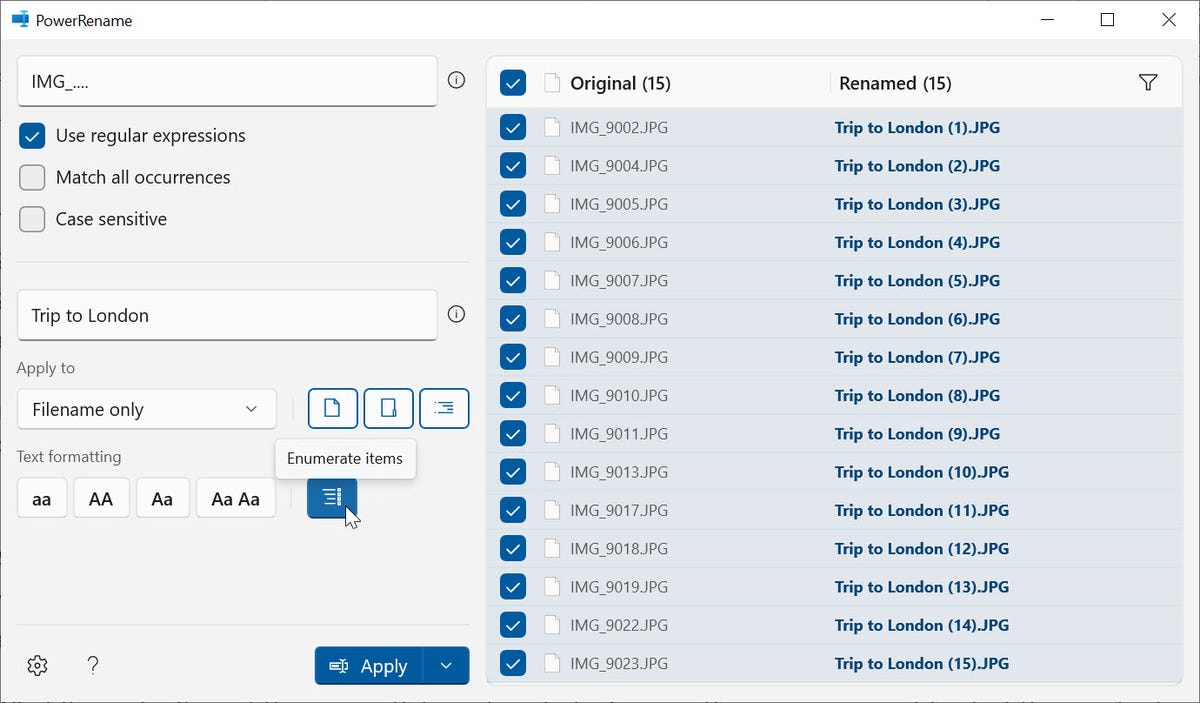
In the Replace field, I typed Trip to London. I then clicked on the button Enumerate Items, because it tells PowerRename to add a sequential number in parentheses to the filename, (Trip to London (1), Trip to London (2), and so on). Clicking on Applythe renaming is performed.
Screenshot by Lance Whitney.
7. Enter the date each photo was taken
The real strength of PowerRename lies in its support for variables. For the second part of this process, I wanted to indicate the date each photo was taken. For this, it was necessary to use variables, more precisely a “$” followed by the character string corresponding to the type of date desired.
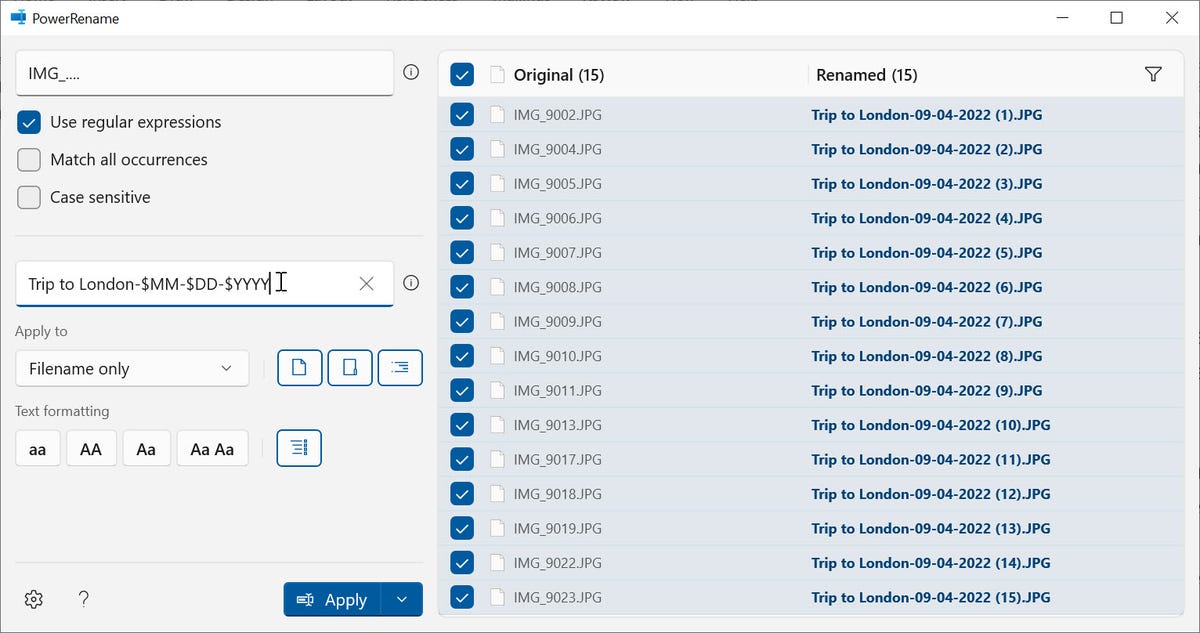
With PowerRename variables, the month is represented by the letter M, the date by the letter D, and the year by the letter Y. The number of times you use the letter determines the exact format. In my case, I wanted to use the two-digit value for the month, the two-digit value for the day, and the four-digit value for the year. So, I typed the string Trip to London-$MM-$DD-$YYYY.
Screenshot by Lance Whitney.
8. Click Apply if everything looks good
To help you, PowerRename previews the new names in the column Renamed so you can see if your syntax is correct. If everything looks correct, click the button Apply, and the files will be renamed. The new names appear in the column Original to indicate that the files have been renamed. In the end, my photos had their new names, full date and sequential numbers. Mission accomplished.
If you need more powerful and flexible file renaming, you may prefer a third-party utility. I used Sherrod Computer’s File Renamer program, which comes in both free and paid versions and has many renaming options. But if your file renaming needs are relatively basic, PowerRename is a useful and handy tool.
Source: ZDNet.com