
With the deployment of macOS Sonoma, Apple introduced a new feature allowing you to share passwords and other identification keys with trusted people who have compatible hardware. We explain to you what conditions are required to take advantage of this function, and how to take advantage of it.
Do you want to share your passwords with your significant other, your family, with a roommate or simply with one of your contacts? It is now possible. The deployment of macOS Sonoma allowed Apple to inaugurate a function specifically offering the possibility of sharing passwords, or possible identification keys.
Practical and simple to set up, this functionality nevertheless implies that each person concerned by this sharing has one or more of the following devices: an iPhone running iOS 17 (or newer), an iPad running iPadOS 17 (or higher), or a Mac powered by macOS Sonoma (or later). These details having been made, let’s now detail how to create a password sharing group in a few clicks.
How to share passwords with loved ones in macOS Sonoma?
Let’s start with the procedure for creating a sharing group. To do this, go to the System Settings of macOS, then click on the “Passwords“. Then follow the following steps:
- Click on the button “Add» decorated with a “+» at the top of the window, then opt to create a “New shared group“.
- Add a name for this new group (“Frandroid» in our example).
- Then click on “Add people» to select the different contacts with whom you want to share. Note that if some contacts’ names are grayed out, it’s because they don’t have a compatible device.
- Then click on “Create» so that the group is finalized.


You now have a password sharing group of which you are the administrator. You are the only one who can add or remove people from the group, rename it or delete it. Now here’s how to add passwords to this new sharing group.


- Return to the “Passwords» from the System Settings of macOS.
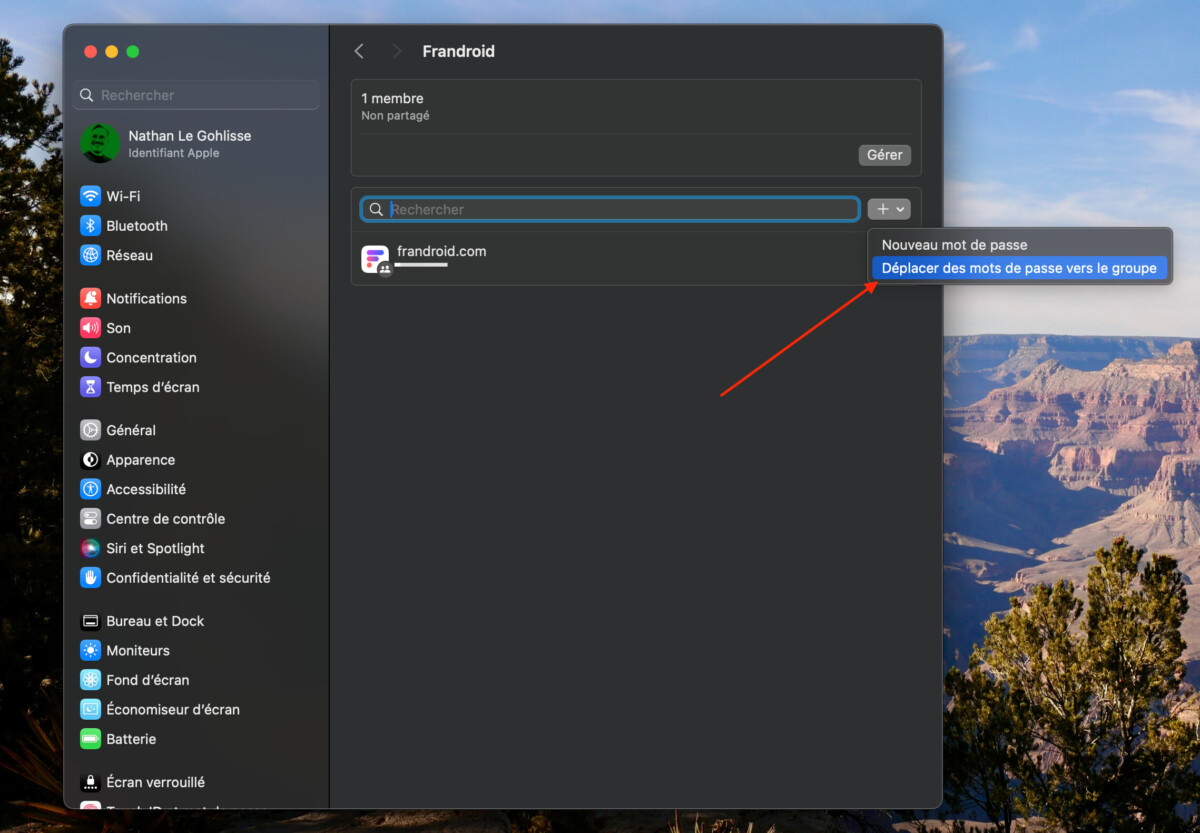
- Select the group you have just created (the icon is blue with two white silhouettes, at the top of the window).
- Click on the little “+” to create a new password; or more likely to add one already saved to your iCloud Keychain.
- All you have to do is check the different passwords you want to add from the list that appears, then click on “Move“.
- The selected passwords are added to the group and can now be used by other members.
Note that the contacts you added to the group will have the option to accept or decline your invitation. It is also possible to notify them by message via the dedicated option during the process of adding new contacts to the group.
Last clarification, and not least: each person in the group can modify the passwords and identification keys that you have shared. They can also share other passwords with the group in turn.
Did you know ? Google News lets you choose your media. Don’t miss Frandroid and Numerama.