
macOS includes a tool dedicated to screenshots, accessible from several keyboard shortcuts. How does it work ? The answer in this article.
On Windows, depending on the device you are using, it is not always easy to take a screenshot. On the other hand, on macOS, Apple has for several years offered tools that are perfectly integrated into its operating system. Some use them every day, others continue to take pictures of their screen due to lack of knowledge, which is not practical at all!
In this article, Numerama tells you how to take a screenshot on Mac. We present all the keyboard shortcuts available, in order to possibly teach you new ways to take screenshots.
A screenshot on Mac of the whole screen or just a window?
There are several shortcuts to take a screenshot on Mac:
- [Majuscule ⇧] + [Cmd ⌘] + [3] : to take a screenshot of the entire screen (or all of your screens if you have more than one).
- [Majuscule ⇧] + [Cmd ⌘] + [4] : It’s up to you to choose the area you want to capture. Pick a rectangular area, release, and the capture is complete.
- [Majuscule ⇧] + [Cmd ⌘] + [4] + [Espace] : This shortcut allows you to capture only one application. Click for example on Safari and only the selected window will be captured.
- [Majuscule ⇧] + [Cmd ⌘] + [6] : To take a screenshot of the Touch Bar, on Macs that have one.
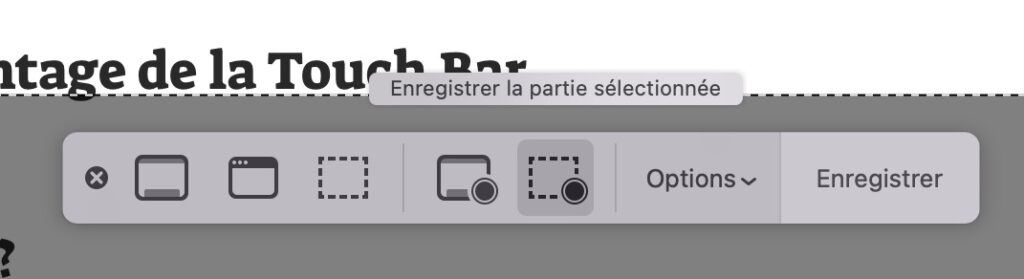
Finally, from macOS Mojave, Apple offers a shortcut merging all those we have presented to you: [Majuscule ⇧] + [Cmd ⌘] + [5] launches an editor (in the form of a bar at the bottom of the screen) which lets you choose whether you want to capture the whole screen or just a window. This menu also allows you to choose the destination of the screenshot. By default, it goes to the desktop. You can also configure a timer or disable the display of the mouse.
Video captures on Mac are also possible
To film a piece of your screen, you used to have to use QuickTime software. Since macOS Mojave, Apple has added a new tool to its computers. Also accessible from the toolbar of the[Majuscule ⇧] + [Cmd ⌘] + [5], it allows you to film a part of the screen or its entirety. Again, the end result arrives on the desktop. We interrupt the recording from the menu bar, at the top of the screen, where there is a small round logo with a square inside.
Bonus: The Touch Bar Advantage of the MacBook Pro
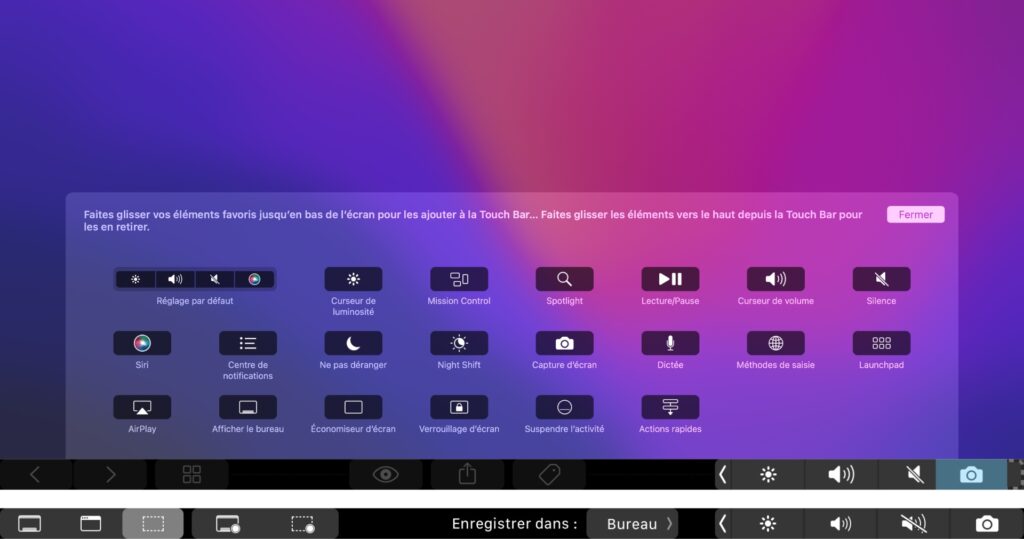
A handy little trick for owners of a MacBook Pro with a Touch Bar, it is possible to add a “screenshot” button to the touch bar of your keyboard. Touching it launches the tool[Majuscule ⇧] + [Cmd ⌘] + [5] and you can create images or videos. The Touch Bar is all the more practical as it allows you to choose the mode you want to use directly with your fingers.
To add this button, go to the Finderchoose Presentation in the menu bar, and choose Customize the Touch Bar. Touch with your finger the four buttons on the right on the Touch Bar and you can drag the mouse to the “Screenshot” shortcut in place of one of them. We have on our side replaced Siri.
PNG or JPEG for a screenshot on Mac?
Finally, last little tip for those who are bothered by the PNG format, which is too large. By default, all macOS screenshots are in PNG and play on transparency. If you prefer JPEG, which is lighter, go to Terminal and copy-paste the following command:
defaults write com.apple.screencapture type jpg;killall SystemUIServer
You can go back with the command:
defaults write com.apple.screencapture type png;killall SystemUIServer
So much for this tutorial which we hope will make your life easier.