Do you want to switch from Windows to macOS, but you are afraid of losing all your data? Don’t panic, there is a solution to make the transition go smoothly. In this short guide, we explain everything you need to know about data transfer and how to go about it.
It happens that Windows has had its day and that the user turns to new horizons. One can choose to switch to macOS for various reasons, whether it is a better compatibility with other Apple devices or a preference for its more intuitive interface. Be that as it may, when the choice is made, the question of data transfer always arises.
For a long time indeed, the thing was not easy. Both operating systems were relatively waterproof to each other and it could be quite complicated to find all of your files without a hitch. Fortunately, things have now changed, in particular thanks to applications developed simultaneously for both platforms.
Related: Apple Smashes Nearly All Windows Competition With Late 2021 MacBook M1s
How to Find Your Windows Apps on Mac
The first problem to solve is therefore that of the applications. Both Microsoft and Apple offer a number ofnative apps on their respective operating system, and it will therefore be very difficult to find the data of the latter by passing from one to the other. On the other hand, the developers have greatly improved the character cross platform of their software over the years.
Indeed, most major applications are now available both on Windows and macOS. What’s more, if the updates are not always done at the same time, the functionalities are generally the same on both OS. In other words, you will have no trouble opening a Photoshop file created on Windows with the Mac version of the application.

The same goes for all services based on the cloud or on an Internet connection, such as messaging (Discord, Zoom, Skype), as well as online storage solutions (OneDrive Google Drive). Note, however, that compatibility issues may occur with some applications. Take the example of Excel, which does not use the same databases on Windows and macOS. We therefore advise you to inform yourself well before performing the migration.
Finally, be aware that if you used to use an application on Windows that is not available on your Mac, there are always solutions to make it run. First, you can create a second Windows partition on your hard drive with tools such as Bootcamp and using a bootable key. Otherwise, you can also go through a virtual machine within macOS itself, which apps like Parralels allow you to do. Note that you will also need a TPM 2.0 chip if you want to emulate Windows 11.
How to Manually Transfer Your Windows Data to Your Mac
Once these checks have been made, it’s time to take a concrete look at your data. There are concretely two solutions to recover everything during the migration, the first being to take care of it manually. This method can be convenient if the amount of data to be transferred is less. You can thus use an external hard drive, the storage capacity of which will depend on the total amount of data. However, you will have to pay attention to the format of the hard drive, so that it is compatible on both your Windows PC and your Mac. Here’s how to go about it:
- Connect your Hard disk to your PC
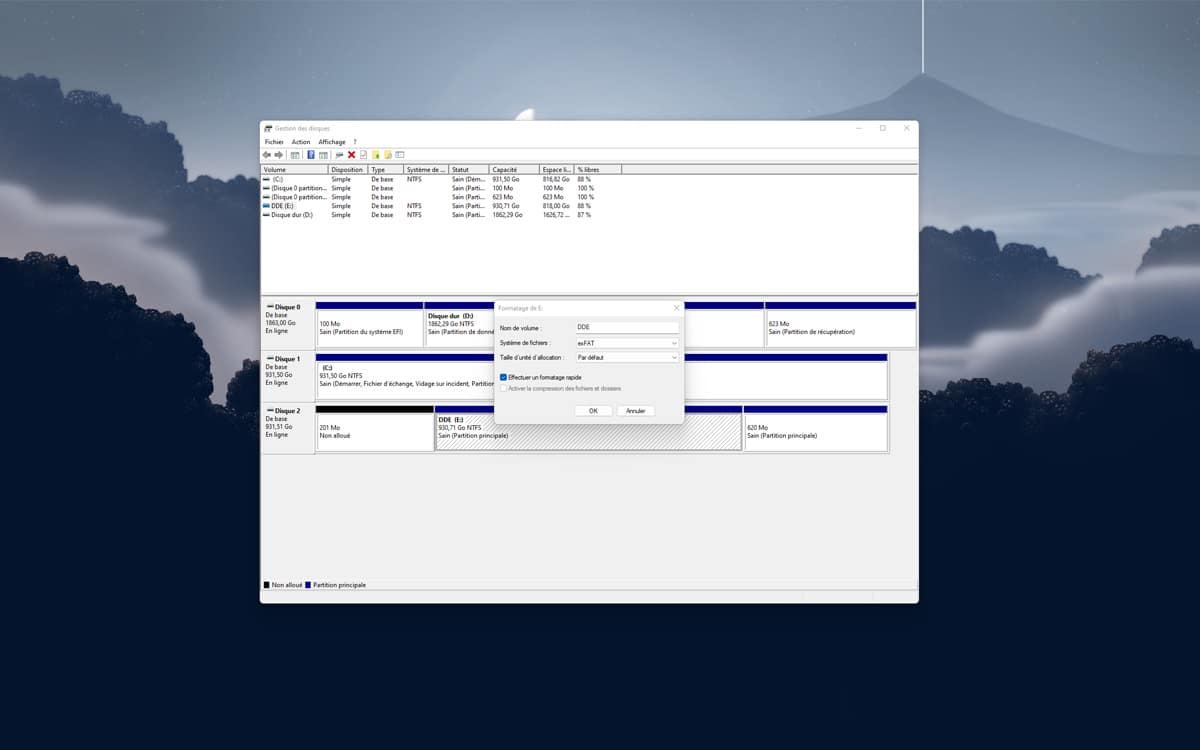
- Use the windows key to search Create and format hard disk partitions
- In the new window, do a right click on your hard drive
- Select option Format
- In the menu file systemclick on exFAT
- Give a name to your disc then click on OK
Your hard disk will then be formatted — be careful, you will lose all of your data stored on it! — and you can use it on both Windows and macOS.
You can also opt for a cloud storage service, such as Google Drive, OneDrive or iCloud. All you have to do is copy the files you want to recover to the service and then find them on your Mac. Finally, if you have a home server or NASyou can also use it to perform the same procedure to access your data on both devices.
How to transfer your Windows data to your Mac with Migration Assistant
However, if you are looking for a simpler solution or if the volume of your data is simply too large to transfer everything manually, be aware that Apple offers its own application to make life easier for its new users. This one is called Migration Wizard and is used precisely to migrate its data from its Windows PC to its Mac. In addition, it is particularly effective for recovering data such as contact lists, emails or calendars.
Before you start, make sure that your PC is running on Windows 7 at least, and that it and your Mac are connected to the same WiFi network. You are also advised to disable automatic Windows updates, as these can interfere with the process. Once done, here is the procedure to follow:
- Go to this link to download Migration Wizard on your Mac
- Be careful to select the version of Migration Assistant that corresponds to your version of macOS
- Open Migration Assistant and click OK
- Follow the on-screen instructions then click From a Windows PC
- Select the Windows-PC concerned
- After scanning, select the data you wish to transfer
- Once the migration is complete, log in to your user account on your Mac

Voila, all your important data is now on your Mac. You can start your new life in the Apple ecosystem without the hassle of starting all over again. Feel free to share your own solutions with us in the comments!