Screenshot by Lance Whitney/ZDNET.
The popularity of generative AI has given rise to a multitude of websites and services capable of creating an image from a textual description or a prompt, including Stable Diffusion.
Effective and versatile, this tool is available on several websites and as a standalone application. To be able to generate an image, all you have to do is type a description.
To learn how to use Stable Diffusion to generate images, locally or on the web, follow this guide.
Use Stable Diffusion online
Several websites offer you the option to use Stable Diffusion online. Be careful though, these sites generally do not have a French version, so your requests must be written in English. Here are a few :
Stable Broadcast Online
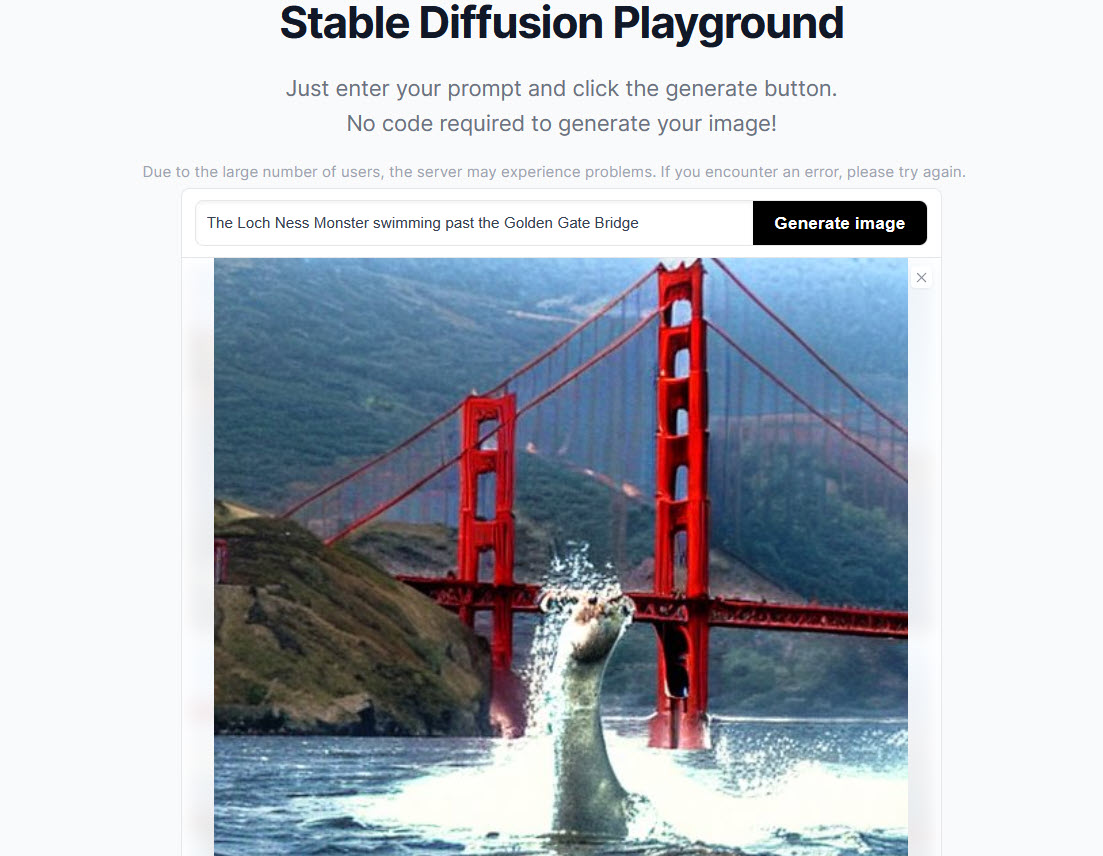
1. Generate an image
Open your browser, go to the Stable Diffusion Online website, then click Free AI Image Generator. In the field Promptwrite the description of the image to generate, then choose the style you want to give it from the drop-down list Styles. Finally, click Generate.
The site then offers you one or more images corresponding to your request:
Screenshot by Lance Whitney/ZDNET.
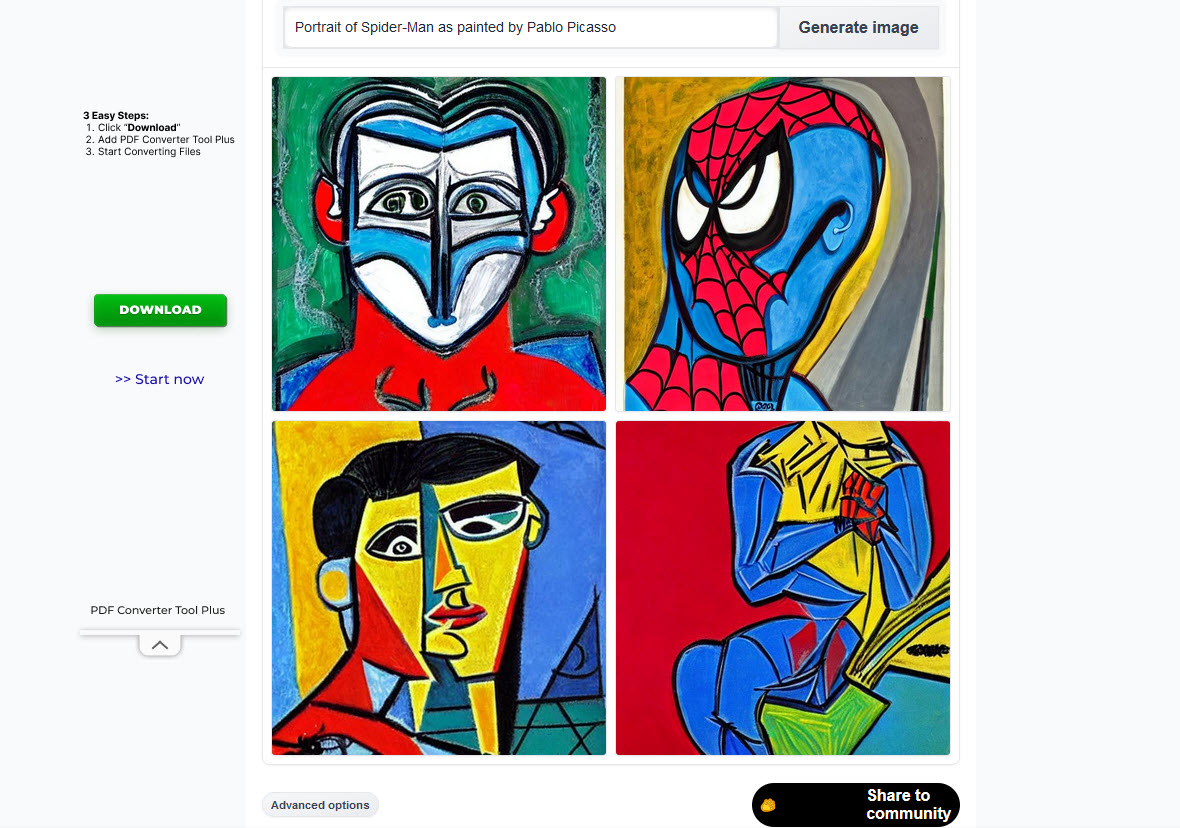
2. Select an image
Click on one of the generated images to enlarge it. You can move from one image to another by clicking on the thumbnails.
Right-click to save, copy or send the image using your browser menu.

Screenshot by Lance Whitney/ZDNET.
Hugging face
1. Generate an image
Open your browser and go to the Hugging Face website. In the field Write your Prompt, enter the description of the image to generate. Hugging face also offers a “negative” prompt field. This way, you can tell the AI what you don’t want to see in the image.
When you have finished writing your description and what to exclude from the image, click Generate image. The site then offers you several images:
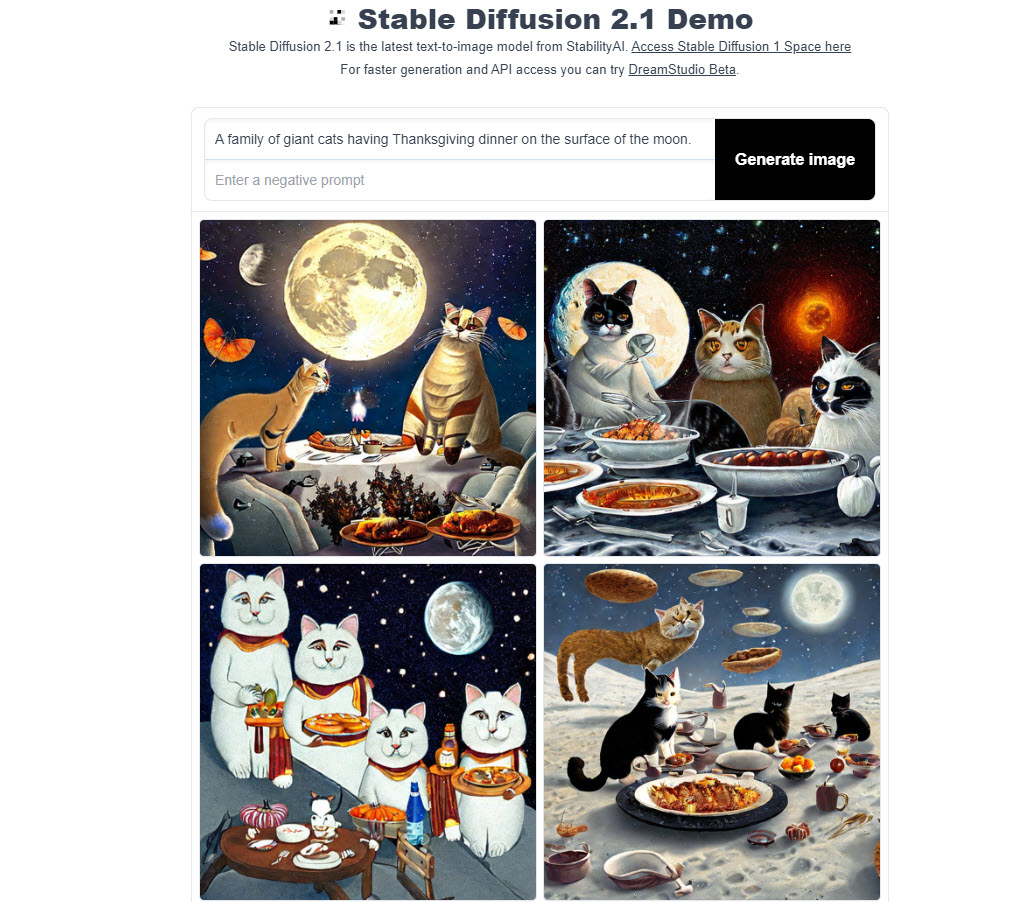
Screenshot by Lance Whitney/ZDNET.
2. Select an image
You can click on the image you want to enlarge it, then save it or copy it with a right-click. To navigate between the different images, you can click on the thumbnails below the image.
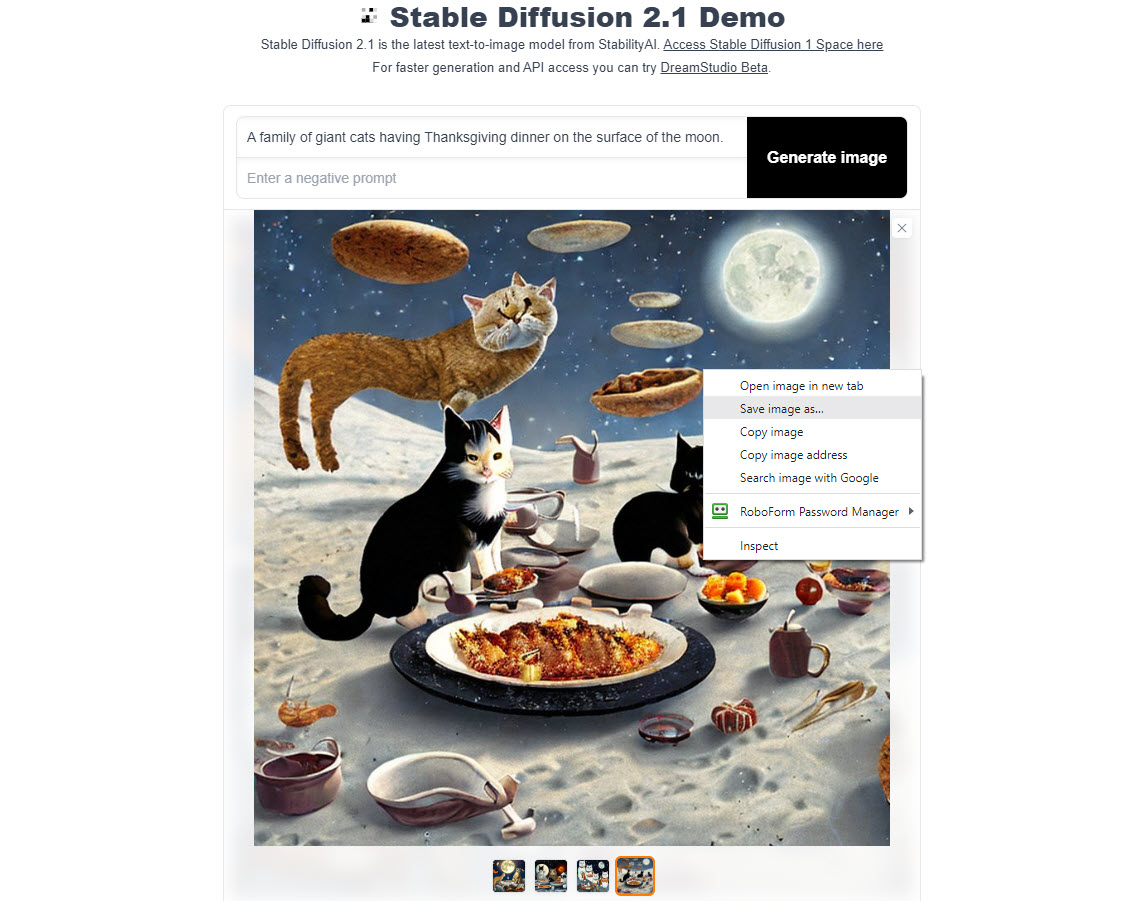
Screenshot from Lance Whitney/ZDNET.
DreamStudio
DreamStudio also uses Stable Diffusion. However, to use the AI image generator, you will need to use an account this time. In addition, the site offers credits to generate images. You start with free credits but, once they run out, you have to buy new ones to continue using the service.
Go to the Stability.AI login page. You can sign in with an existing Google or Discord account, or click the sign up link at the bottom of the page to create a new account. Once logged in, you are directed to the DreamStudio website.
1. Generate an image
Before generating an image, you can select preferences. In the field Style, choose the style to apply to your image: cartoon, photo, comics, cinema, 3D, etc. Below Settings, you can choose the image size by moving the first slider. The second slider allows you to select the number of images you want to generate.
In the field Prompt, write the description of the image you want to generate. You can also exclude elements by adding them under Negative prompt. Once you are satisfied with all the settings, click Dream. The site then offers you the number of images you requested.
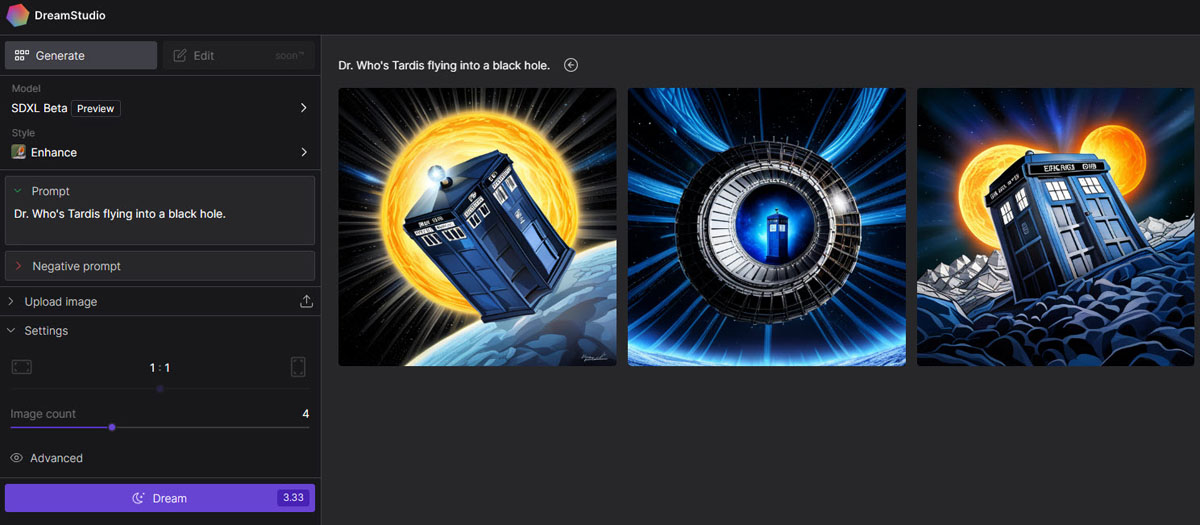
Screenshot by Lance Whitney/ZDNET.
2. Select an image
You can click on the image you want to enlarge it, then save it or copy it with a right-click.

Screenshot by Lance Whitney/ZDNET.
Download and install Stable Diffusion
If you prefer to work locally rather than online, it is possible to install Stable Diffusion on your computer. However, be aware that configuring the application is rather difficult and requires specific steps. But, once the template is installed, you can use it whenever and as many times as you want.
Hardware Requirements
To be able to use Stable Diffusion on your workstation, it must work with Windows 10 or Windows 11, and it must be equipped with an Nvidia video card with at least 4 GB (or more) of VRAM. To check the name and model of your video card, as well as its VRAM amount, you can use the DirectX diagnostic tool: press the keys win + R to open the Run dialog box. Then type dxdiag, then click OK. In the DirectX Diagnostic Tool, click the tab Display to see the name of your card and the amount of video memory (VRAM).
If your PC meets the minimum system requirements, follow the following instructions to install Stable Diffusion:
1. Install Python
Go to the Python 3.10.6 website. Scroll down to the section Files, and then click the installer link for 64-bit Windows (if you have 64-bit Windows). Then run the downloaded file to install Python.
2. Install Git
Go to the Git for Windows download page. Click the Git Windows 64-bit installation link. Run the downloaded file to install Git, accepting all options by default.
3. Download the Stable Diffusion project file
Go to the Stable Diffusion project GitHub page. Click the green Code button at the top right and select Download ZIP.
Once the folder is downloaded, right-click then select Extract all. A named folder stable-diffusion-webui-master is then created. Copy this folder with all extracted files to a simple location – for example the root of your C: drive.
4. Download and configure the checkpoint file
Go to the Hugging Face page to find the Stable Diffusion checkpoint file.
Click the download link to save the file 768-v-ema.ckpt. This is a large file, so be patient while it downloads.
Once the file is downloaded, navigate to the following location: C:stable-diffusion-webui-mastermodelsStable-diffusion (if you have copied this folder to the root of your C: drive). In this folder there is a file named “Put Stable Diffusion checkpoints here.txt”. Paste the file 768-v-ema.ckpt in this file.
5. Download the yaml config file
Go to the yaml config file page.
When you open the page, simple text appears. Right-click anywhere on the page, then select Save as. Save the yaml file to the location C:stable-diffusion-webui-mastermodelsStable-diffusion.
Change the file name to 768-v-ema, but keep the yaml extension. It must therefore be called 768-v-ema.yaml.
6. Run the webui-user.bat file
Go to folder stable-diffusion-webui-master and run the webui-user.bat file. After a few minutes, the window should display a line saying Run on local URLfollowed by a URL with your machine’s IP address and a port number.
Copy and paste the entire URL, with port number, into your preferred browser to view the Stable Diffusion application. Keep the command window open.
7. Generate an image
You can now generate an image. In the Stable Diffusion application, enter a description of the image you want to generate in the field Prompt. You can also specify what you want to exclude from the image in the field dedicated to Negative prompt.
You can also change the sample settings, width, height, etc. You can also change the number of images generated for each query.
When all the settings suit you, click on the button Generate. The application displays the number of requested images.
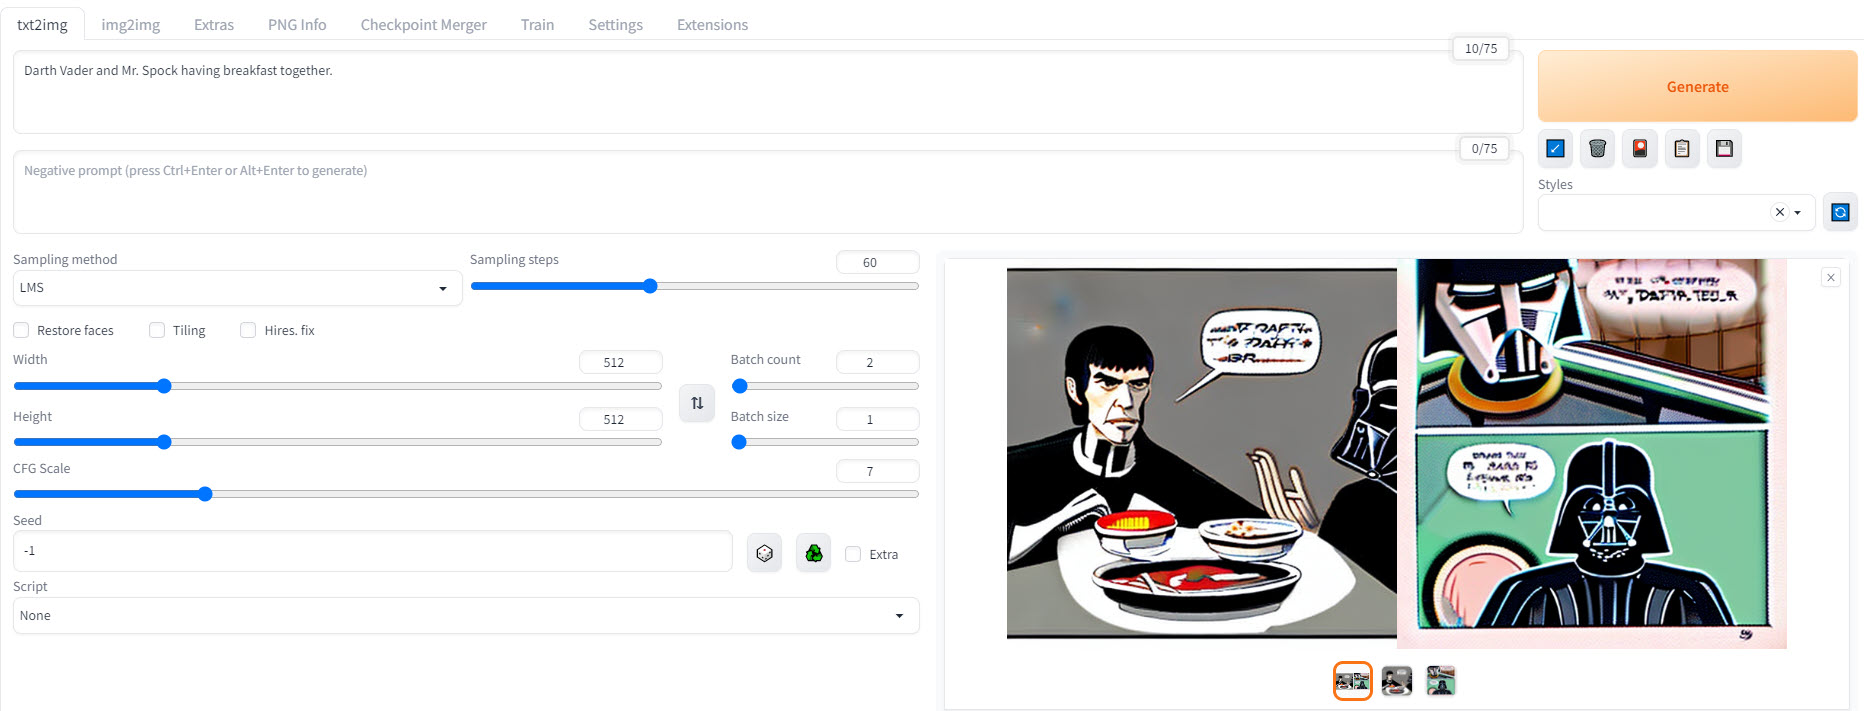
Screenshot by Lance Whitney/ZDNET.
Once the images are generated, you can click on the one you want to enlarge and save it. Otherwise, they are all automatically saved in a folder which you can access by clicking the button Folder.
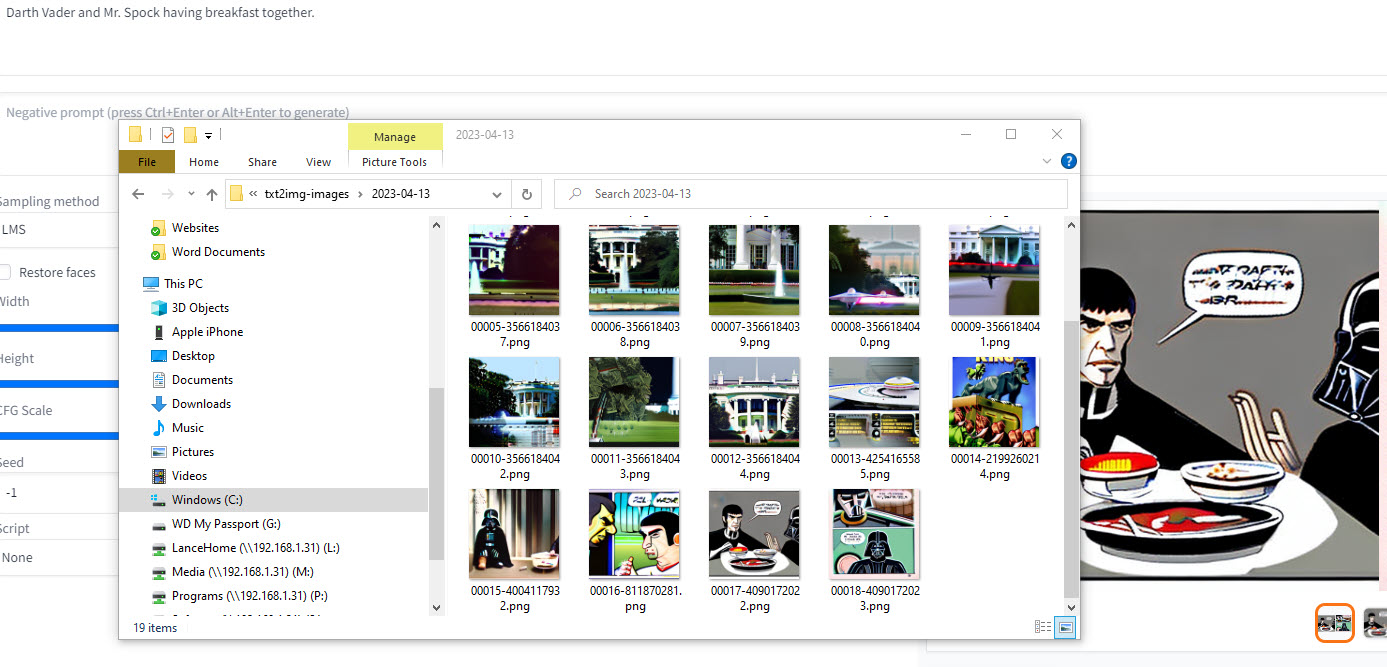
Screenshot by Lance Whitney/ZDNET.
The app offers many other customization options for your images.
You can now generate images according to your desires and needs. However, remember that using AI-generated images may result in copyright violations. So, be careful if you want to use them for commercial purposes.
Source: ZDNet.com