
You are moving from one Windows computer to another and you want to transfer some files and settings to your new PC. The Windows Backup app is a free and easy way to do this. Available in Windows 10 and Windows 11, the backup tool lets you back up specific folders, apps, settings, and credentials to the cloud. When you set up your new computer, you can then apply the backup to restore all your items. Here’s how to do it.
First of all, you need to have a Microsoft account because the backup will be stored in the cloud using OneDrive. Work and school accounts are not supported. By default, OneDrive offers 5 GB for free. If that’s not enough to back up everything you need, you need to pay for a paid Microsoft 365 subscription.
How to properly use Windows Backup
The main disadvantage of Windows Backup tool is that it only backs up certain locations and items. For example, it doesn’t allow you to backup and restore traditional desktop applications. Therefore, you need to make sure that you have the installation tools for any desktop applications that you need to reinstall. Still, this tool will give you a head start when you need to move from one PC to another.
1. Launch Windows Backup
First, turn on the computer you want to back up.
- In Windows 10Click on the button Start and select Windows Backup from the menu.
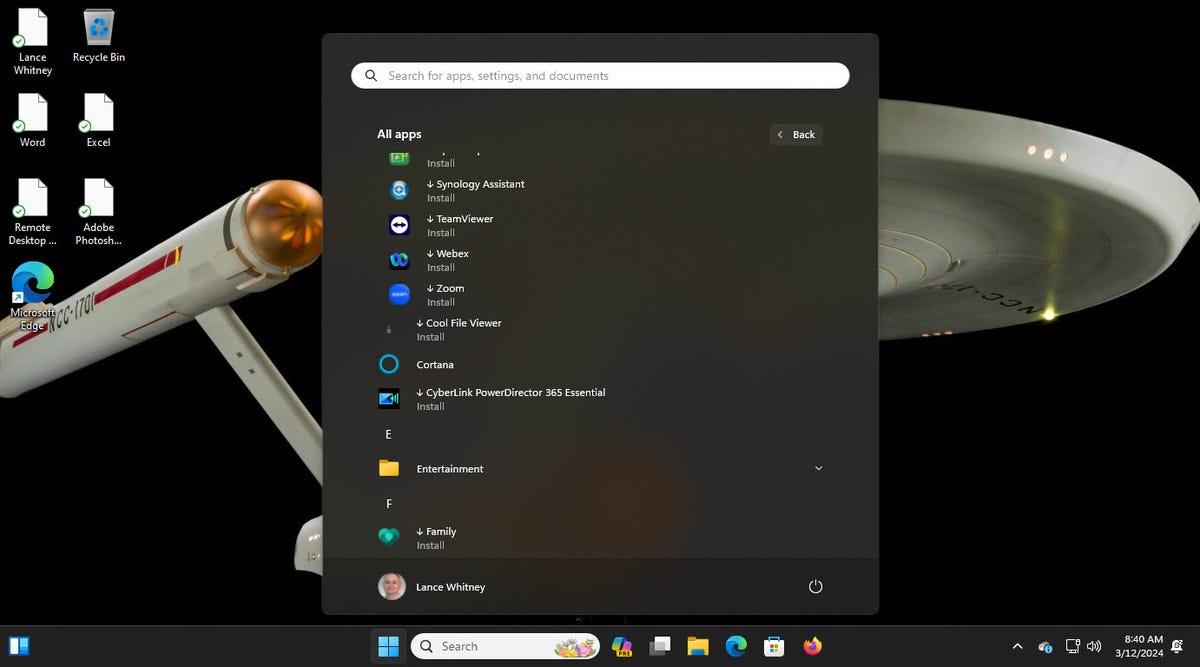
- Below Windows 11Click on the button Start, go to the All Apps screen, then select Windows Backup.
The main screen of the tool is displayed.

screenshot by Lance Whitney/ZDNET
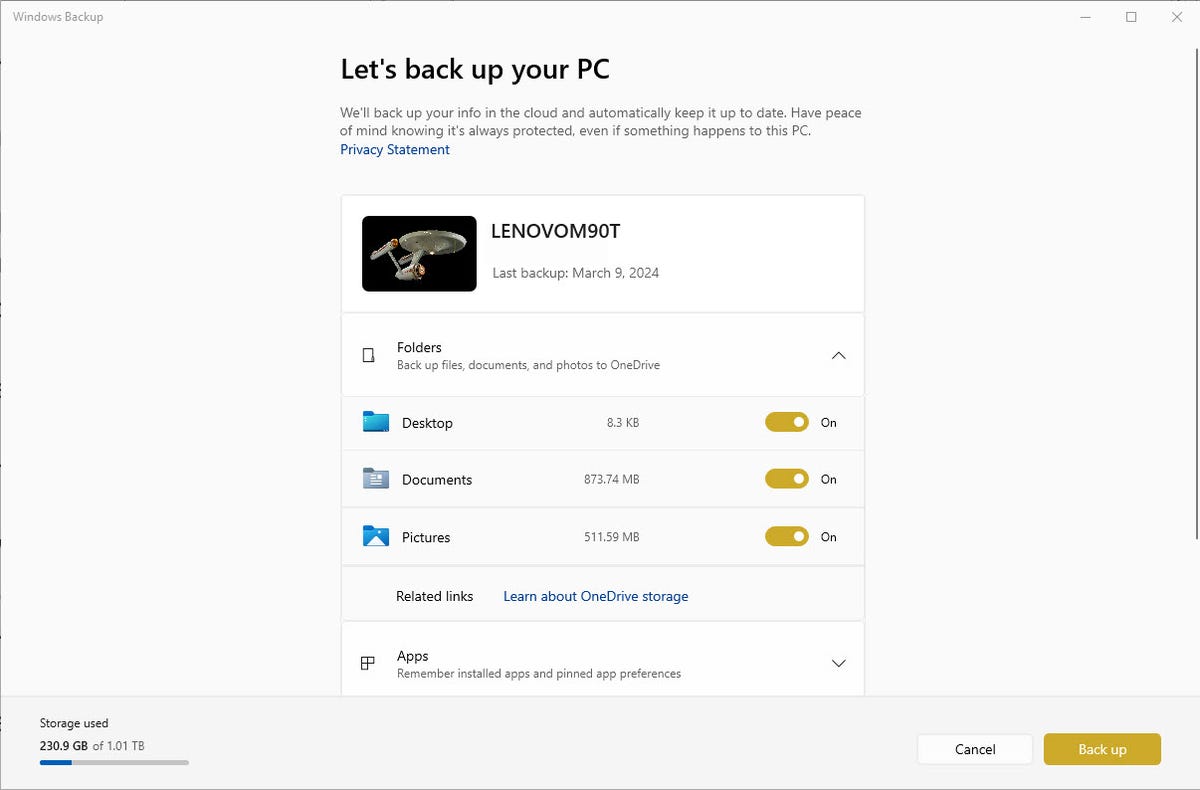
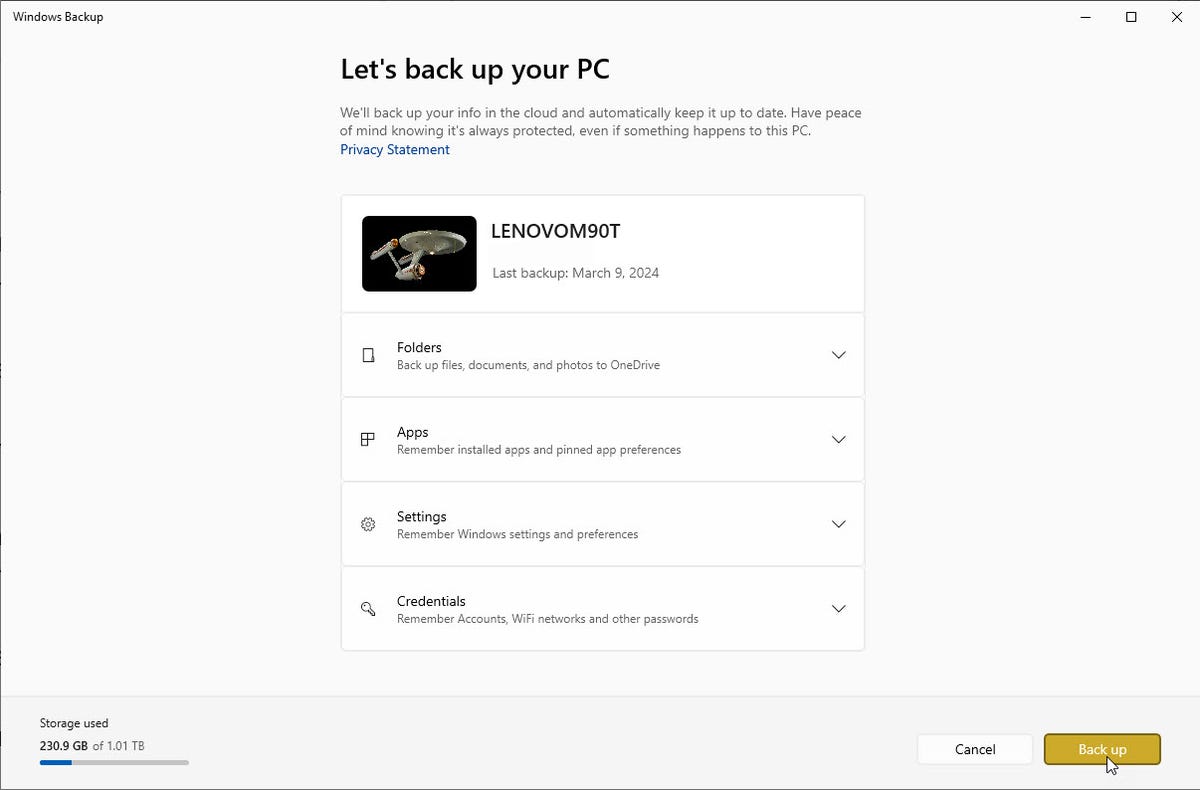
2. Configure Windows Backup folders
The Windows Backup tool offers four different categories to configure: Folders, Applications, Settings, and Credentials. To get started, click the down arrow in the Folders category. Enable the Desktop, Documents, and Pictures buttons, depending on the folders and files you want to back up.
screenshot by Lance Whitney/ZDNET
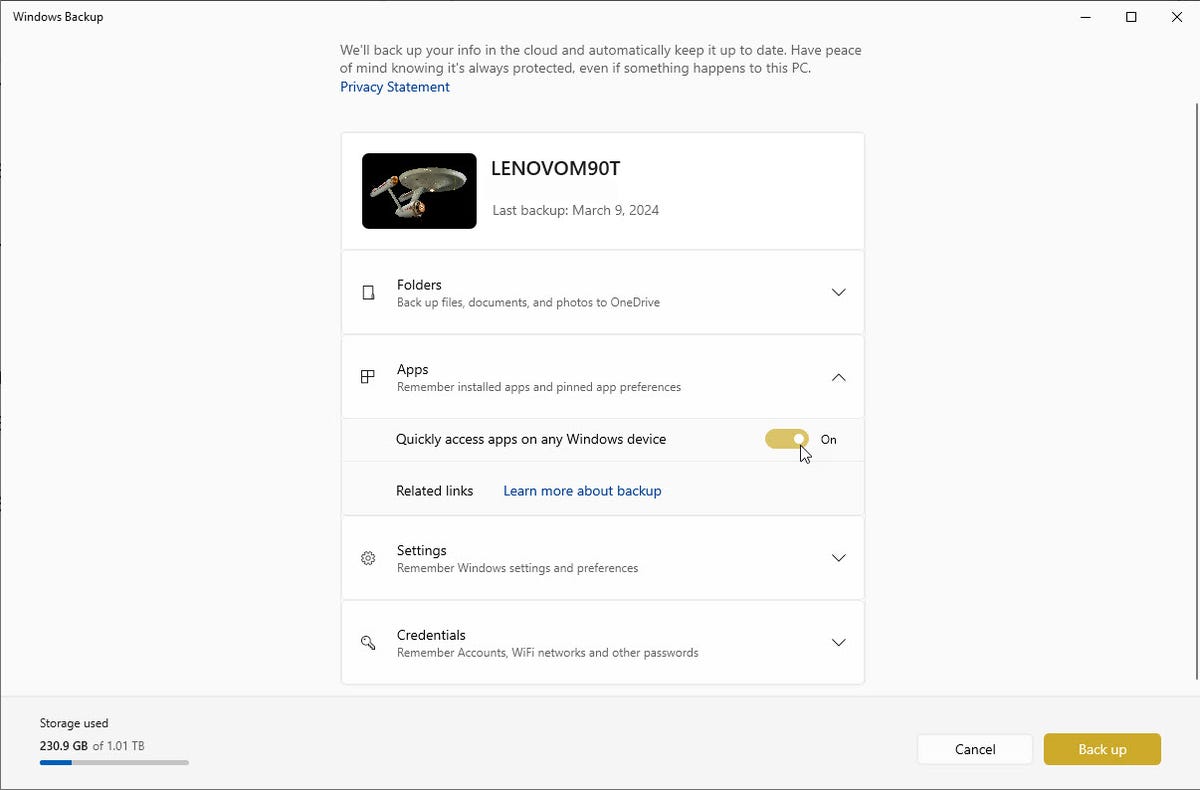
3. Configure Windows Backup applications
Next, click the down arrow for Apps. Make sure Quick access to apps on any Windows device is enabled, as it generates a list of installed apps and lets you recover them when you restore your backup.
screenshot by Lance Whitney/ZDNET
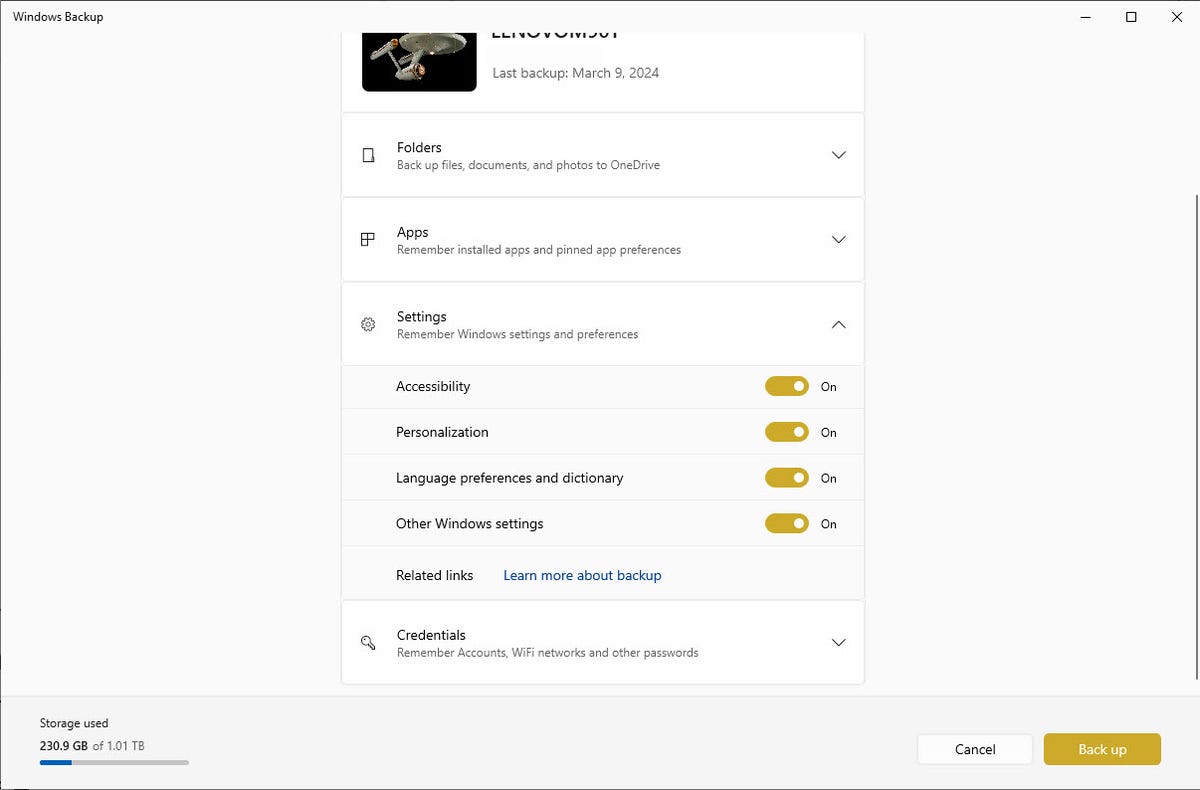
4. Configure Windows Backup settings
Click the down arrow for Settings. Here, the tool displays options for accessibility, personalization, language preferences and dictionary, and other Windows settings. Toggle the toggles on for any settings you want to save. When in doubt, leave them all enabled.
screenshot by Lance Whitney/ZDNET
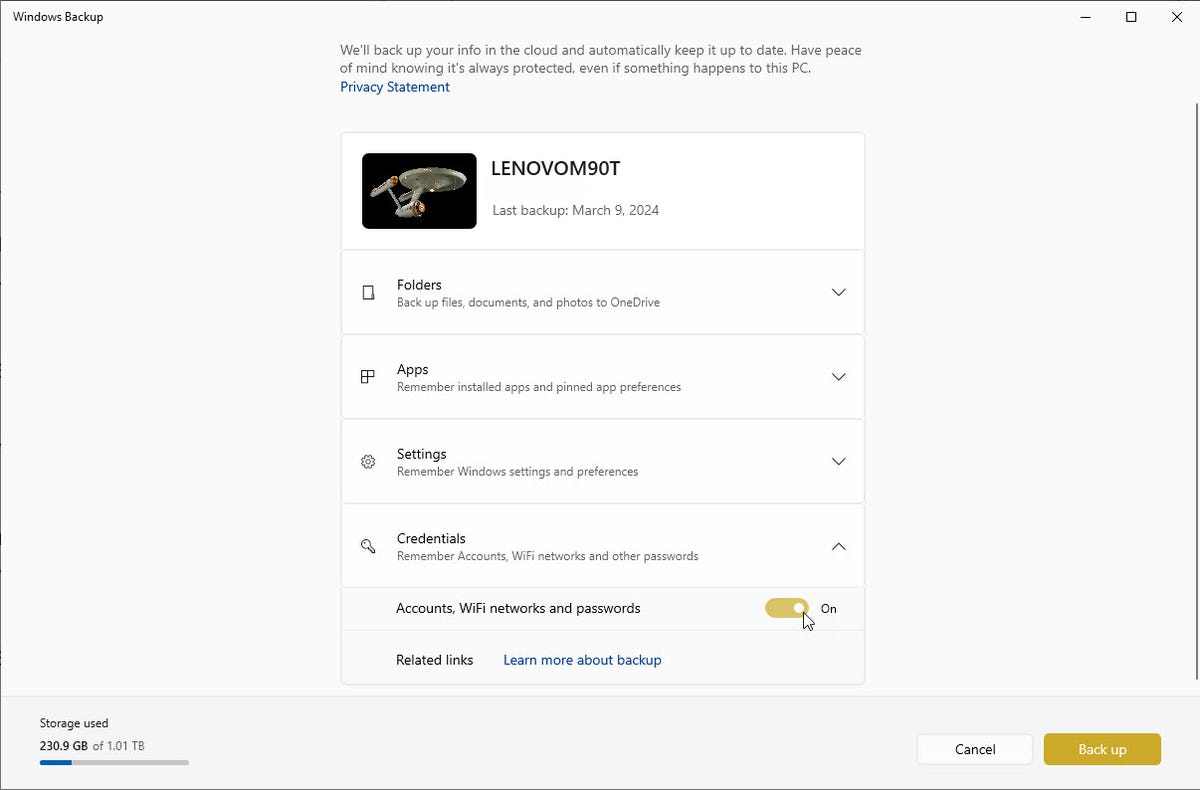
5. Configure Windows Backup credentials
Finally, click the down arrow for credentials. Make sure the button is enabled for accounts, Wi-Fi networks, and passwords.
screenshot by Lance Whitney/ZDNET
6. Start backup
When you are ready, click the Save button. The items you selected will be backed up to your Microsoft account’s OneDrive storage. You can minimize Windows Backup and continue other tasks while the tool works in the background.
screenshot by Lance Whitney/ZDNET
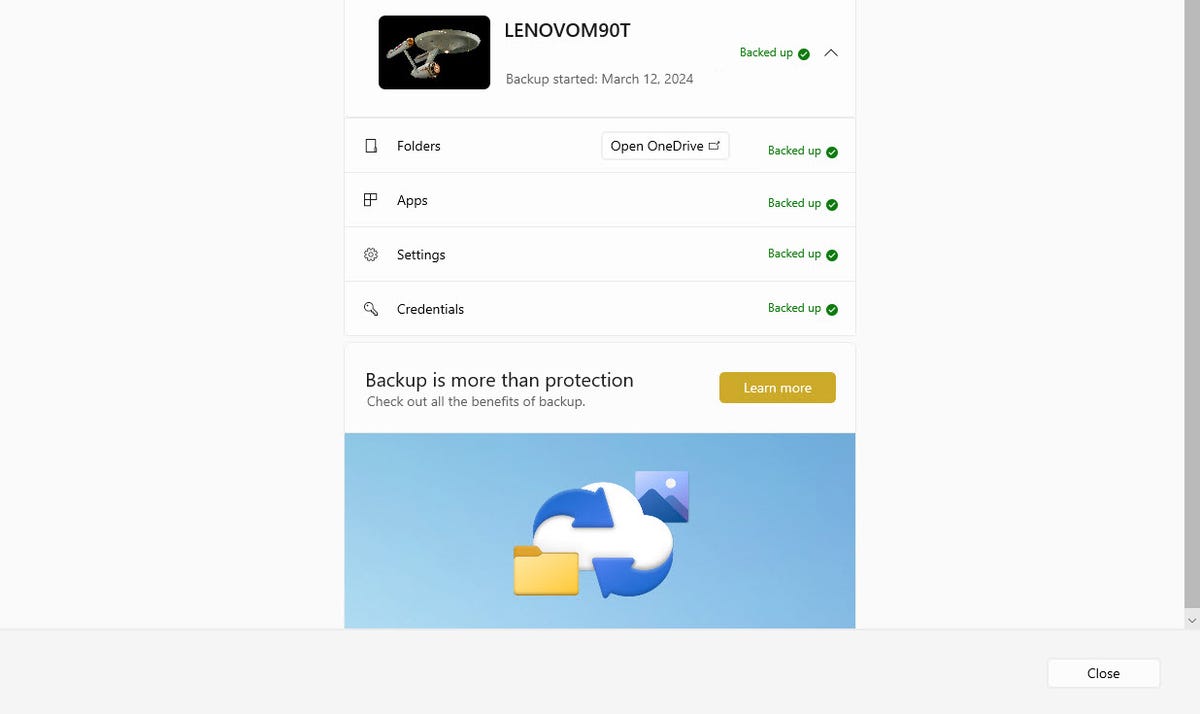
7. Check Backup
To check the backup progress, simply return to Windows Backup. The tool will indicate the items that have been backed up so far. When the backup is complete, you should see that each of the four categories has been backed up.
screenshot by Lance Whitney/ZDNET
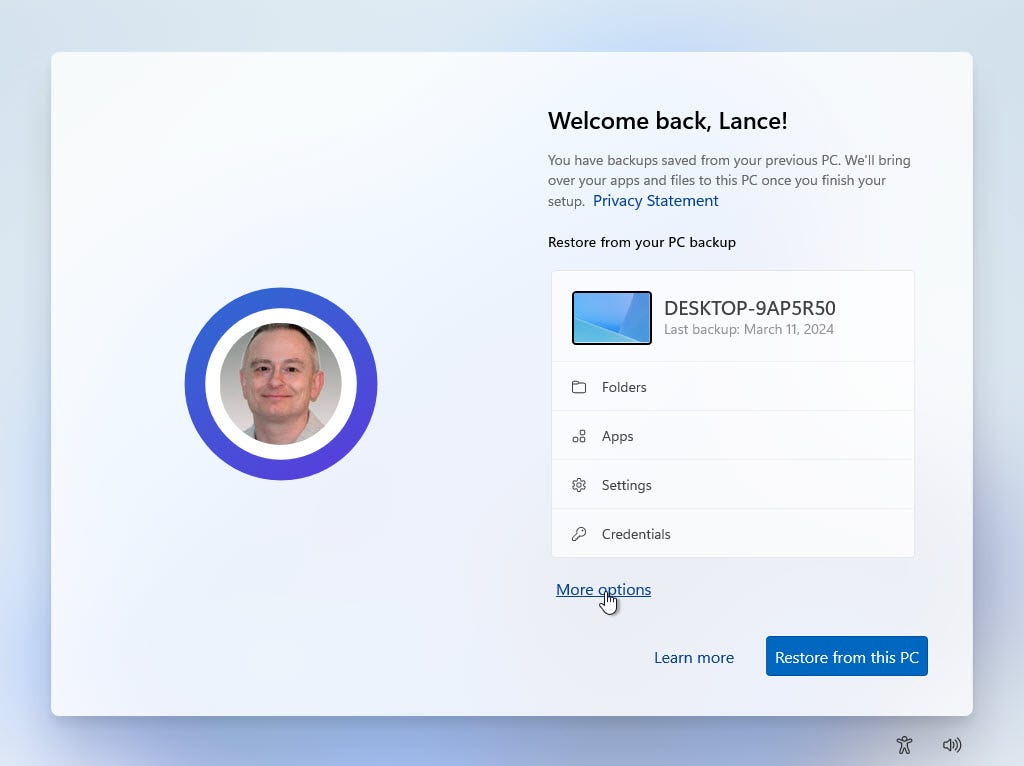
8. Configure your new PC
Turn on your new computer and begin the Windows installation process. At some point you will see a screen welcoming you and informing you that you have saved backup copies of your old PC. Click on the link More options.
screenshot by Lance Whitney/ZDNET
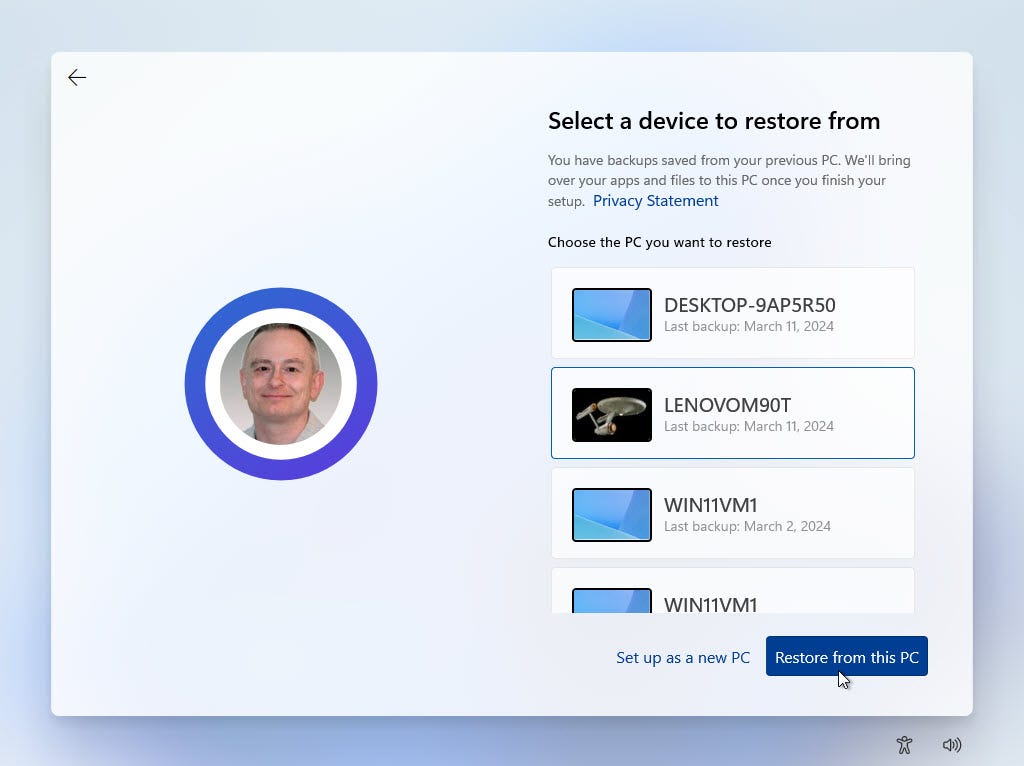
9. Choose backup
Find and click the name of your old PC backup. Click the Restore from this PC button. Items in each of the four categories will be restored to your new computer. Once the process is complete, go ahead and complete the installation.
screenshot by Lance Whitney/ZDNET
10. Log in to your new computer
Log in to your new computer. Check the Start menu, Settings screen, and File Explorer to confirm that your apps and settings have been restored. Some of your Windows apps will be available, but your desktop apps will need to be reinstalled.
Go to the All Apps menu. Any app that needs to be reinstalled will display an arrow with the word “Install.” In some cases, clicking on the app will automatically reinstall it, or at least take you to the Microsoft Store where you can download and install it.
screenshot by Lance Whitney/ZDNET
Source: “ZDNet.com”