
You’re on a video or voice call, but you have a bad cough, sore throat, or other problem that’s preventing you from speaking. How about using a synthesized voice of yourself instead of your real voice? Yes, it is now possible with the right iPhone and the right version of iOS.
With Apple’s new Personal Voice feature, you can record your entire voice saying 150 different phrases. Once the recording is saved, you can enable the new Live Speech option to speak whatever you type using your new voice.
The voice itself has a synthetic quality, so it’s unlikely to fool someone into thinking it’s actually you speaking. Rather, the goal is to provide a voice that mimics your own when you are unable to speak yourself.
How do I use Apple’s Personal Voice feature?
The Personal Voice feature works with FaceTime calls, phone calls, and some communications apps. However, the feature is only supported on iPhone 12 or later and requires iOS 17 or newer.
You can also create your personal voice using select iPad models with iPadOS 17 or later and select Mac models with macOS Sonoma 14 or later. Otherwise, you are able to sync the recording you make on your iPhone with your iPad, your Mac and your Apple Watch.
In this article, I walk you through the process of creating voice on an iPhone 12 or later, but the steps are similar for a compatible iPad and Mac.
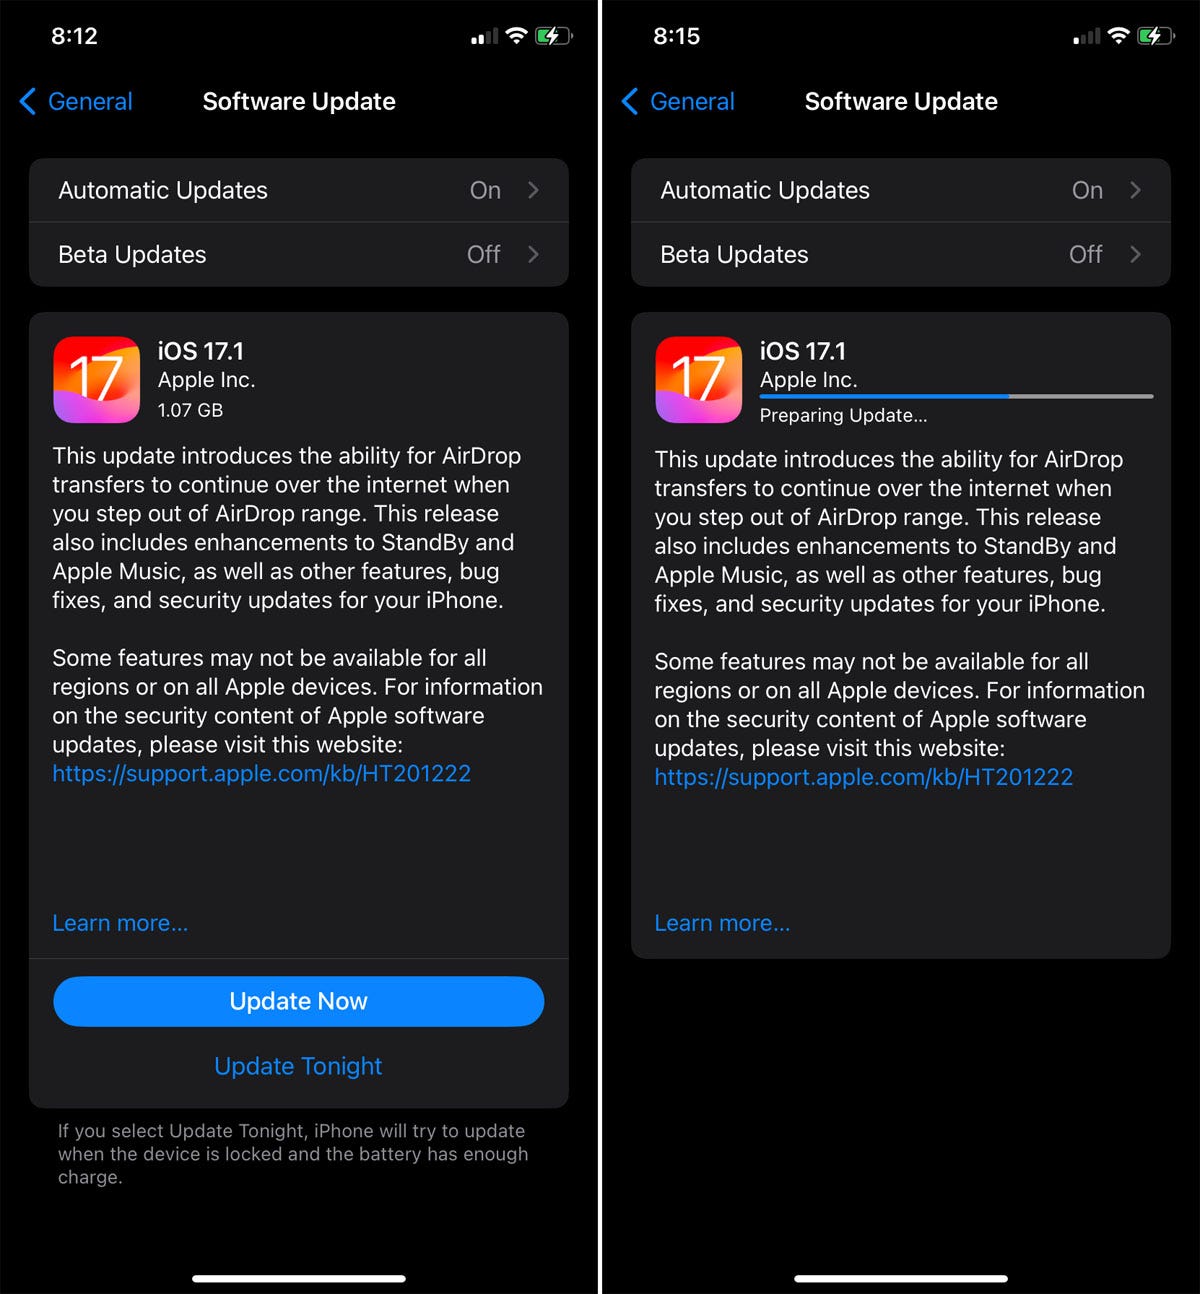
1. Update your iPhone
To make sure your smartphone is running iOS 17 or later, go to Settings, select General, then tap Software Updates. You will be notified that your device is up to date or prompted to download and install the latest update.
Screenshot by Lance Whitney/ZDNET
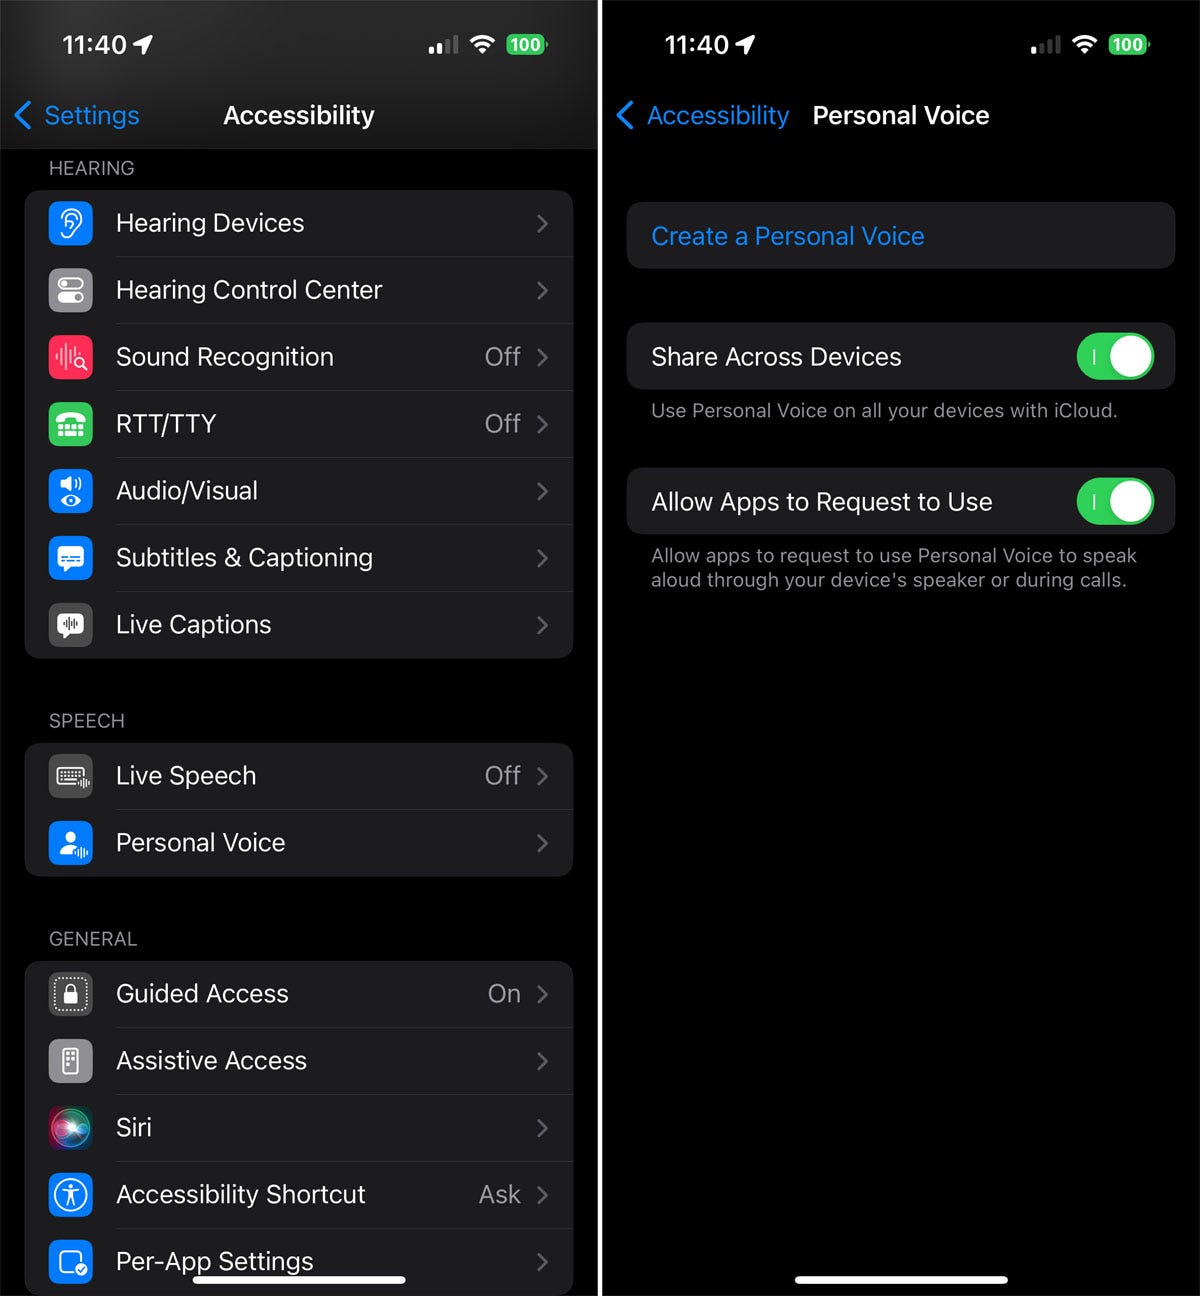
2. Set up Personal Voice on your iPhone
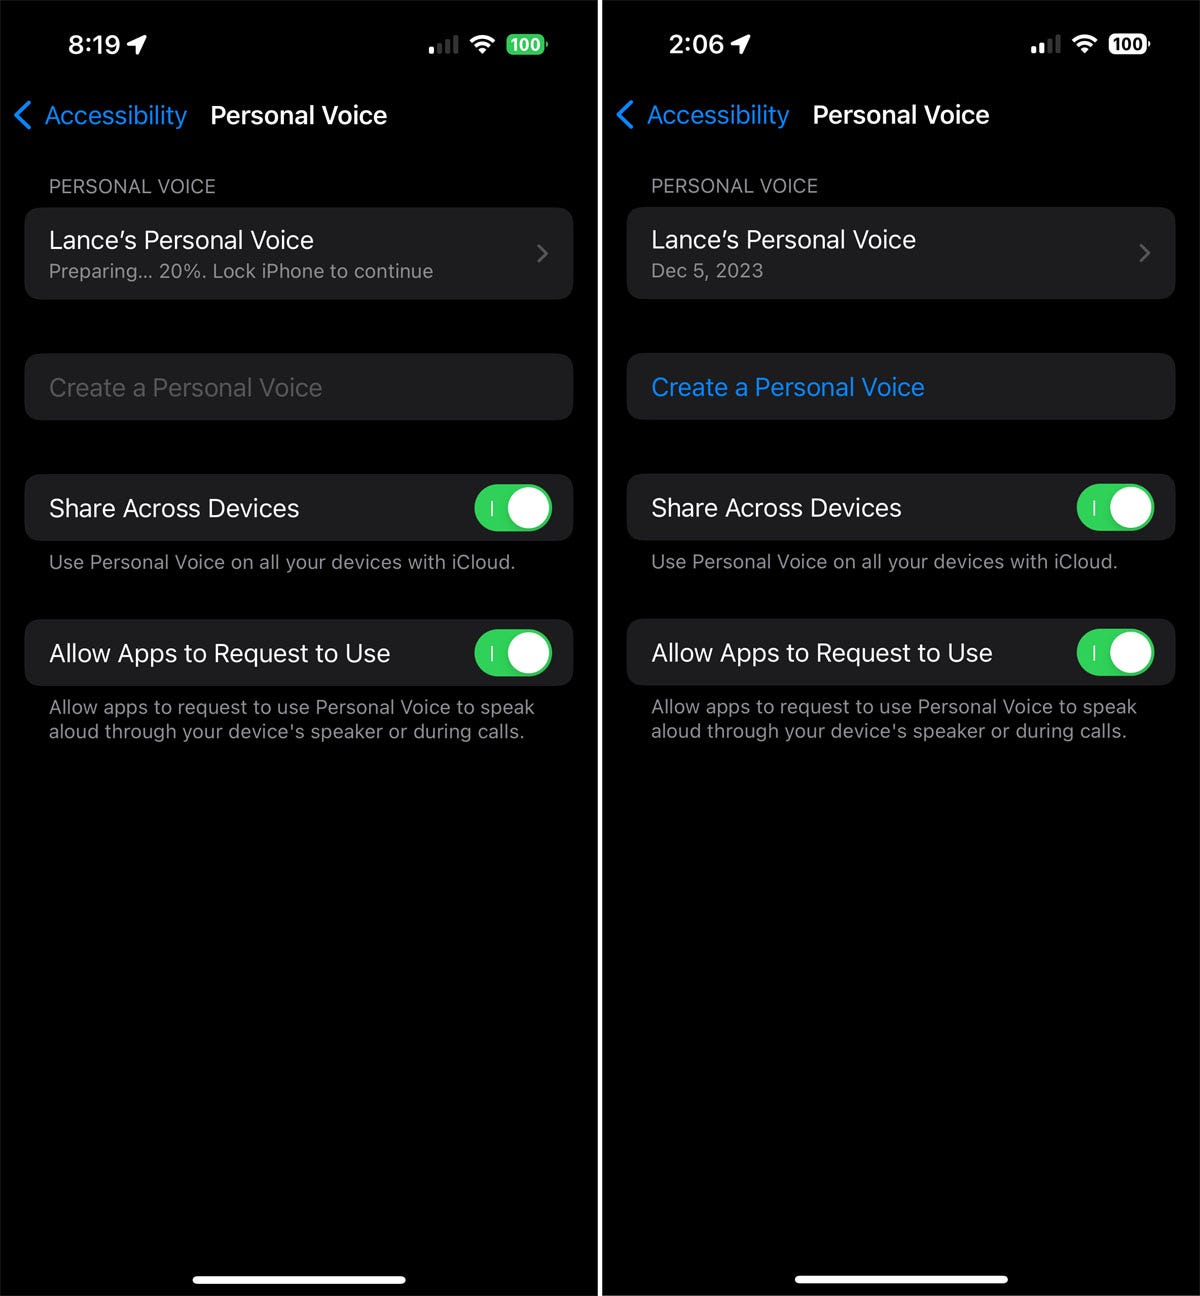
On your iPhone, go to Settings and select Accessibility. Swipe down to the section Speech and tap the Personal Voice option. The next screen offers two settings.
Turn on the switch for Share Across Devices if you want to share the recording you make on your iPhone with other iCloud-enabled devices, such as your iPad or Mac.
Enable the Allow apps to request use button if you want Personal Voice-enabled apps to request access.
Screenshot by Lance Whitney/ZDNET
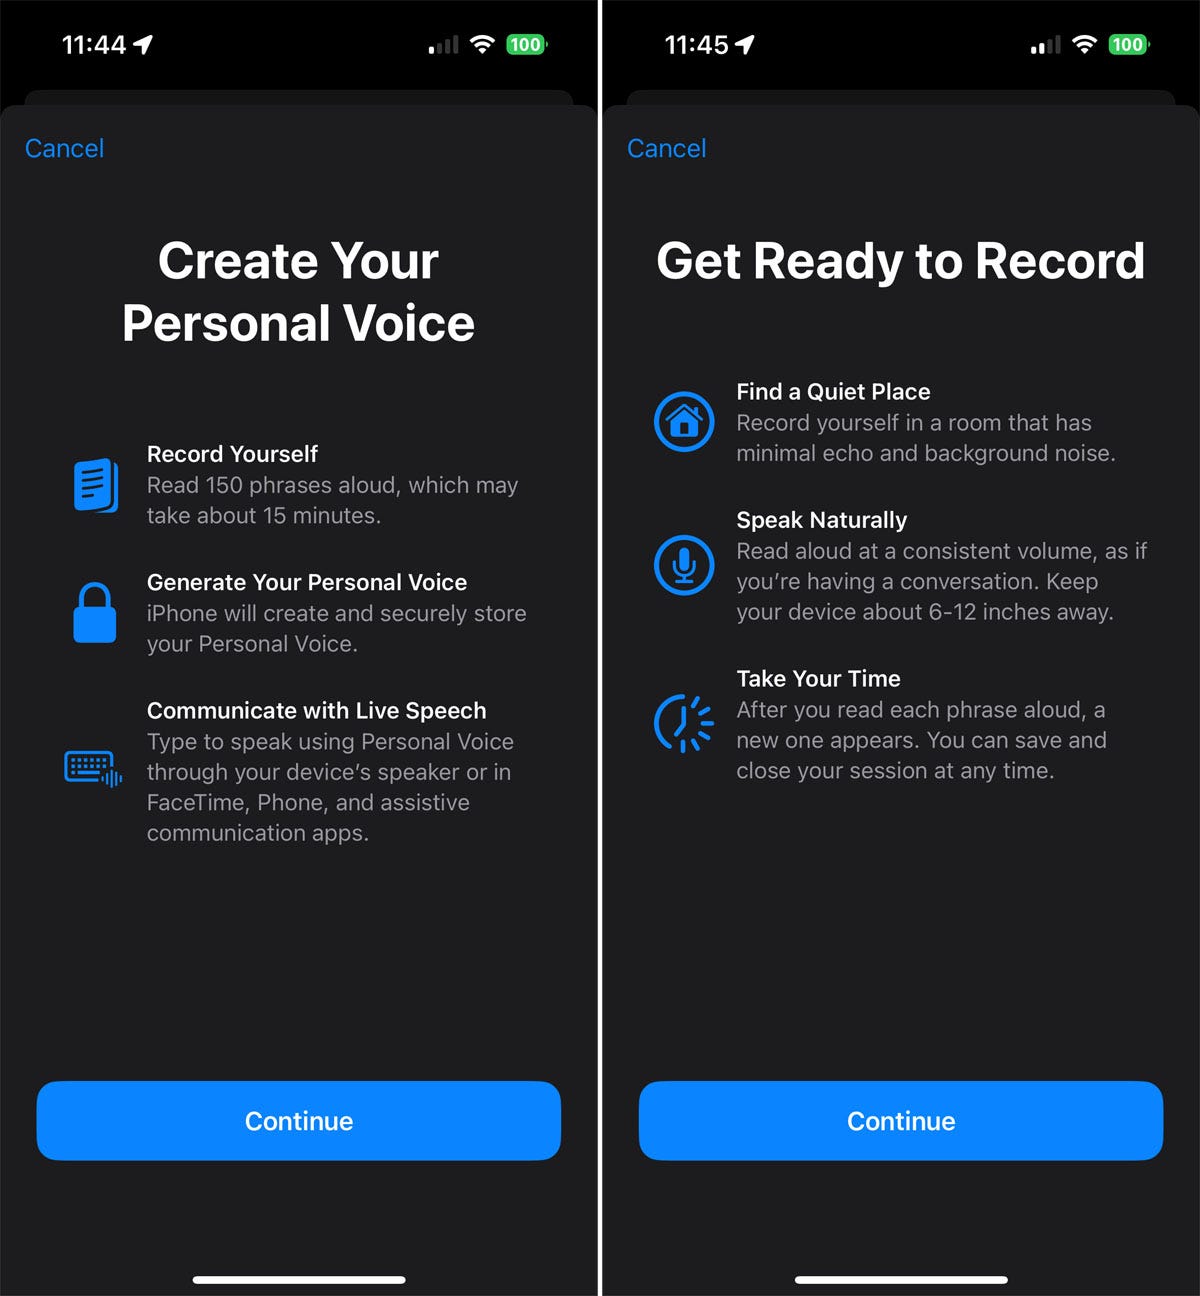
3. Find a time and place to record the phrases
Tap on the Create a personal voice option. The next screen explains how the process works, telling you that you will need to record 150 different phrases, which can take around 15 minutes.
Make sure you have enough time (and patience) to do this. But don’t panic. You can always start recording phrases, stop, and then pick up where you left off at another time. Tap Continue.
The next screen prepares you by advising you to find a quiet place, speak naturally, and take your time. Tap Continue.
Screenshot by Lance Whitney/ZDNET
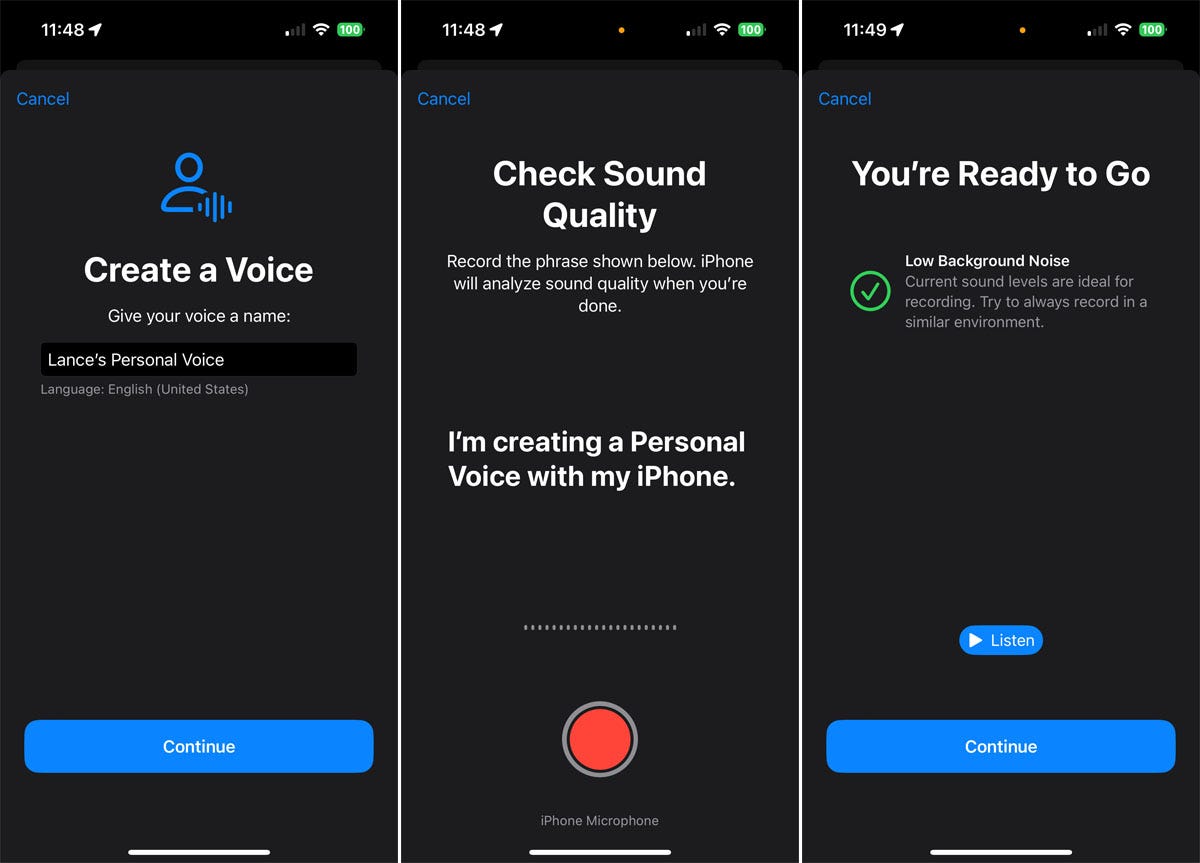
4. Test your environment
Confirm or change the name assigned to your voice and tap Continue. On the next screen, press the red record button and say the phrase displayed on the screen.
The next screen tells you if the conditions are met for recording. If so, tap Continue to proceed.
Screenshot by Lance Whitney/ZDNET
5. Record your sentences
Press the record button and say the phrase displayed on the screen. The following sentence then appears automatically. Continue with each new sentence. If you make a mistake in a sentence, tap the Rewind button at the top to go back. Then press the record button and try again.
By default, the Personal Voice recording process takes you to each new phrase without you having to press the record button. If you want to stop after each phrase and press the record button to move on to the next phrase, tap the Continuous Recording option at the bottom and change it to Stop at Every Phrase. Otherwise, continue recording.
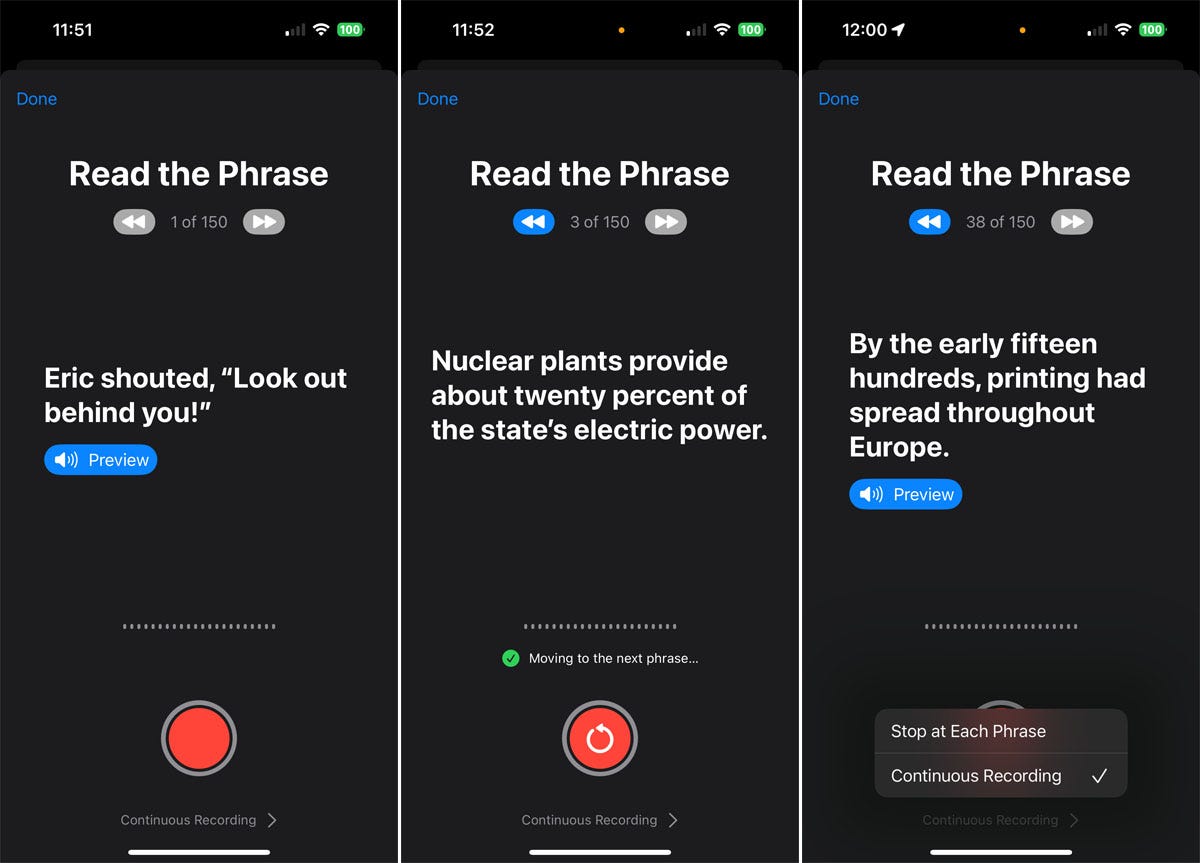
Screenshot by Lance Whitney/ZDNET
6. Stop recording
To pause at any time, tap Done at the top. When you’re ready to resume, make sure your personal voice screen appears.
Tap Continue recording. Press the record button to record the next sentence. A countdown tells you how many phrases you have left to record.
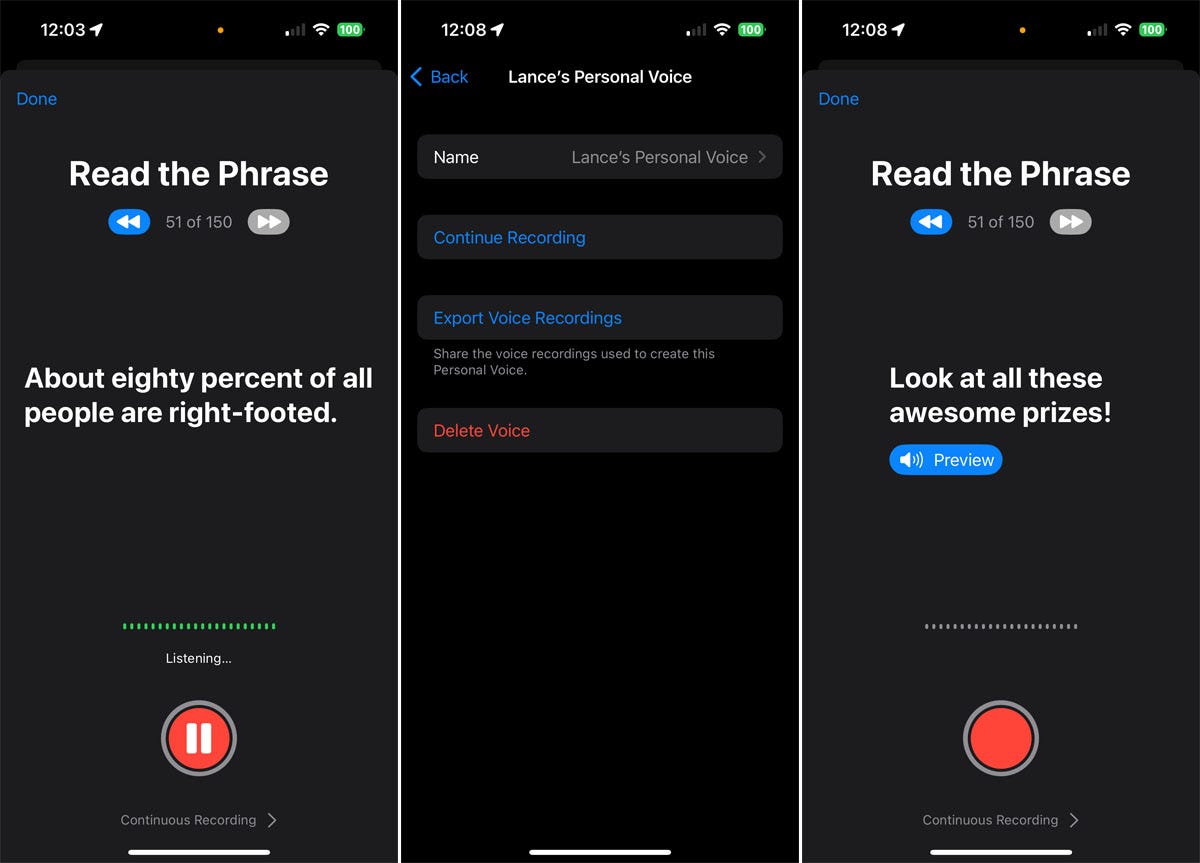
Screenshot by Lance Whitney/ZDNET
7. Complete the registration
Continue recording each sentence until you have completed all 150 sentences. At the end, the screen tells you that you have finished recording. Tap Continue.
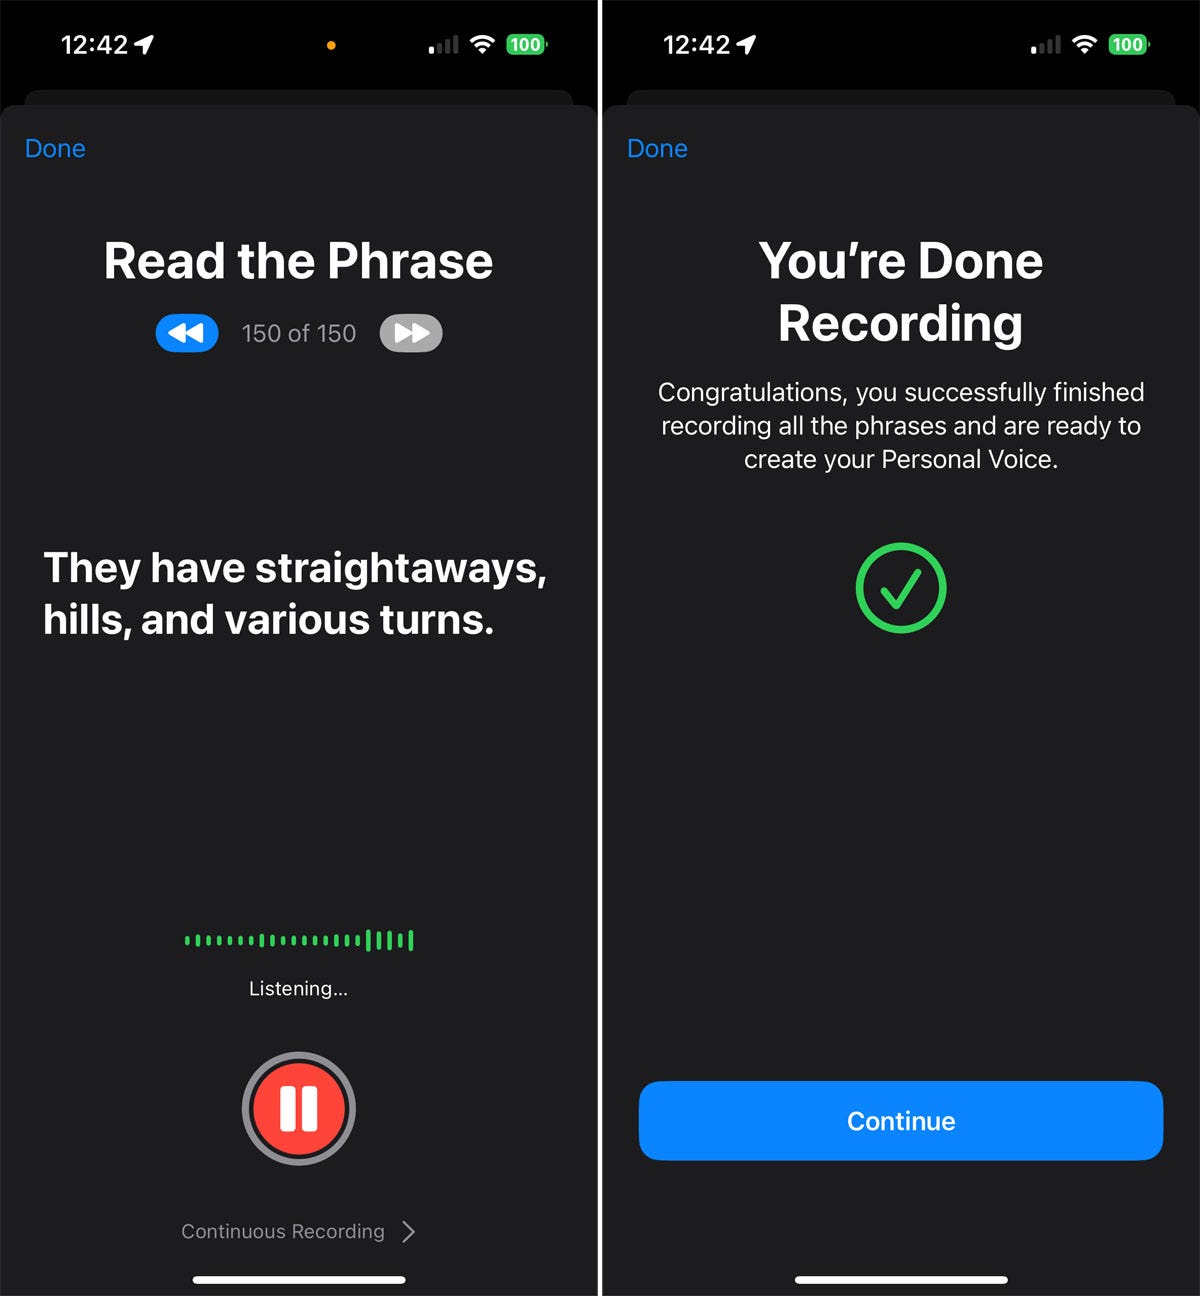
Screenshot by Lance Whitney/ZDNET
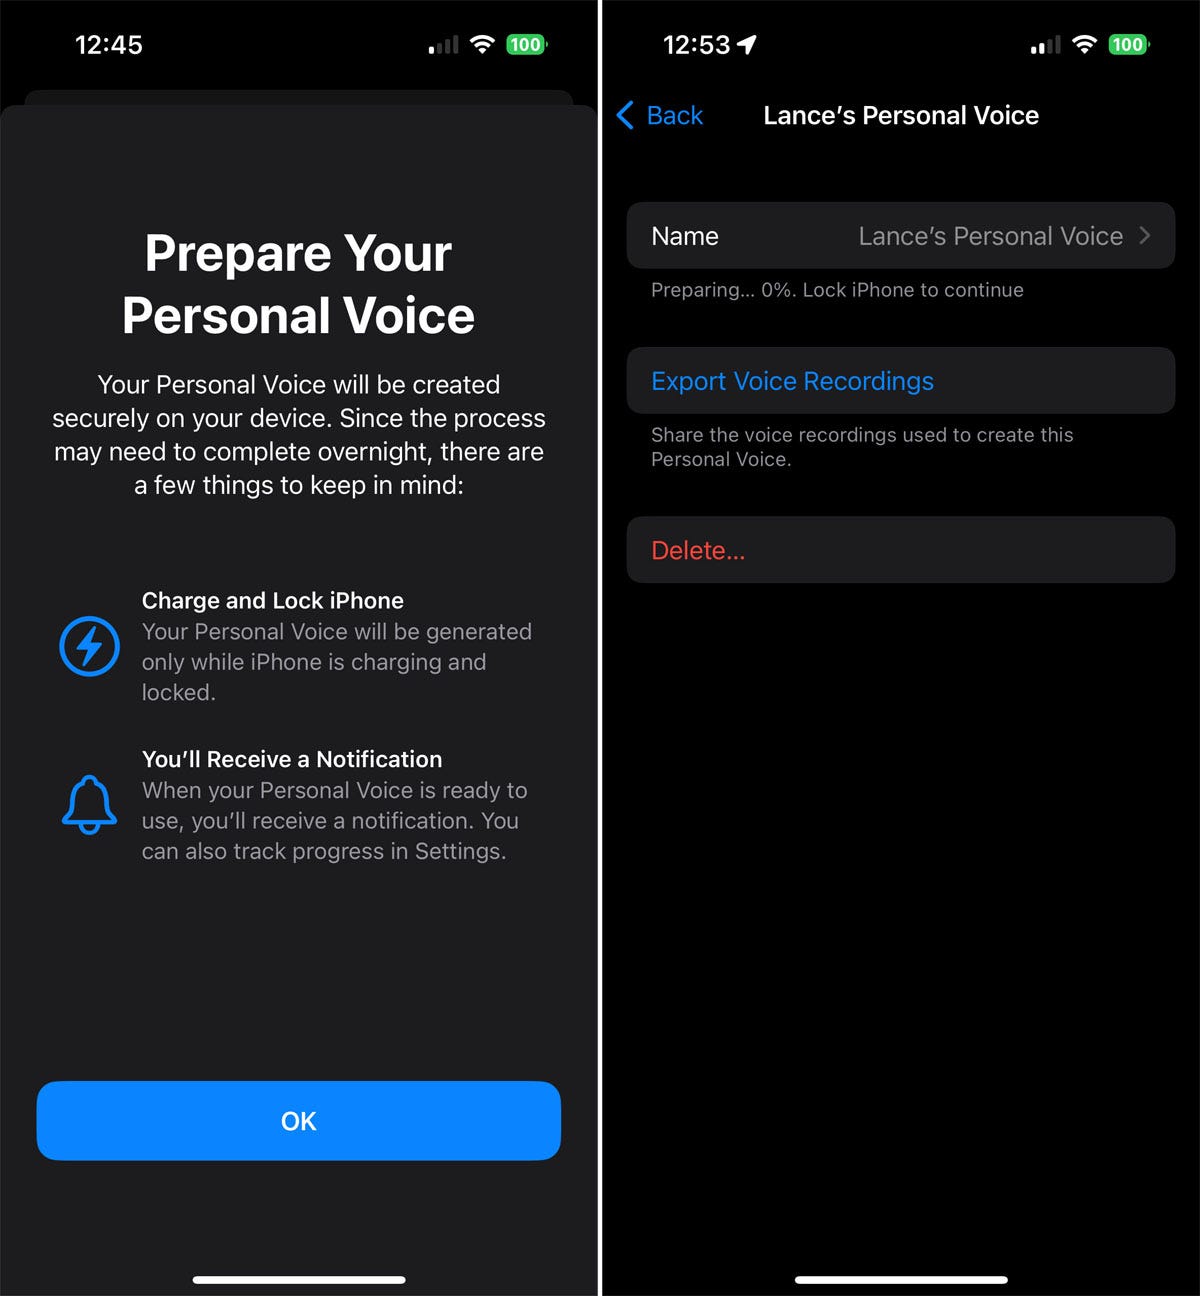
8. Prepare your personal voice
The next screen prompts you to create your personal voice, telling you that the voice will only be generated when your phone is locked and charging.
Press OK. The tool then begins to prepare your personal voice, displaying a percentage countdown.
This process can take some time, so it’s best to schedule a time when you won’t need to use your phone. Preparing your personal voice
Screenshot by Lance Whitney/ZDNET
9. Let the preparation process finish
Check your phone periodically to see the percentage countdown. When the countdown no longer appears, your voice is ready to be used.
Screenshot by Lance Whitney/ZDNET
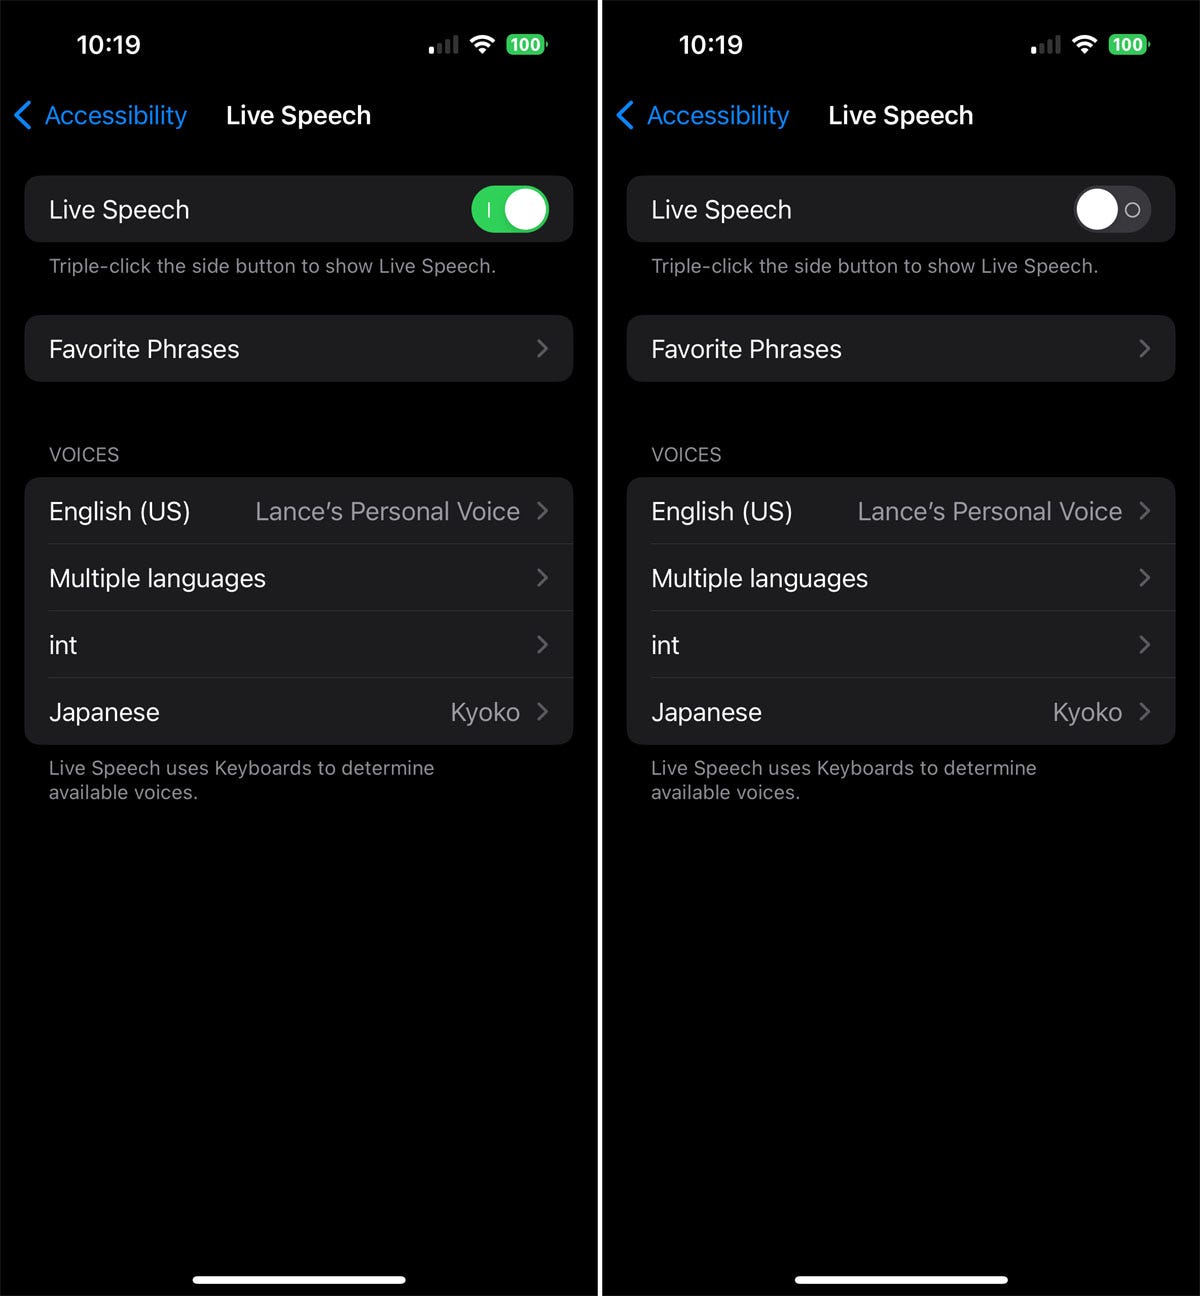
10. Enable Live Speech
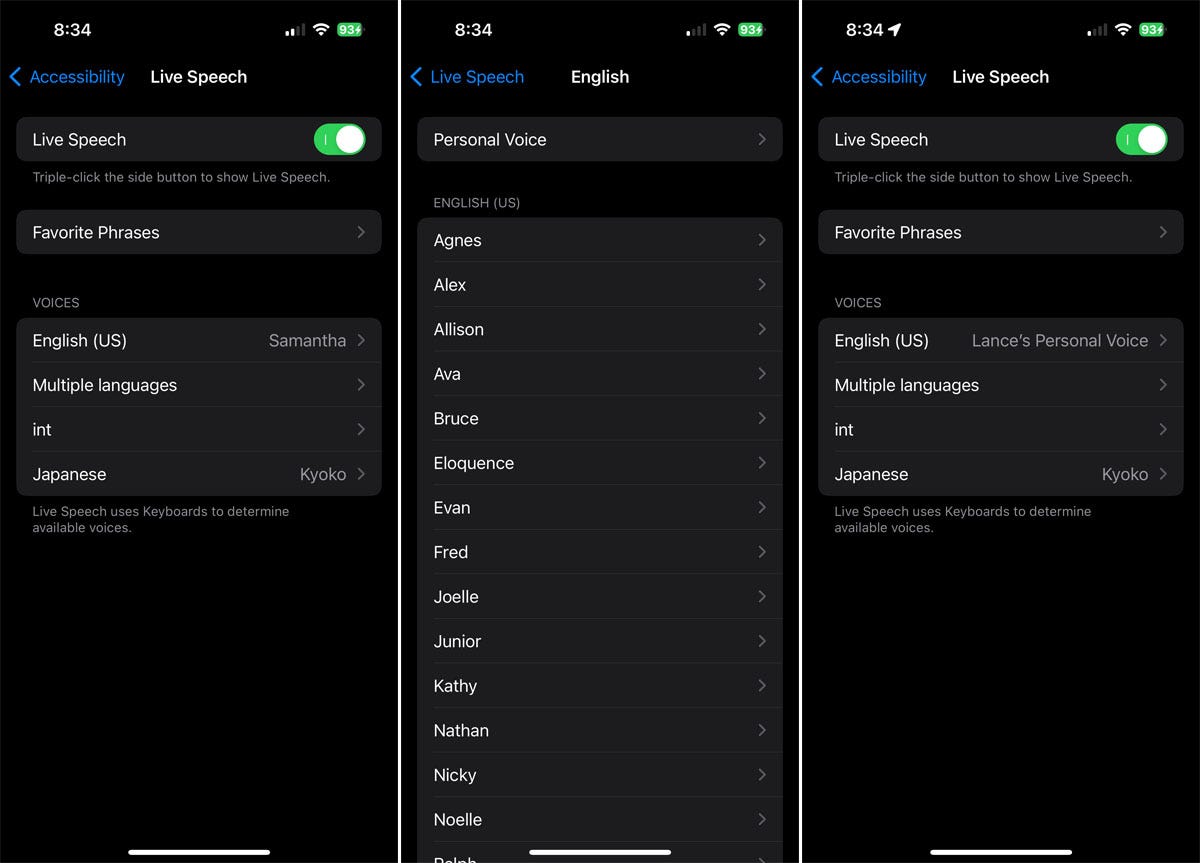
Next, you need to enable the Live Speech option. Go back to Settings and select Accessibility.
Swipe down to the Speech section and tap Live Speech. Turn on the switch for Live Speech.
Tap the current voice listed for your language and change it to your new personal voice.
Screenshot by Lance Whitney/ZDNET
11. Configure your voice on an iPad
If you selected the option to share your voice between devices, you can also use it on your iPad, Mac, and even your Apple Watch.
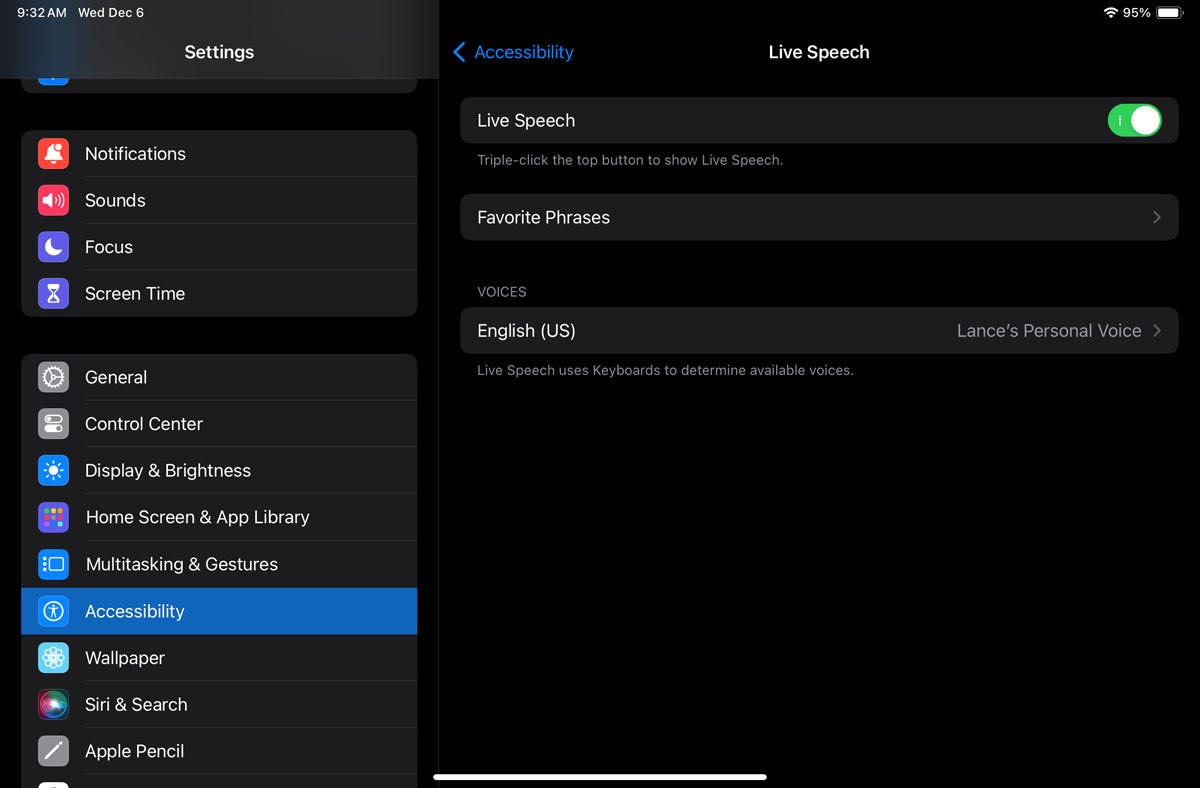
To configure this option on an iPad, go to Settings and select Accessibility.
In the Speech section, tap Live Speech. Turn on the switch for Live Speech, tap the voice listed under Voices and change it to your personal voice.
Screenshot by Lance Whitney/ZDNET
12. Set up your voice on a Mac
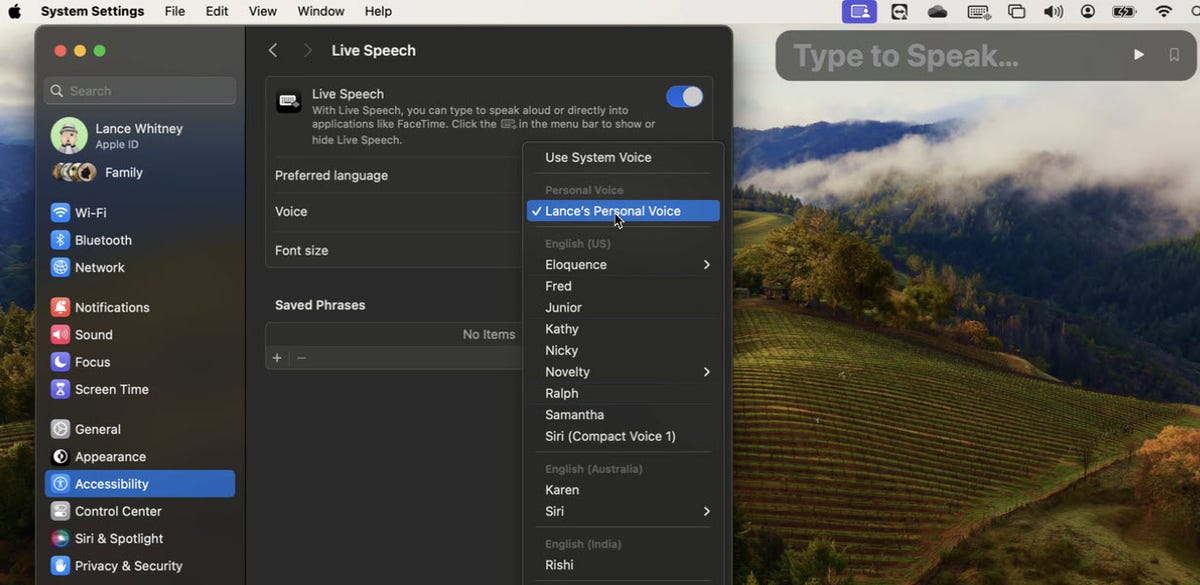
To use the voice you created on your Mac, click the Apple icon, select System Settings.
Go to Accessibility and select Live Speech. Turn on the switch for Live Speech, then change the voice to your personal voice.
Screenshot by Lance Whitney/ZDNET
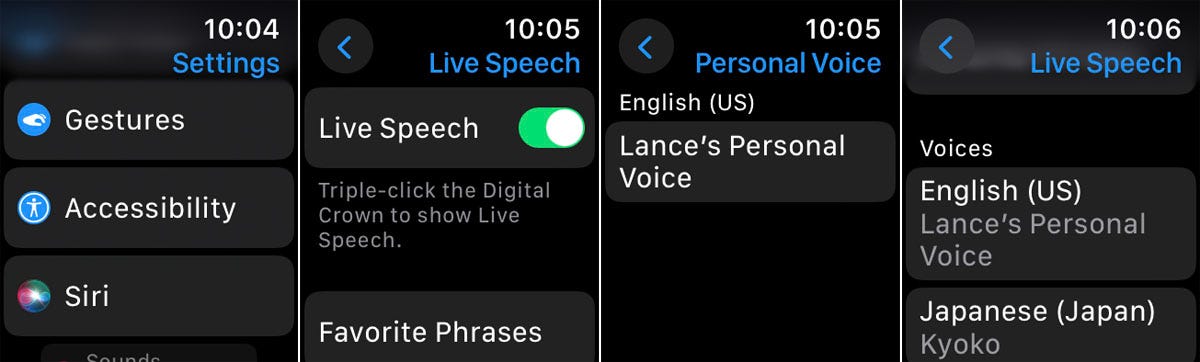
13. Configure your voice on an Apple Watch
On an Apple Watch, go to Settings and select Accessibility.
Swipe down to the Speech section, tap the Live Speech option, then turn on the Live Speech switch.
Tap the current voice listed under Voice and change it to your personal voice.
Screenshot by Lance Whitney/ZDNET
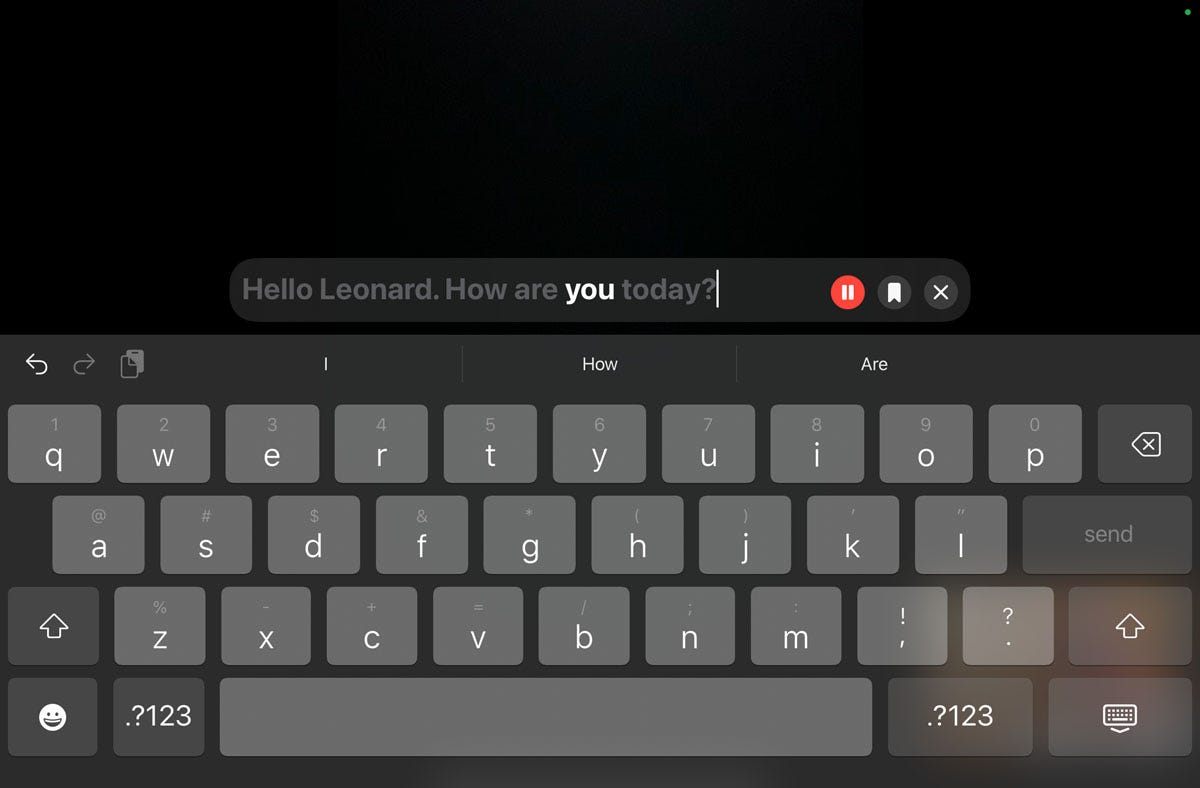
14. Use your personal voice
After enabling Live Speech on any supported device, initiate a FaceTime call or regular phone call.
On an iPhone or iPad, triple-tap the side button, select Live Speech, type the text you want to be spoken, then tap Send. On a Mac, enter text in the Type to Speak field, then click the Send button. On an Apple Watch, triple-click the Digital Crown, enter the text you want to speak out loud, then tap Send.
Your typed text is then spoken in your personal voice, heard by you and the person(s) on the other end of the line. Continue typing the words you want to be spoken until the call ends.
Screenshot by Lance Whitney/ZDNET
15. Turn off live speech
Remember to turn off Live Speech when you no longer need it.
Go back to Settings, select Accessibility, then tap Live Speech. Turn off its switch.
Screenshot by Lance Whitney/ZDNET
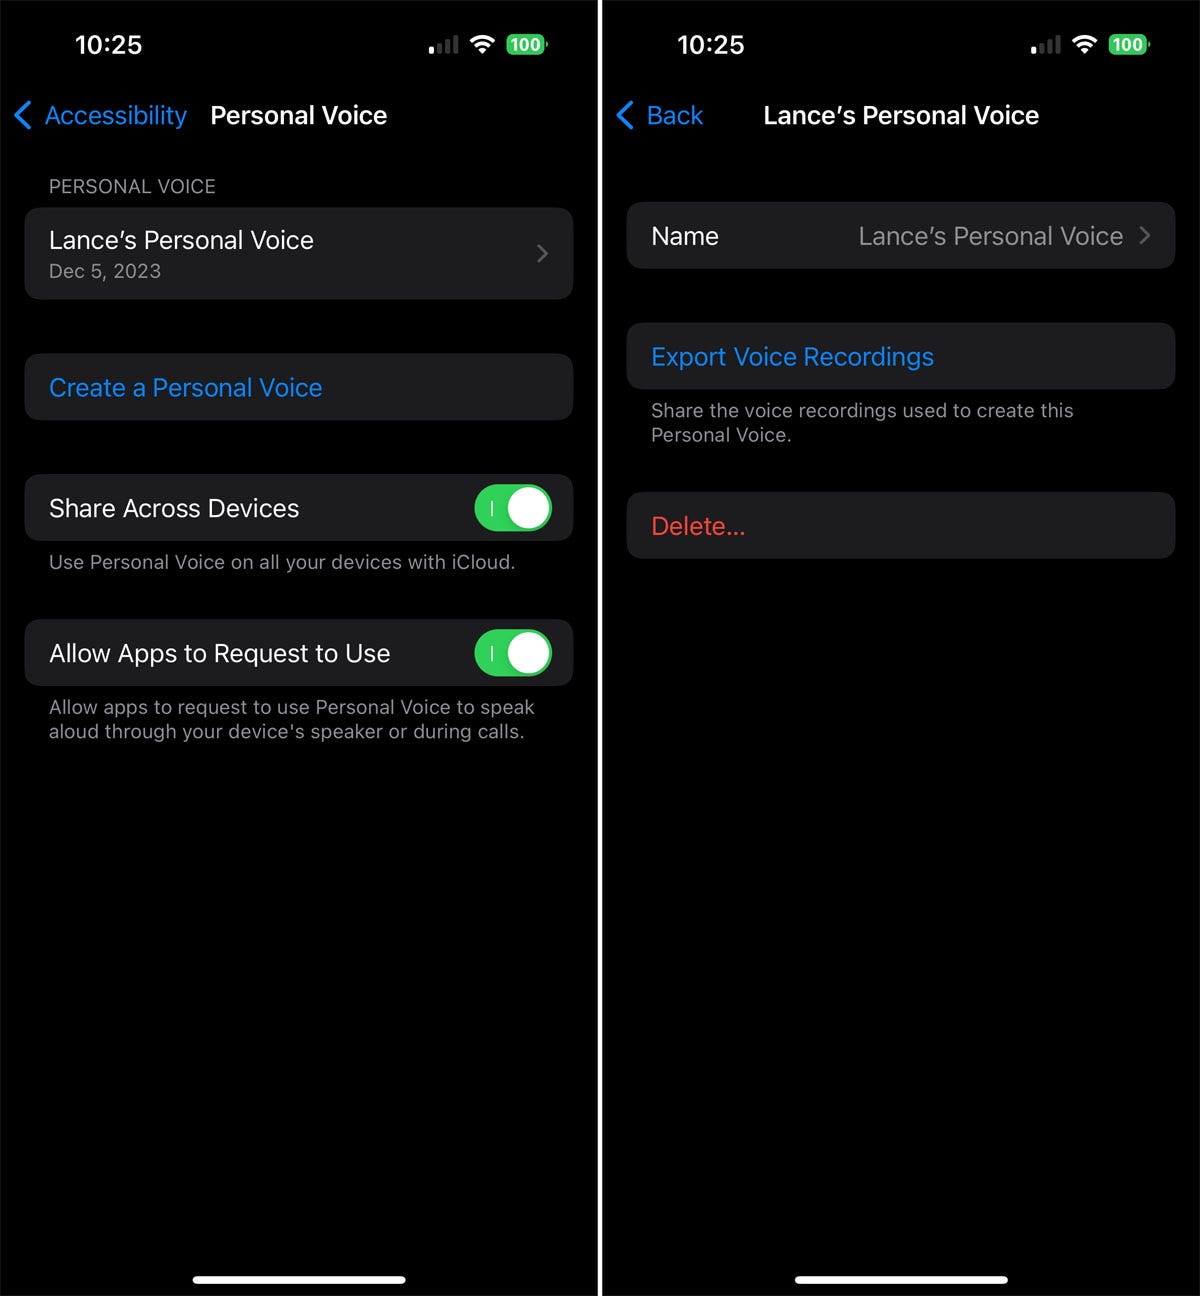
16. Manage your personal voice
To manage your personal voice on your iPhone, go back to Settings, select Accessibility, then tap Personal Voice.
You can create multiple voices if you want. Tap the Create a Personal Voice link and follow the steps to record and create a new voice.
Next, tap your existing personal voice. You can now change the name, export the files used to create the voice, or delete the voice entirely.
Captured by Lance Whitney/ZDNET
Source: “ZDNet.com”