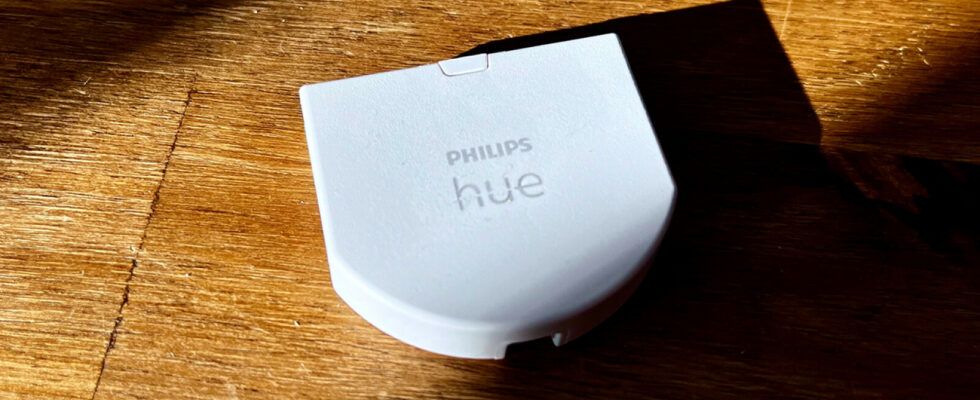
The Philips Hue wall switch module ensures that your lamps are constantly supplied with power – even when the light switch is activated. This is how you install the useful accessories.
Philips Hue lamps can actually be easily controlled via the manufacturer’s app, smartphone widgets, voice assistants or smart light switches. However, things become critical when Hue lamps are installed on the existing connection of a ceiling lamp with a classic switch.
If the Hue lamp is switched off with the usual light switch in such a case, the smart lighting element is without power and can therefore no longer be operated via the app or voice assistant. Even smart routines can no longer include the lamps – it simply doesn’t work anymore.
The Hue problem with the classic light switch
Would the light switches now have to be removed to guarantee the smart home functionality of the lamps? Not necessarily, because with the wall switch module, Philips Hue provides the ideal accessory for installations in which a classic switch is connected to the circuit.
In addition to the not insignificant purchase costs for wall switch modules from Philips Hue, their somewhat demanding installation is an obstacle for fans of the smart home. However, if you don’t have two left hands and a little DIY experience, you can complete the work in a manageable amount of time. Netzwelt explains to you step by step how it works:
A notice: Working with electrical current is dangerous if not carried out professionally and should not be carried out by laypeople without technical experience. If in doubt, it is better to seek expert or professional help before putting yourself in danger.
Philips Hue: Instructions for installing the wall switch module
 1
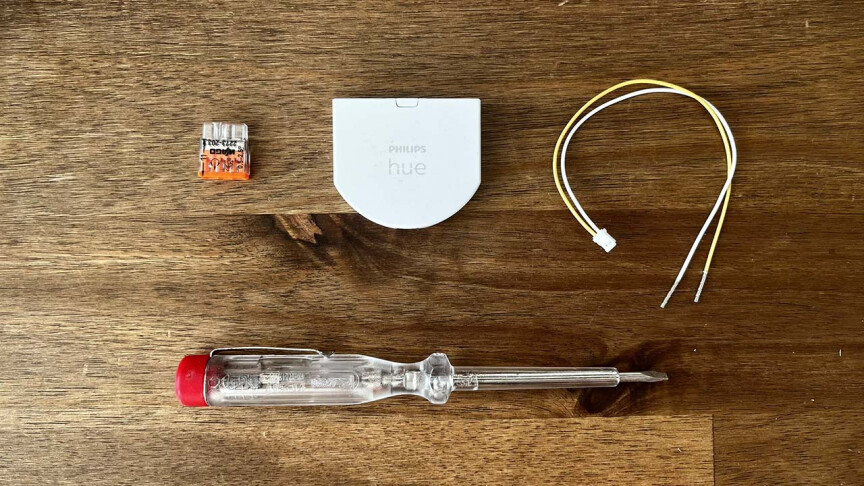
1To install the wall switch module, in addition to the Hue accessories themselves, all you need is the included plug-in terminal, the connecting cable that is also included in the scope of delivery, and a small screwdriver with a phase tester (see picture).
 2
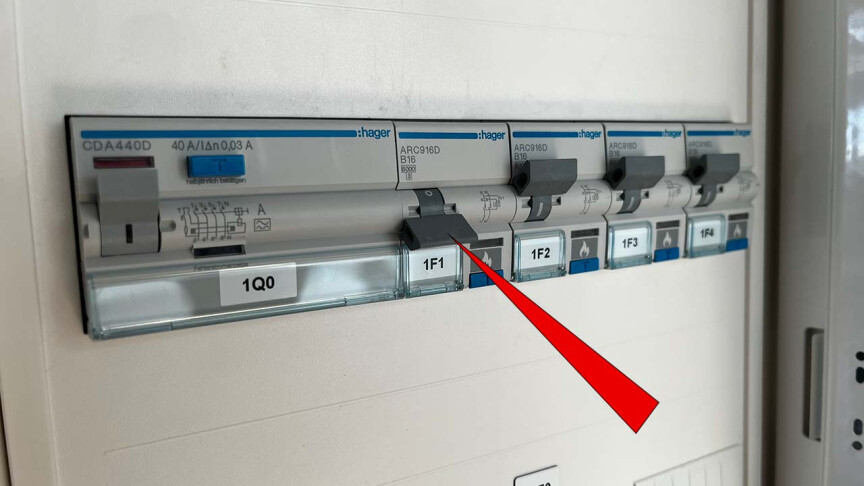
2Before you get to work, you have to switch off the circuit with the desired lamp on the fuse box, i.e. “take out” the fuse. To do this, you can find out which switches you need to operate on the circuit diagram in the fuse box. After carrying out the activation via the desired light switch, check that there is no longer any power supply and, if other people are present in the premises, make sure that no one switches it on again while you are working.
 3
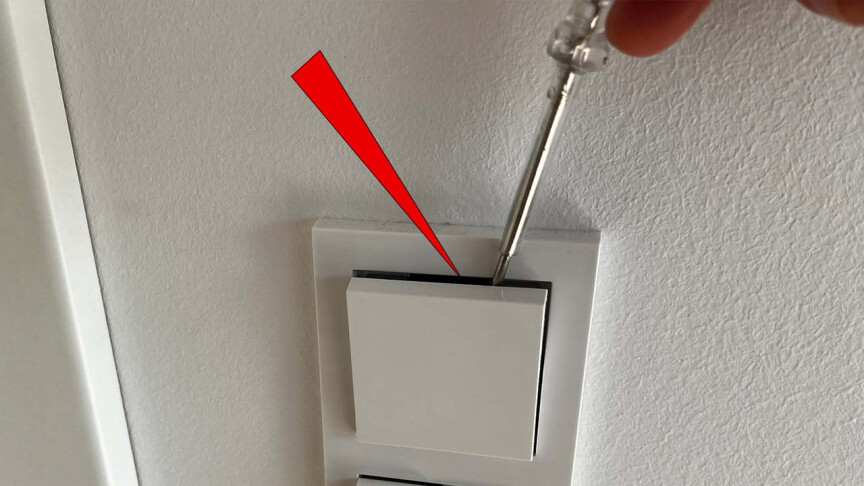
3Carefully remove the rocker on the switch from the wall panel using the phase tester or another flat utensil and then pull it off completely. No violence should be necessary.
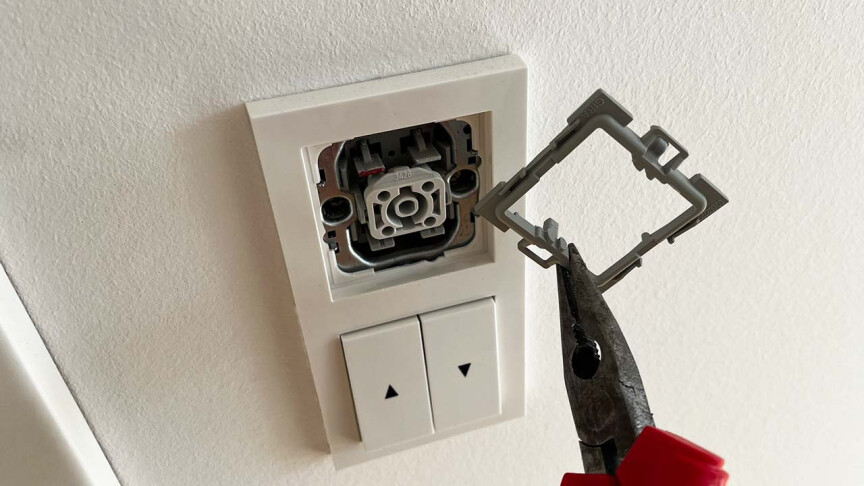 4
4Before you can remove the frame, you will often find a plastic clamp that needs to be removed. If this is particularly tight or cannot be removed with your hands, use flat-nose pliers. Here too, proceed with sensitivity.
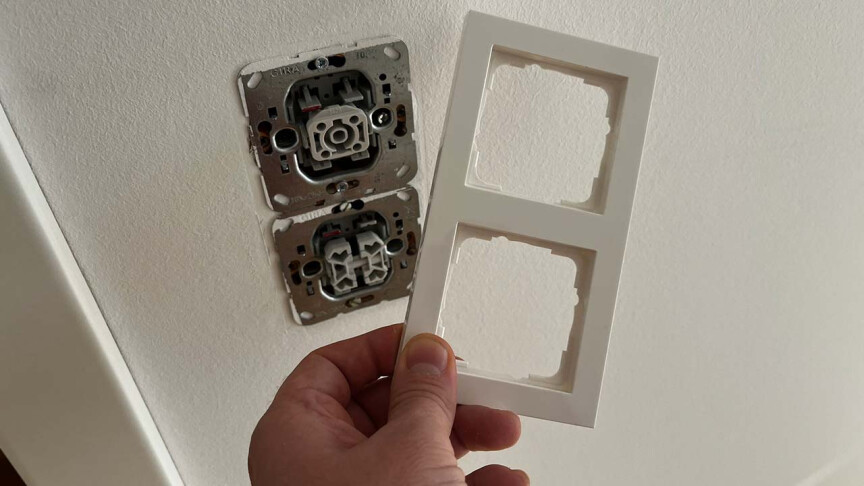 5
5Now you can easily remove the frame. Set the switch panel pieces aside safely before proceeding.
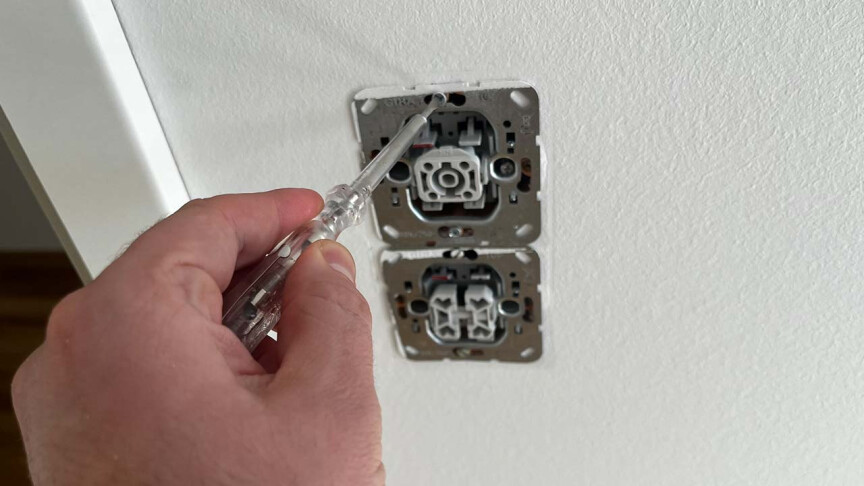 6
6Use the phase tester to loosen the outer screws on the switch insert. It is not necessary to loosen the screws further inside, so it is better not to do so.
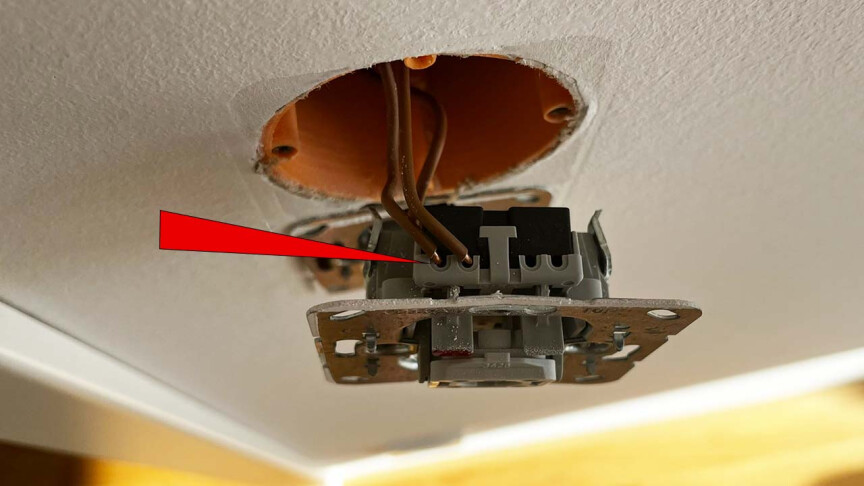 7
7Now you can pull the switch insert out of the flush-mounted box and see the wires attached to it. If necessary, secure your work again using a voltage tester before you loosen the wires using the clamp or screw caps and remove the switch insert.
 8th
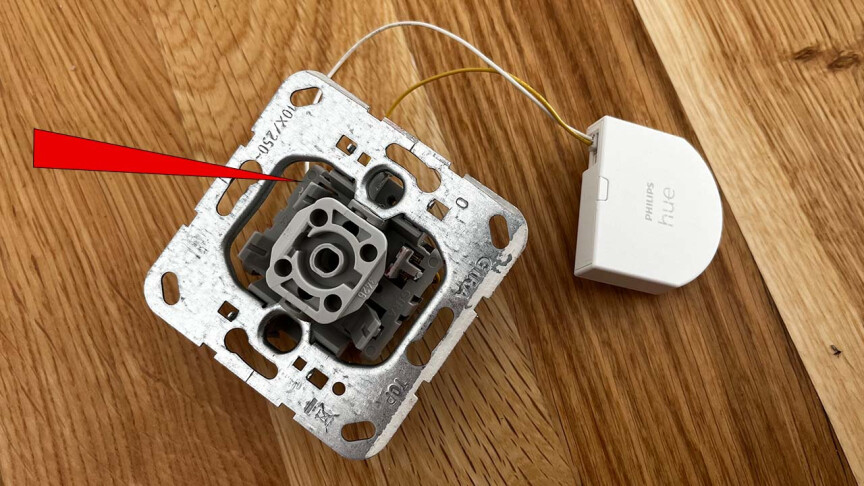
8thAttach the plug of the included cable to the Philips Hue wall switch module. Next, attach the white wire to the top side of the switch and the yellow wire to the bottom. The fastening mechanisms can vary depending on the manufacturer and type of switch. It is important that the inserted cables fit tightly and do not simply slip out of the connections.
 9
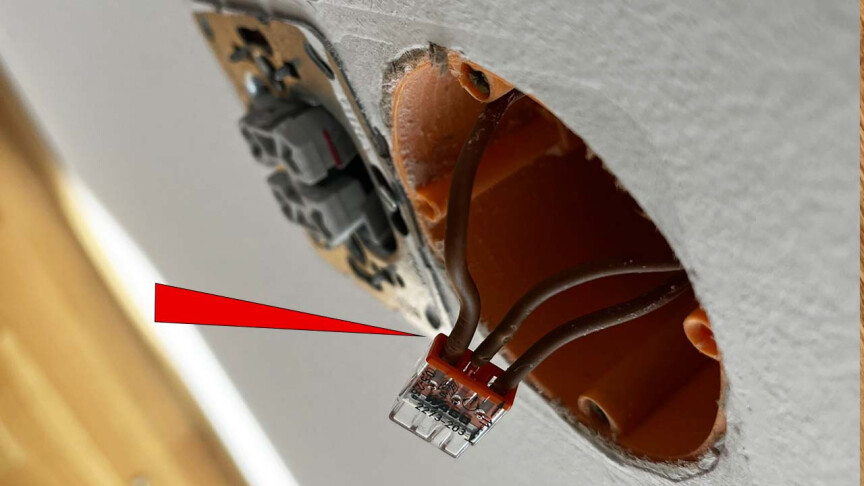
9Now take the plug-in terminal included with the wall switch module to connect the exposed phases of the light switch. Here, too, make sure that it is firmly seated. Before you insert the wall switch module and the switch cover, you can now check on the switch box whether the plug-in terminal is correctly seated: Briefly reinsert the fuse and see whether the connected lamp lights up. Without further action, this is now the permanent condition as the switch has been removed from the circuit itself. In the future, the lighting element will only be operated via Zigbee signals that the wall switch module sends to your lamp.
 10
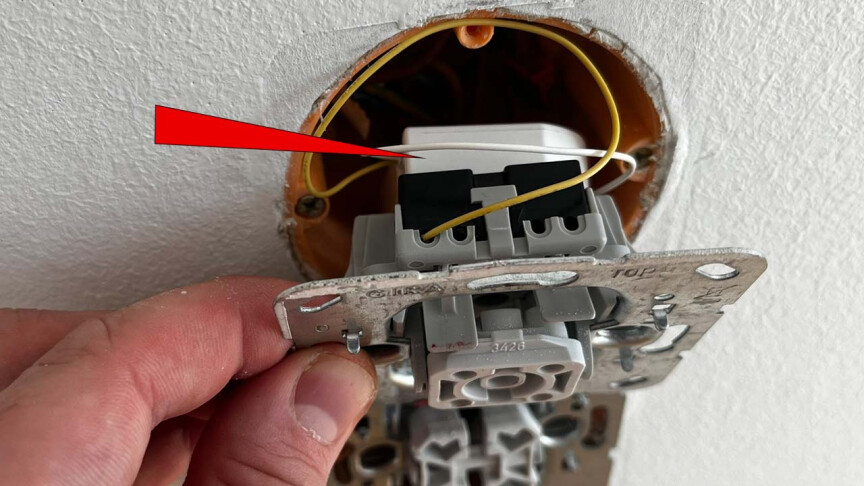
10Make sure again at the switch box that there is no voltage on the circuit being processed and first insert the plug-in terminal with the connected phases as deep and as space-saving as possible into the flush-mounted box before you follow with the wall switch module and finally the switch insert. There is usually not much space in the flush-mounted box, so the individual parts may need to be cleverly and closely positioned until the metal frame of the switch insert can be positioned flush on the box.
 11
11Now dismantle the switch system.
If you would like to watch the installation of the Hue wall switch module in a video, you can do so on the Philips Hue YouTube channel.
- ” Tip: The best VPN providers for more security and data protection
- » Buy balcony power plant: Comparison of the best solar systems
Don’t miss anything with this NETWORK WORLDNewsletter
Every Friday: The most informative and entertaining summary from the world of technology!