The latest beta version of Photoshop includes new tools based on artificial intelligence. Manipulations that were once time-consuming are now accessible in a few seconds.
Firefly, Adobe’s generative AI, has been rolling out gradually since early June. The new functions are currently reserved for “ images and text effects but, eventually, Adobe plans to deploy generative AI for 3D or video content.
Trained on the photographic basis of the group “Adobe Stock” and on images under free license or fallen into the public domain, Firefly is supposed to pose no legal problem of copyright. To test the new features, you have two options: download the latest beta version of Photoshop with a Creative Cloud subscription or use the web version of Firefly. Here are 5 functions to test with the tool:
1. Generate an image from scratch
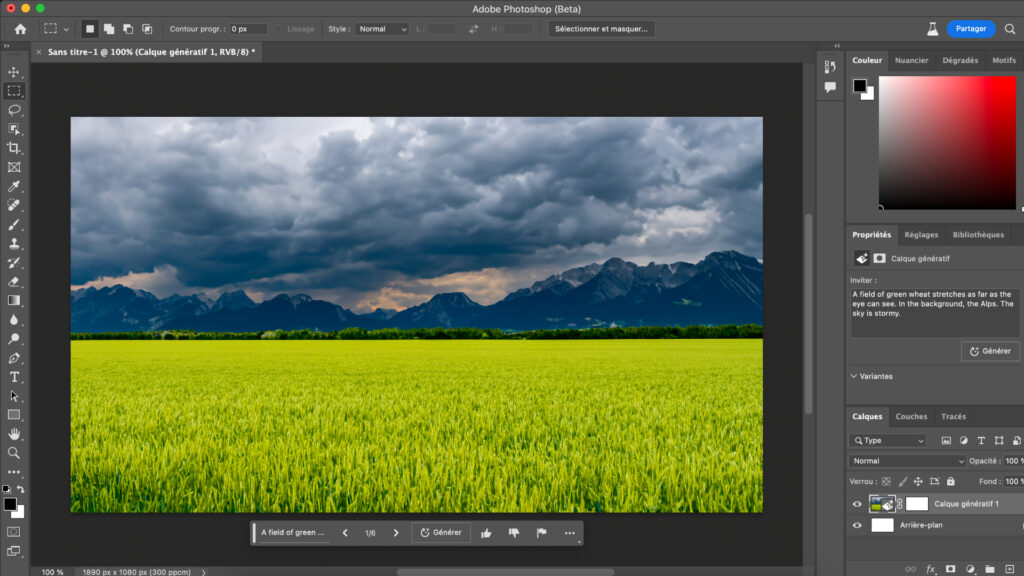
After installing the beta version of Photoshop, you will discover a new rectangular taskbar named ” Generative Fill .” Most of Photoshop’s AI features go through this.
To create a fully AI-generated image (similar to Midjourney), you need to create a new document. Customize the size (width, height) and validate.
Once the document is open, select the entire layer (with a CTRL+A or CMD+A) to bring up the ” Generative Fill. » A text entry space opens, it is here that you must indicate the descriptive prompt to generate the image. Currently only English is supported in the beta. On its site, Adobe recommends entering a simple sentence of 3 to 8 words, a subject and ” descriptors for a faithful rendering. Example : ” A green wheat field in France, in the heart of the mountains, the sky is stormy. (“A field of green wheat in France, deep in the mountains, the sky is stormy”)
2. Generate Objects
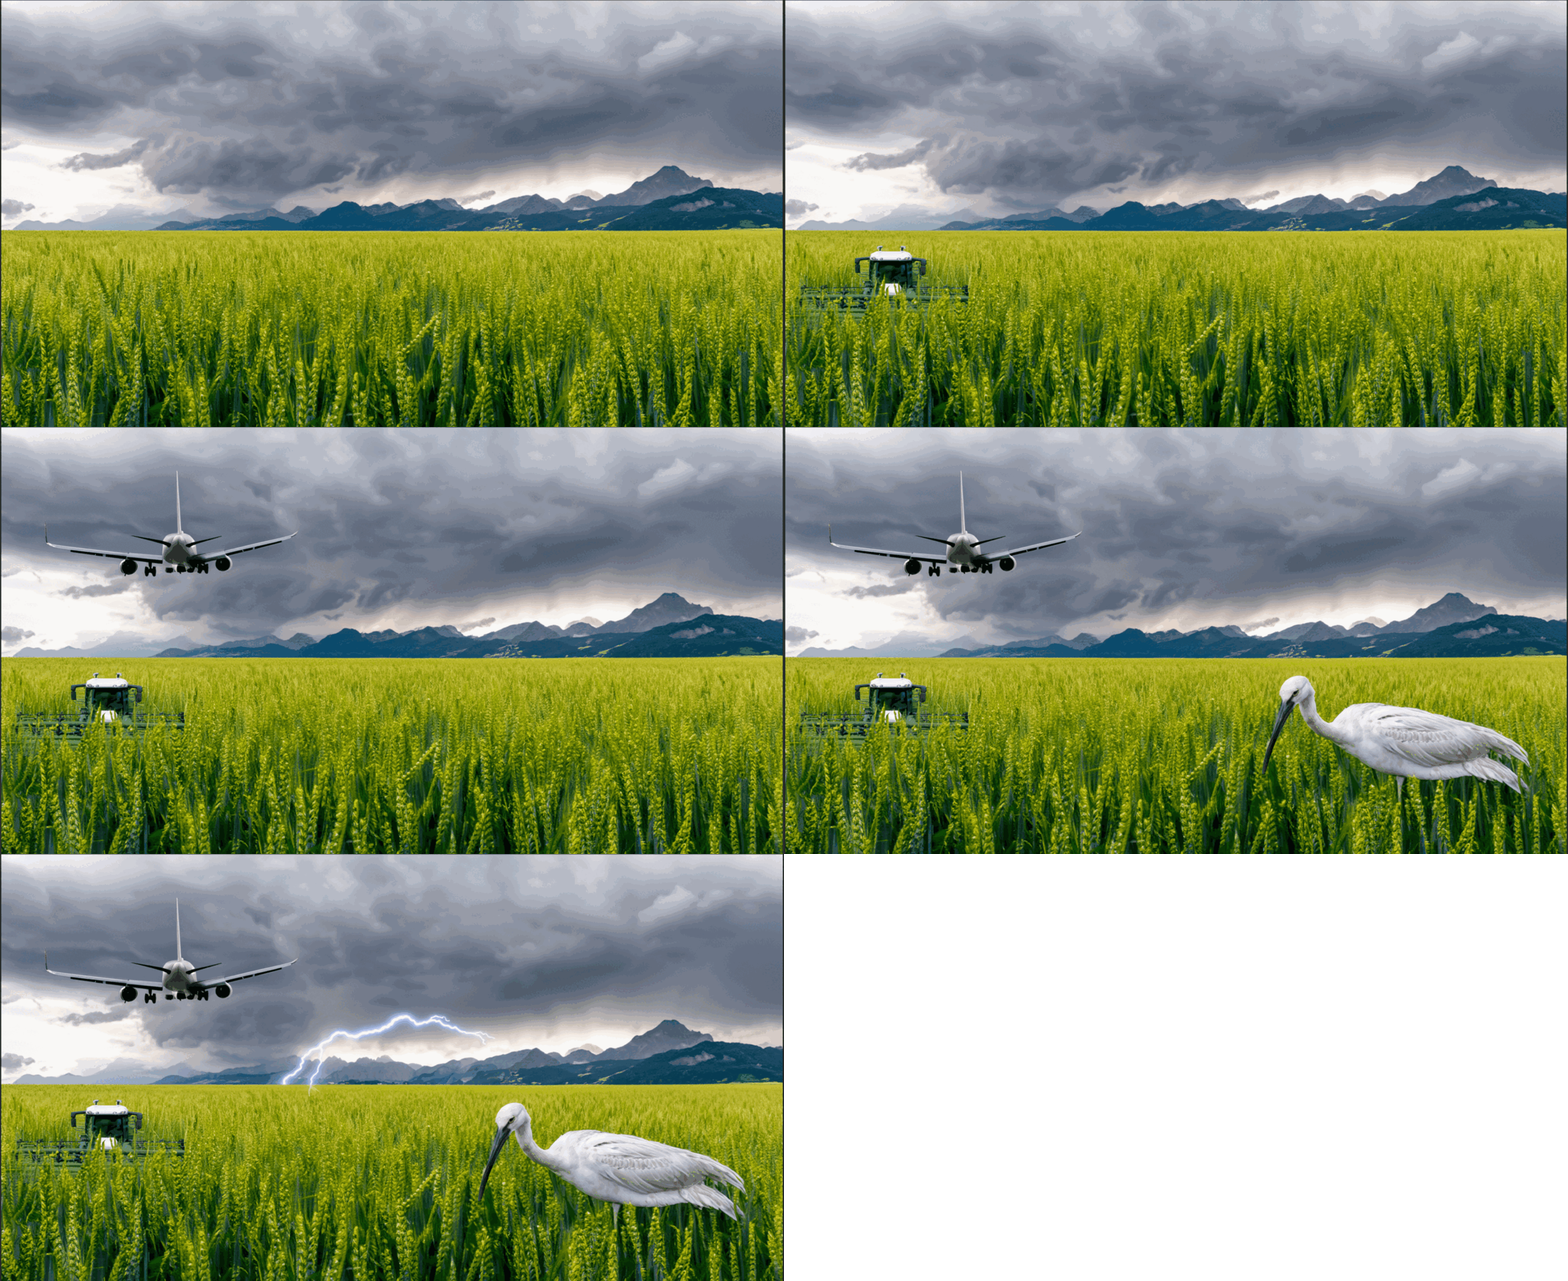
Generative Fill in Photoshop lets you generate synthetic objects and blend them naturally into the image. To add an element, simply use the selection tool, select the area where the object will spawn, access the fill tool and finally enter the description of the expected accessory.
In our case, we choose to add to our rural landscape a combine harvester, an airplane, a bird (the AI here decides to generate a wader), and finally a lightning bolt. Although the final rendering is quite artificial, the integration of the different objects is clean and does not shock at first sight. The AI adapts the original image to more harmoniously accommodate the objects (the lightning lights up the mountain in white). The perspective is generally well respected although the combine is a bit small.
3. Enlarge an image
Image extension is possibly one of generative fill’s most amazing features. The tool allows you to imagine the contour(s) of an image. Once the photo to be enlarged is open in Photoshop, use the ” Cropping to enlarge the work area. Then use the selection tool and select the area of the image to enlarge. You then have two options: use a prompt to customize the rendering or let the AI imagine the outline. In both cases, the tool takes into account the general context of the image to remain faithful to the original work.
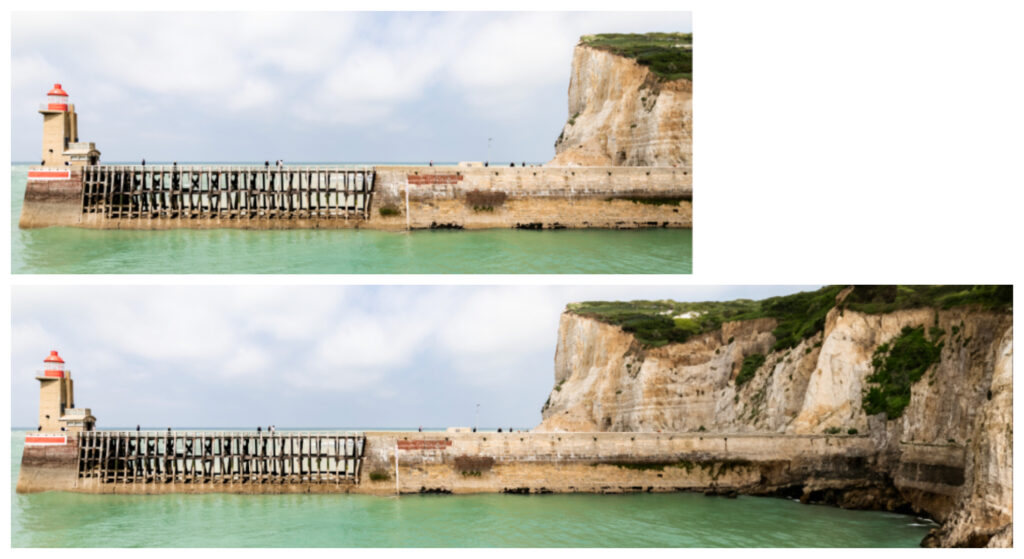
In our case, we use a photograph of the cliffs of Fécamp in Seine-Maritime and ask the AI to imagine the right side of the image. firefly then generates a whole new landscape (not in conformity with reality). The demarcation is invisible and the whole coherent. The result is better than with DALL·E 2. However, we note the presence of a slight pixelation on the generated part (most probably due to the size of the original image).
Generating outlines can be very useful, especially to decenter a portrait and add context. Example below with the photograph of a Seagull above the Mediterranean. The bokeh is reproduced to perfection.

4. Change background
Transforming the background of an image becomes far too easy. Photoshop’s generative AI now makes it possible to transform the landscape and context of a photograph in just a few clicks. A stunning novelty that raises questions in the era of the explosion of fake images on the web.
To get started, just select the image background. Go to the top menu ” Selection » then click on « Subject “. Once the subject has been selected, return to the “ Selection » and click on « Invert “. With the background now selected, enter a prompt in ” Generative Fill “. Example: “A fine sandy beach”, “An ocean in the background a mountain range”… The possibilities are numerous.
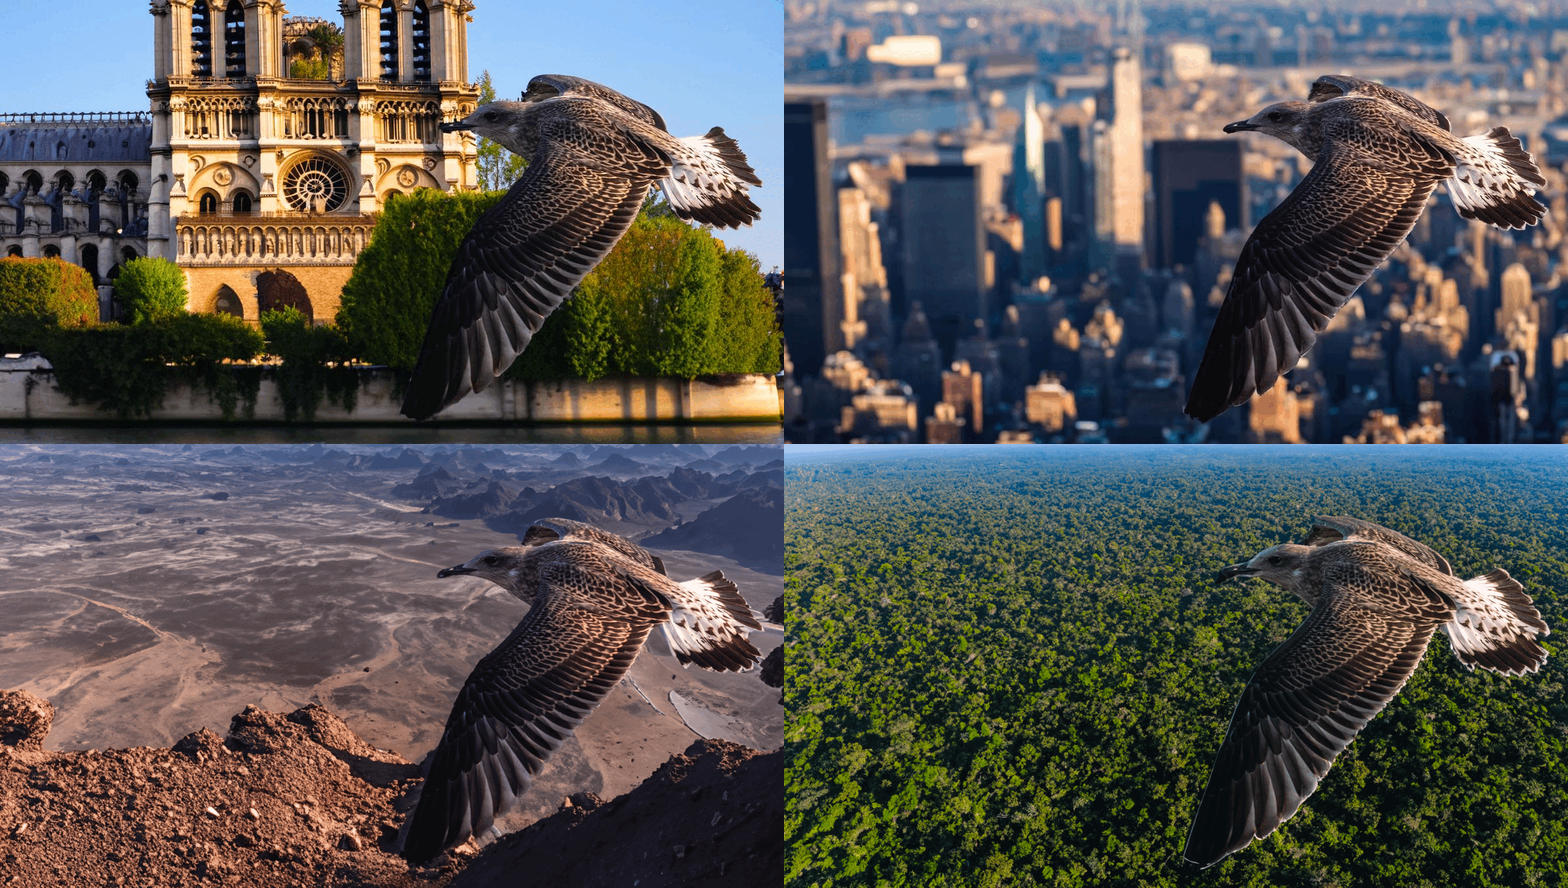
In our case, we will make the gull travel in a street in Paris, New York, on Mars or even above the Amazon. The result is classic, gives an impression of photoshopped but only took a few seconds.
5. Delete an item
This is certainly one of the most useful functions offered by Photoshop’s generative AI: removing an element from an image. Although earlier versions of the software (or Lightroom) offer similar functions, AI removal is much more accurate and efficient.
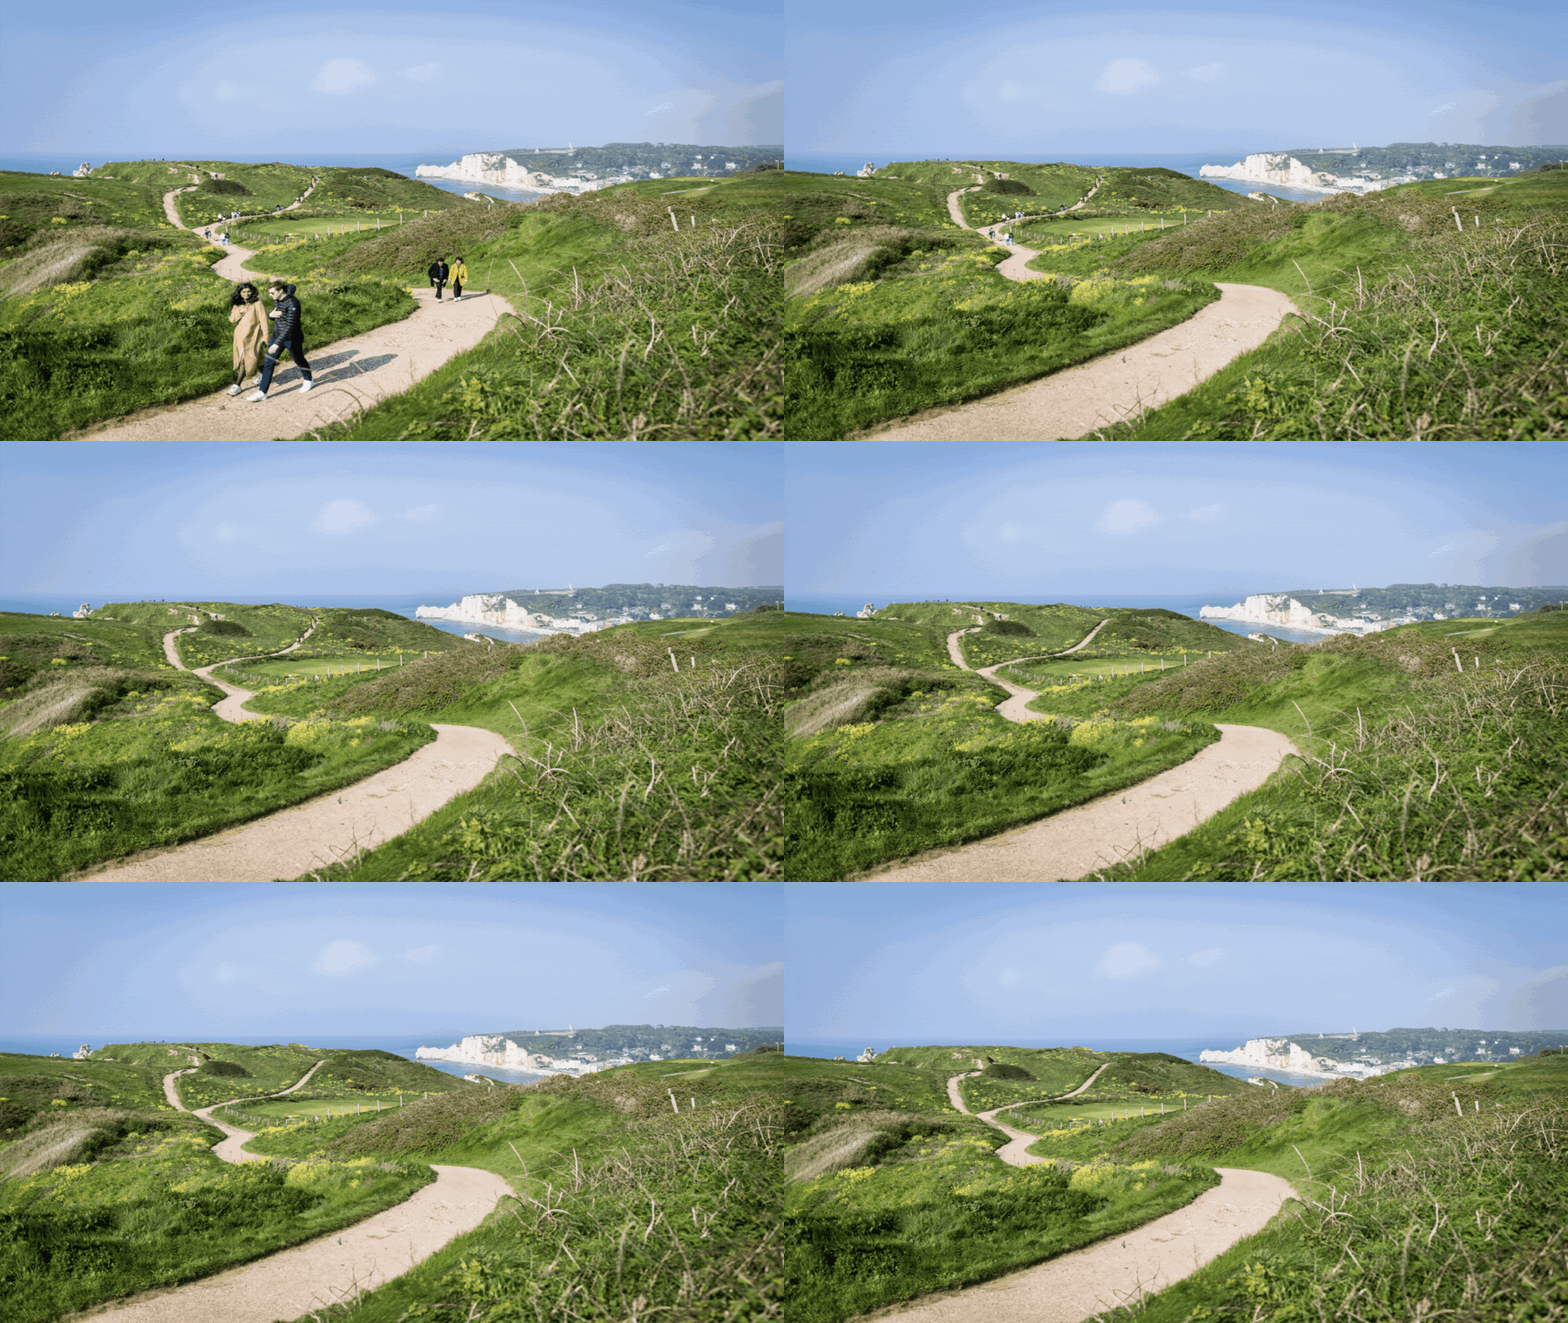
First, select the area of the image to be replaced, with the rectangular selection tool (this is the most practical for this task). Then leave the prompt text box empty and click ” Generate “. The magic of the artificial intelligence works and the area is completely remodeled to erase the detected element. However, we advise you to select small areas to prevent the AI from completely distorting the context of the image.
For example, we managed to remove many tourists from a photograph of a coastal landscape (Etretat, Seine-Maritime) in a few minutes.
Are you intrigued by artificial intelligence? Perfect, we just launched an innovative newsletter: written by an AI and reviewed by Numerama. To not miss any of our articles on AI topics, subscribe for free to ‘Artificials’:
Subscribe to Numerama on Google News to not miss any news!
