A festively decorated table should not be missing at Easter. You can make the decoration yourself from natural materials. That’s how it’s done.
Colorful eggs, cheeky rabbits and sweet chicks: Homes are properly decked out at Easter. In order to protect the wallet and the environment, it is advisable to make the decoration yourself. The material for this can be found in nature. In this way, tree slices, twigs and the like achieve a great effect with little effort.
Naturally dyed Easter eggs
Whether red, yellow, green or blue: Colorfully painted eggs are traditionally part of Easter. With the right food, practically any color can be conjured up on your shell without the use of chemicals. A reddish color is achieved with the help of beetroot. To do this, boil three finely chopped tubers in two liters of water for at least half an hour.
If you prefer yellow eggs, boil ten grams of turmeric in half a liter of water for at least ten minutes. Cooking 300 grams of spinach for 40 minutes gives it a green color. 200 grams of blueberries will turn the eggs blue.
Drain after boiling, collect the brew and leave to cool. Then place the blown chicken eggs or wooden alternatives in the desired color. The longer they rest in it, the more intense the result will be. Rub the bowl with vinegar beforehand, which also strengthens it. Finally, take the Easter eggs out of the broth, let them dry and brush them with oil for more shine. Instagrammer Saskia’s naturally colored eggs are in no way inferior to chicken eggs.
Funny cress eggs
If an egg breaks when you blow it out, it’s worth picking it up. The same goes for the shells of cracked eggs. Because funny cress heads can be made from them. Here’s how it works: After rinsing, paint faces on the eggs and place them in an egg cup or carton. Then add some soil, sprinkle cress seeds over it and water regularly. After five to ten days, green, harvest-ready cress hairs have grown on the egg heads. Taste as good as they look know blogger Laura and her children.
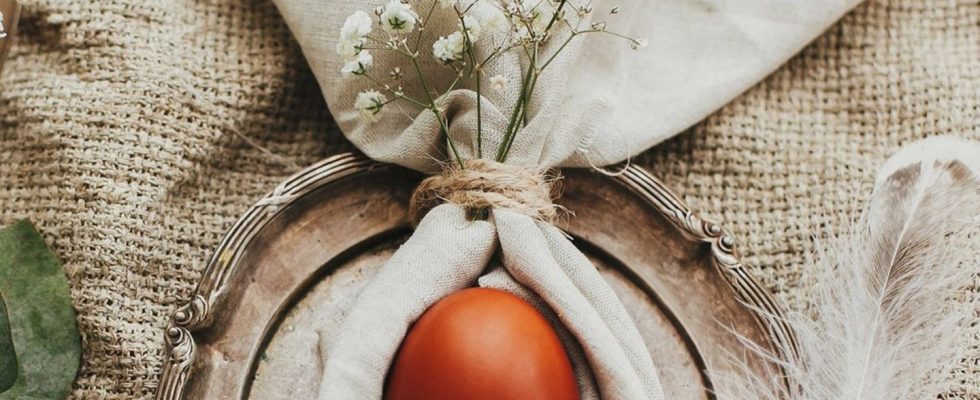
Fold napkins differently
In combination with a napkin, painted eggs are also suitable for decorating the festive table. To do this, place the napkin, preferably made of eco-friendly linen, face down on the table and fold it into a triangle. Fold the tip to the bottom of the triangle and fold the resulting band in half again. Drape the napkin around the egg and tie it together at the top to create a bunny’s head with long ears. Add a spring branch and the creation is complete.
Another option is to roll napkins and hold them together with wire rabbit rings, as Christine alias @uponmylife shows on Instagram. First she wraps the wire loosely around her hand three to four times. By wrapping one end of the wire around the resulting wire ring, she holds it together. She forms the other end of the wire into ears and connects it to the ring.
Paper honeycomb eggs
Those who want to do without animal products decorate their home with paper honeycomb eggs. First make an egg template. To get a symmetrical result, fold the paper in half, draw half an egg on the fold line and cut out. Have 16 sheets of paper ready for the lamellas, for example from an old book, and fold them in the middle. Place the egg template on each of the folded sheets of paper, trace the outline and cut out. Then fold the sheets in half and fold the top and bottom corners of the egg so that there are three fold lines in all.
Apply some craft glue along the center line, place half an egg on the glued area and press firmly. Repeat the process until all the pieces of paper have been processed. Then carefully fan the egg and glue the ends together. Finally, glue the slats together along the top and bottom fold lines and tie the eggs to the Easter tree using thread. Also works with rabbit figures, as the Instagram account @klickerkram proves.
Easter nest from branches
If there is no branch available, you put the Easter eggs in a nest. This can also be made from natural materials with little effort. You need: a bundle of flexible willow or hazel branches, a tree disc, moss or wood shavings, ten long nails, an Easter egg and decorations of your choice.
First hammer in the nails at a distance of 0.5 to 1 centimeter at the edge of the tree disc. In the next step, braid the branches along the nails until you reach the top edge. Finally, line the nest with moss or excelsior, place the egg inside and decorate as you like. Handicraft expert Theresa has on her Instagram channel opted for feathers and flowers.
Easter chicks made from tree slices
Leftover tree slices from the Easter nest can be processed into cute chicks. For the DIY by blogger Judith you need: tree slices, beige and orange felt, yellow paint, a brush, a fineliner, a cord, scissors, liquid craft glue and a drill.
First make one or two holes in the tree disc at the top and bottom, then paint it yellow. The turmeric decoction mentioned at the beginning is a suitable alternative to acrylic paint. While the paint dries, use a fineliner to draw the feathers on the beige felt and the beak on the orange felt and cut them out. Attach both to the tree disc with liquid glue and paint on the eyes.
For the feet, thread the cord through the holes on the lower edge of the tree disc and knot it on the back. Cut the cord to the desired length and tie a shorter piece horizontally in the lower third to create three toes. Finally, pull a neutral thread through the top hole and hang the chick on the Easter tree.