thread pattern
This is how you create individual string art
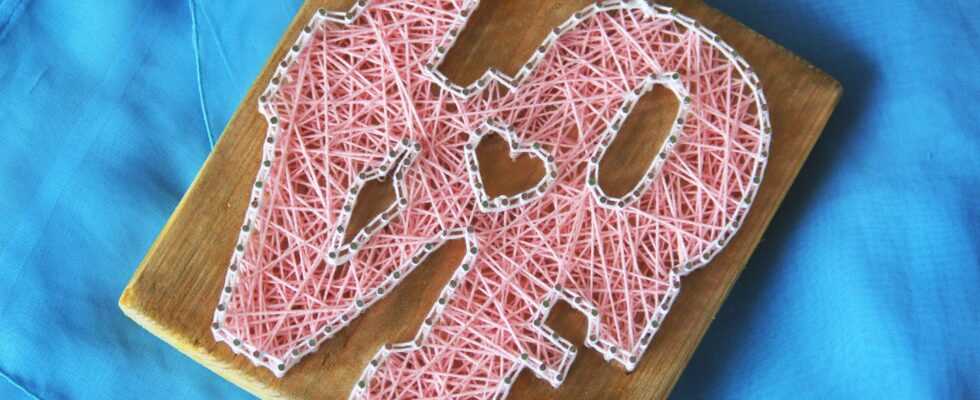
© AmorSt-Photographer / Shutterstock

A thread picture not only looks great, it is also very easy to make yourself! We explain how it’s done.
A string art is a creative way to fix your motif of choice to a surface with nails and thread. The technique is simple – it just requires a little patience. We will show you step by step how to create a thread picture.
Thread image: materials
- Base: A wooden board is best (Note that it must be strong enough for the nails!)
- As required: glaze or varnish, brush or sponge
- Nails: Short nails with broad heads
- hammer
- Stencil: Lettering made up of individual letters or a printed or pre-drawn motif
- tweezers
- Thread (e.g. yarn, embroidery floss)
Thread picture: instructions
- Preparation: Paint your wooden board the color you want. If you want the wood grain to show through, wood stain is the product of choice. Instead of a brush, you can also apply the glaze with a small sponge.
- use one templateto transfer your motif to the wood: You can either draw the outlines with a pencil or fix the template with some adhesive tape and remove it later.
- Drive the nails along the outlines. Make sure they are hammered in evenly. The spacing of the nails is up to you: With fine details, it makes sense to hammer in the nails a little closer, while the spacing can be a little wider on straight stretches.
- If you used a paper template, remove it now. With tweezers, you can also easily remove smaller scraps of paper.
- tighten the threads: To start, tie the yarn tightly to a nail. With detailed templates, it gives a nice effect if the thread is first laid completely along the outline. Depending on the curvature, the thread guide alternates between the inside and outside of the nails. Attention: Every now and then you should put a loop around individual nails to make the thread pattern more stable. If the motif is very complex, it is worth tying the thread in a few places: this way the work will be preserved should you lose the thread!
- To fill in the interior of the subject, the Then stretch the thread criss-cross, creating a network. With knots and loops you increase the stability of the thread pattern. Make sure that the thread always stays taut!
- Tie the end of the thread at the end.
Thread picture: tips & suggestions
- You can change the color of the nails by spraying them with acrylic spray after hammering them in. The background is also colored with it.
- Jute twine is also suitable for a particularly rustic expression. The more detailed the motif, the finer the thread should be.
- Wooden discs or old floorboards can also be used as a substrate.
Thread picture: Nice ideas from Pinterest
We looked around on Pinterest and got inspired.
Looking for more fun crafting ideas? Here we show you how potato printing works. Here you can find out what you have to consider when dry felting or how you can make a mosaic yourself. And here we explain how you can make a lantern or make a bookmark.