
I may be an old-timer, but I still use email a lot. I send them daily, for my personal and professional communications, every day of the year. Because of this, my inbox can quickly become full. Within an hour, I received hundreds of emails on multiple accounts, and it gets tedious to deal with them quickly.
This is one of the many reasons I use the Thunderbird email client. Thanks to an easy to use GUI, I can create specific filters for incoming emails to automatically send them to certain folders.
Create enough filters and you’ll have an easily manageable inbox.
How to create message filters in Thunderbird to organize your inbox?
The only things you will need are to have Thunderbird installed on your computer and to have an email account set up on it.
1. Select the email to filter from your inbox.
In your inbox, locate and select an email from the sender you want to filter.
2. Create a filter from the message
Click the Thunderbird menu button (three horizontal lines in the upper right corner), then click Messages > Create filter from message.

Picture: Jack Wallen.
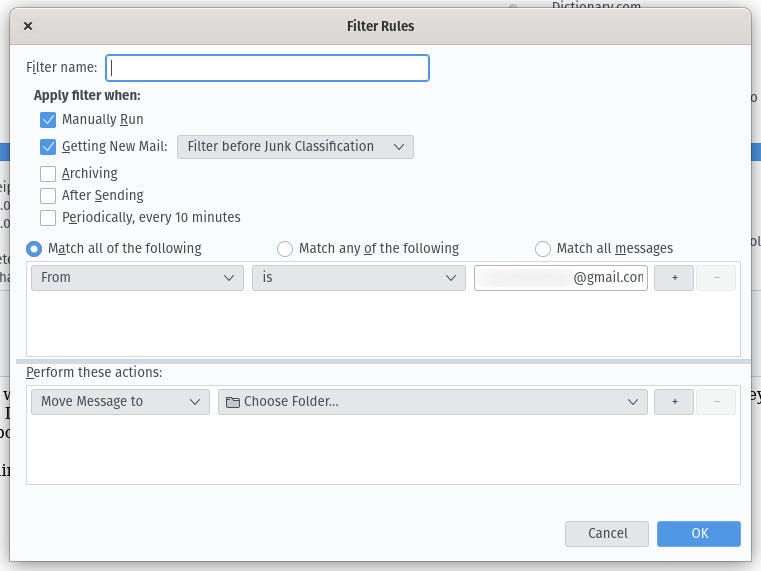
3. Customize the filter
In the window that appears, the email address you want to filter should already be filled in. All you have to do is select it, from the two drop-down lists:
- an action : what to do with the message
- a location: where to save message
In the drop-down menu on the left, you can configure the filter to perform actions such as move, copy, forward, mark as read, etc. In the drop-down menu on the right, you select the folder that will host the message. You can also click + to add another action.
For example, your first action might be to copy the email to a specific folder, and your second action might be to move it to another folder. This is a great way to have a backup of all emails from a specific contact and then keep those emails in their own folder.
Picture: Jack Wallen.
There are other options you can choose from when creating your filter. You can specify how the filter should be applied, filter before or after spam classification, and specify the granularity of the filter (should it match all criteria or just one).
Once you have configured the filter according to your preferences, click on OK to save it. Thunderbird will automatically start applying the filter.
That’s it, you’ve created your first Thunderbird email filter. Keep creating new ones and your inbox will finally become manageable. Don’t forget, however, that there are probably unread messages in these folders…remember to check them!
Source: ZDNet.com