
Over the next few months, millions of iPhone users are going to upgrade to iPhone 14. And as part of this upgrade, their old iPhones are going to be resold or passed on to a family member.
If you are one of those people, read on.
You don’t want to miss this transfer because not only could you lose data, but the next person could find themselves unable to use the iPhone you sold or gave them. Follow these steps for a successful outcome for both of you.
1. Update iOS
Before you even think about erasing your old iPhone, there are some things you should do. I’m going to assume you’re selling an iPhone that still has iOS supported and is capable of running iOS 15.
Here are the iPhones that can run iOS 15:
- iPhone 13 / 13 Mini / 13 Pro / 13 Pro Max
- iPhone 12 / 12 Mini / 12 Pro / 12 Pro Max
- iPhone 11 / 11 Pro / 11 Pro Max
- iPhone XS/XS Max
- iPhone XR
- iPhone X
- iPhone 8 / 8 Plus
- iPhone 7 / 7 Plus
- iPhone 6s / 6s Plus
- iPhone SE (1st generation)
- iPhone SE (2nd generation)
If your iPhone is one of these models and not running the latest version of iOS 15, I recommend upgrading to the latest version for the best experience.
2. Pay attention to apps that need extra help during a transfer.
Some apps, especially banking apps, prefer you to disable or deauthorize them on the old iPhone before transferring them to a new device.
It’s not that the service can’t work, but you might have to try harder to get it.
I would definitely check that banking and finance apps don’t require any special procedure to transfer to a new device and take care of that from the start.
3. Protect your data
Next, I want you to think about your data. How upset would you be if you lost your notes, photos, texts or any other data on your iPhone?
Think about it for a moment. Because it’s very easy to be jaded about your data when it’s all there on your iPhone and safe.
Be sure to back up your data. To be honest, you should anyway. iCloud is the simplest and easiest method. To do this, press Settings > [votre nom] > iCloud on your iPhone, then tap iCloud backup to start the process.
Don’t have enough iCloud space? Do not worry ! Apple will let you borrow some temporary iCloud storage. (This keeps control of your iPhone storage, and you really should consider getting more storage for your future backup needs).
4. Prepare for the transfer
Apple has made the transfer process quite simple.
Tap Settings > Generalthen scroll to the bottom and tap Transfer or Reset iPhone.
You are now ready to start the process.
Press on Get Started to begin the process of backing up your iPhone and getting ready for the new iPhone.
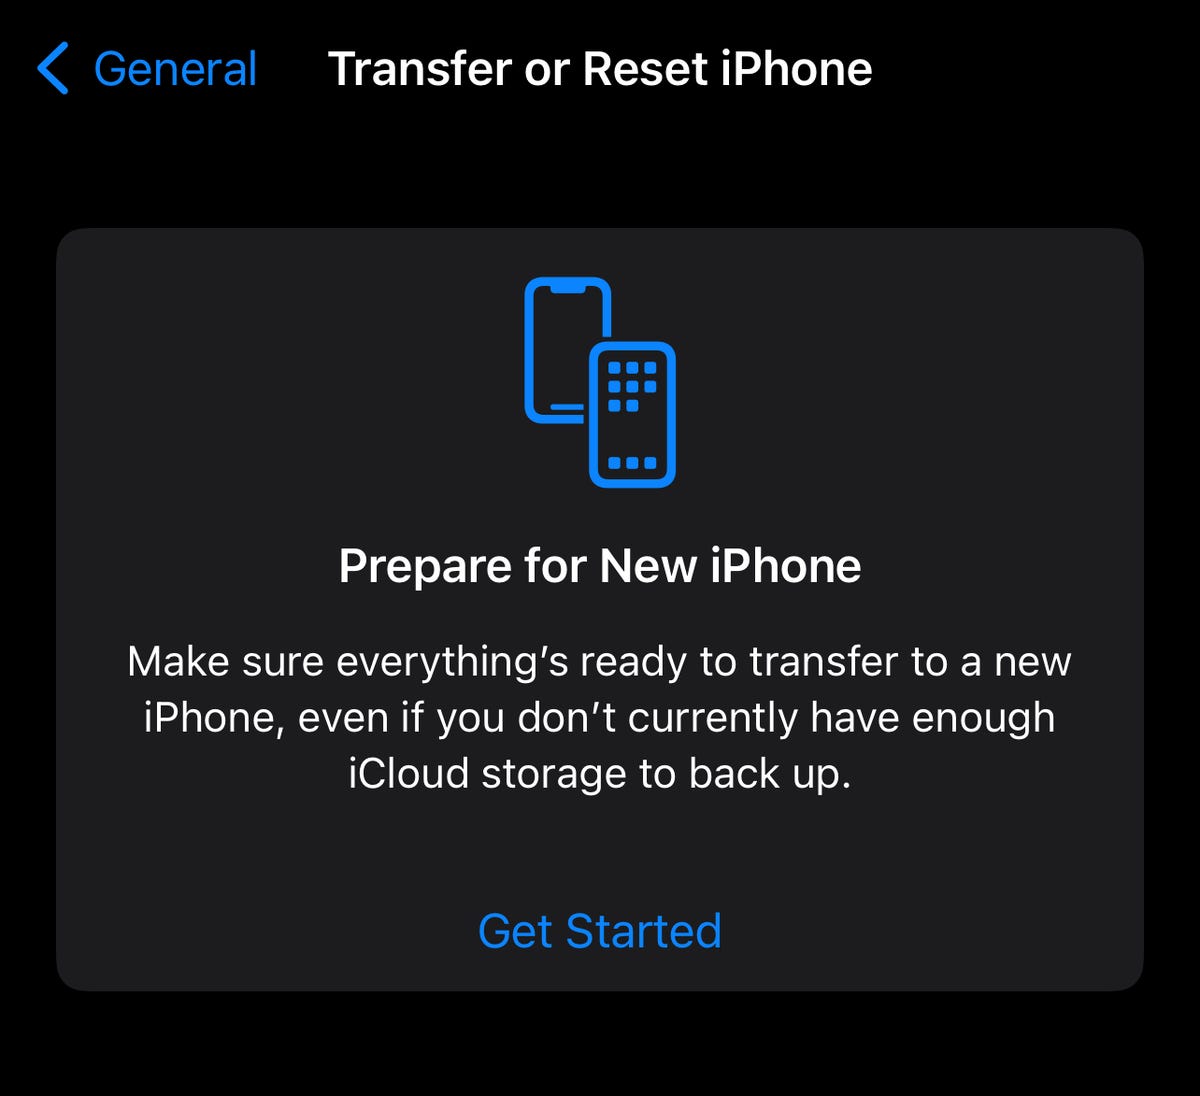
Apple has made it easy to transfer to a new iPhone. Screenshot/Adrian Kingsley-Hughes
5. Erase Old iPhone
OK, it’s done, your data is safe, you have your new iPhone, everything is set up and working fine.
You are now ready to erase your old iPhone.
Remember it’s a one-way street, and once you erase it… The data is gone.
Tap Settings > Generalthen scroll to the bottom and tap Erase all content and settings.
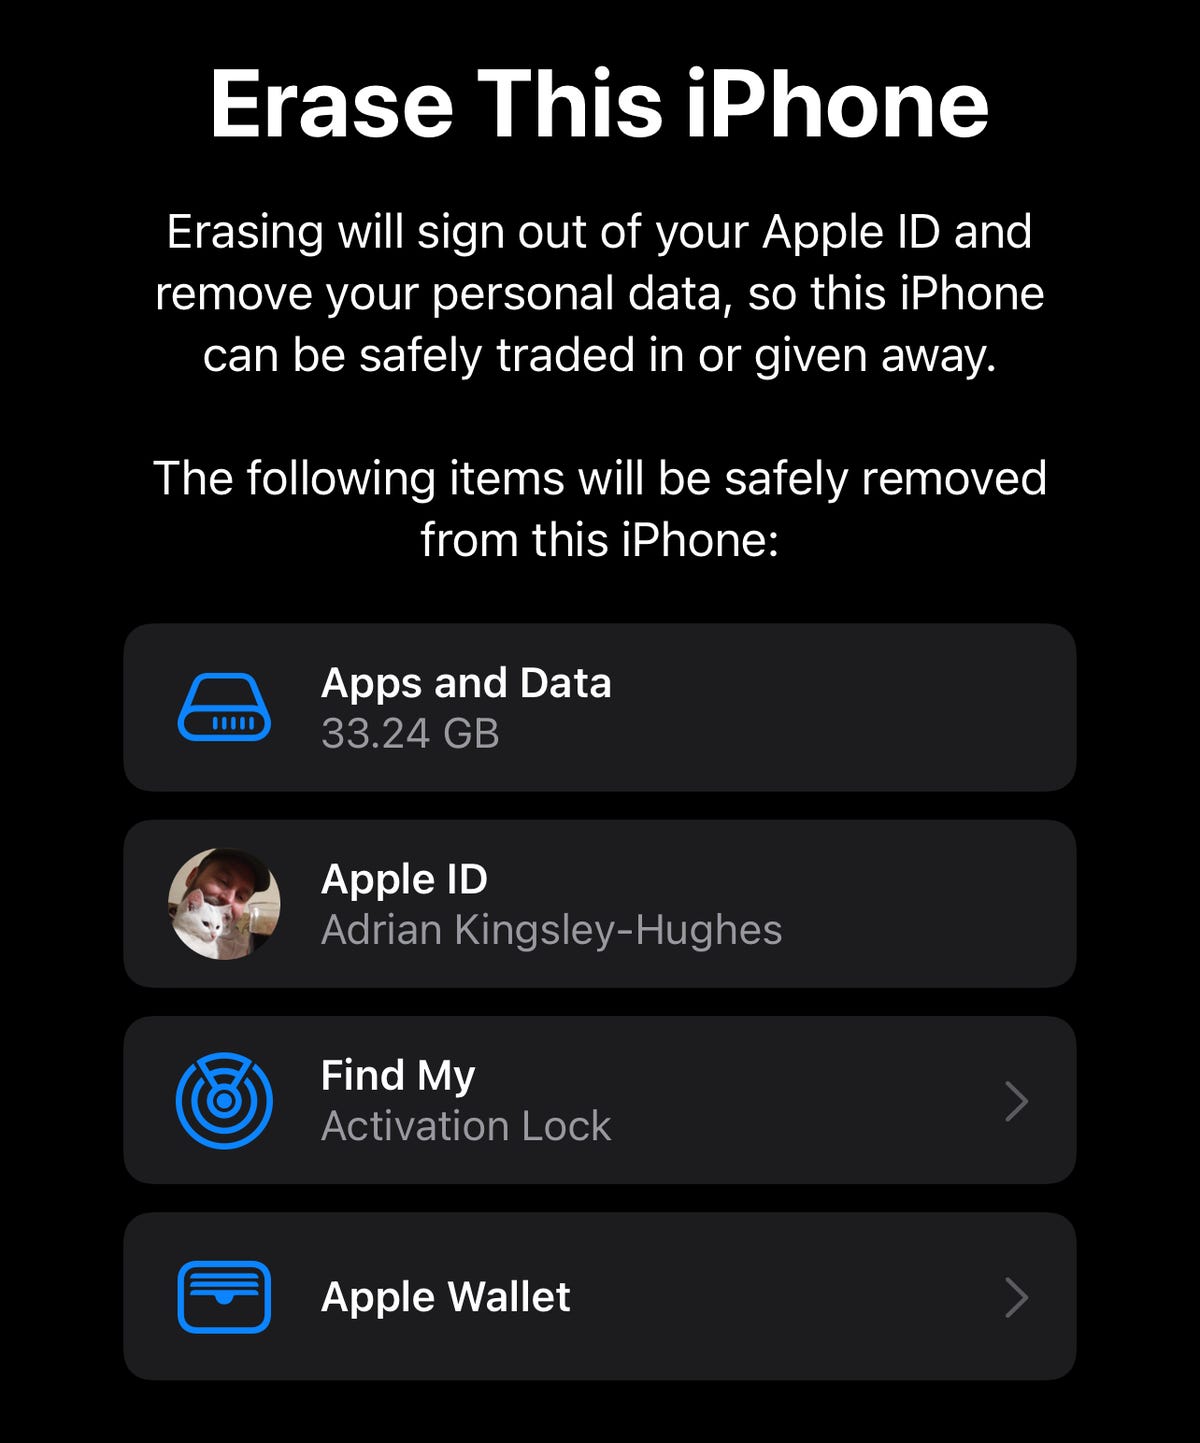
This erases everything!
Screenshot/Adrian Kingsley-Hughes
This will :
- Erase your data and apps
- remove your apple id from iphone
- turn off Activation Lock, allowing the next person to activate the device, and
- delete all data from your Apple Wallet.
Just enter the passcode and erasing will begin.
Remember, once you’ve started this process, there’s no going back!
6. Spring clean your iPhone
Don’t hand a dirty iPhone to the next person.
I always remove cases and screen protectors, and wipe down the phone with lens cleaning wipes, just to freshen it up. It’s also a good idea to give the next person a charging cable and charger if you have a spare.
And if you still have the original box, even better.
You can now relax and enjoy your new iPhone!
Source: “ZDNet.com”