This tutorial is for those who like to tweak their helmet a bit VR Oculus Quest 1 Where 2 and are already familiar with developer mode and what it does. If you don’t know, we invite you first to watch our dedicated video which explains everything on the subject. That said, there are various solutions for manipulating your headset, installing/uninstalling apps, making backups and screenshots, knowing the settings of the headset, but none currently met all the criteria we needed. Effectively, sfollowing the publication of Quest Games Optimizerour application to improve the visual quality of native gameswe encountered several problems in the face of recurring needs:
- How to install an app (.apk) easily in the helmet;
- How to activate the connection adb wirelessly (to carry out manipulations without remaining connected via a USB cable, but also to operate Quest Games Optimizer);
- And especially how to do these two things without a computer.
We have therefore compared the most known and accessible existing solutions, and the finding is bitter. None of these solutions meets these three demands :
| SideQuest computer | SideQuest mobile | Oculus Developer Hub | |
| Installing .apk | Yes | No | Yes |
| wireless adb enable | Yes | Yes | Yes |
| Requires a computer | Yes | No | Yes |
In this tutorial we therefore present the solution that makes everyone agree. This is the mobile app Bugjaegerfamous Swiss army knife of Android smartphone users which offers many possibilities. The application is available for free on the Google Play Store at this address. To use it, it is necessary to have passed your Quest in developer mode just as you would to use Side Quest Where Oculus Developer Hub.
In the following sections, we will not dwell on all the possibilities of the application, but only on the two that interest us.
This section is obviously the most important. It is necessary to make your smartphone communicate with your headset to send it commands.
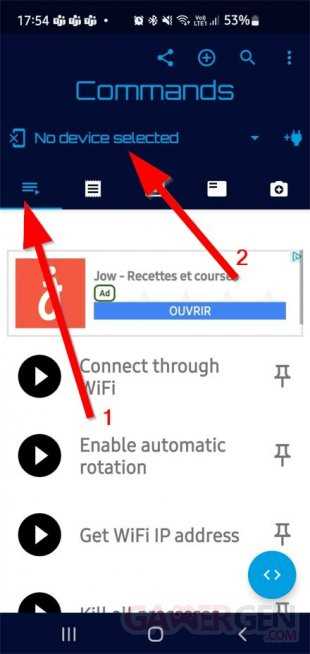
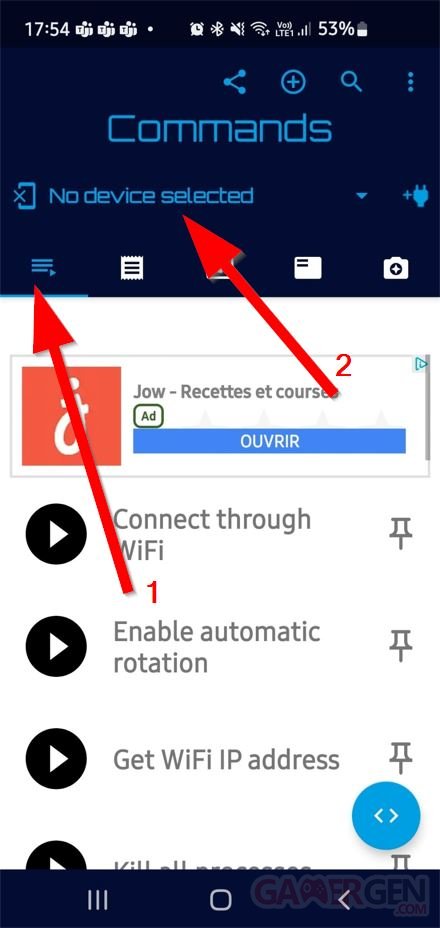
- Launch the application and go to the “Commands” tab (1). At this point, your smartphone is not connected to the headset and the words “No device selected” appear (2).
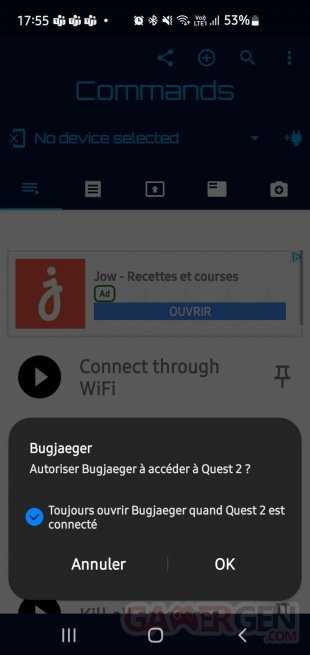
- Now connect your Quest to your smartphone via a USB Type-C cable (OTG). Then accept the two pop-ups that open to you, and check the box “Always open Bugjaeger when Quest is connected”.
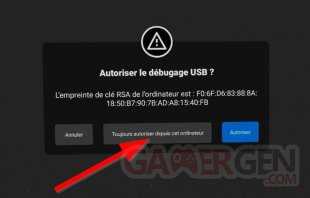
- From now on, you will need to put the headset on your head and allow USB debugging. Remember to click on “Always authorize from this computer”.
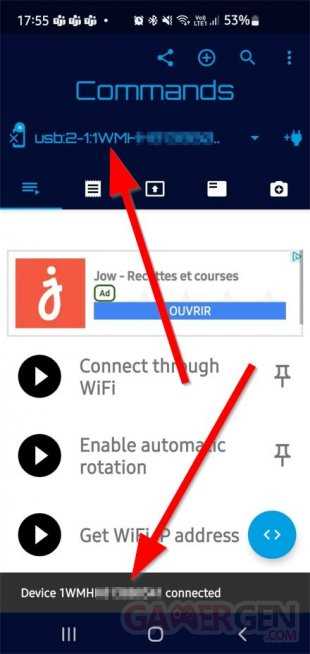
- Now you can see that the headset is recognized by your smartphone.
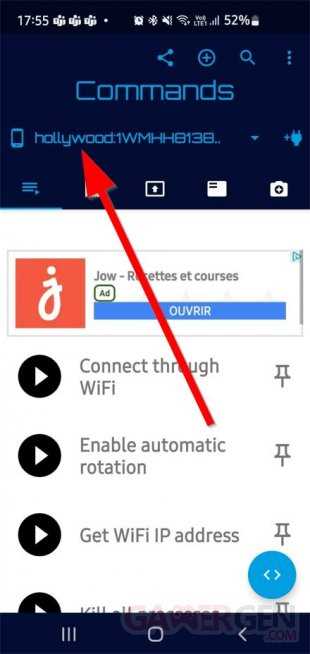
- The technical name of Quest 2 appears here: hollywood.
Before going further, it is necessary to make sure that your smartphone is on the same Wi-Fi network as your headset. If this is the case, you will be able to activate the connection adb wireless. This will allow you to disconnect the USB cable between your two devices while continuing to communicate. In the case of Quest Games Optimizeractivate theadb wireless will aim to start the service adb present in the helmet. Proceed as follows:
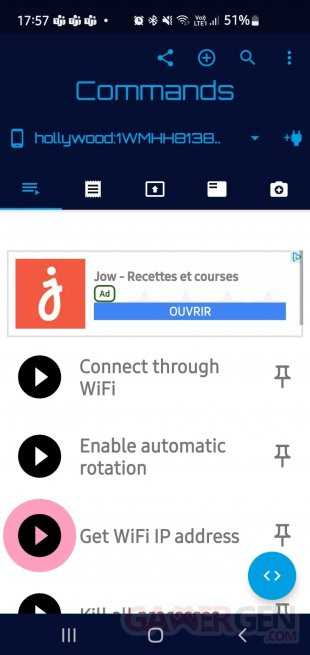
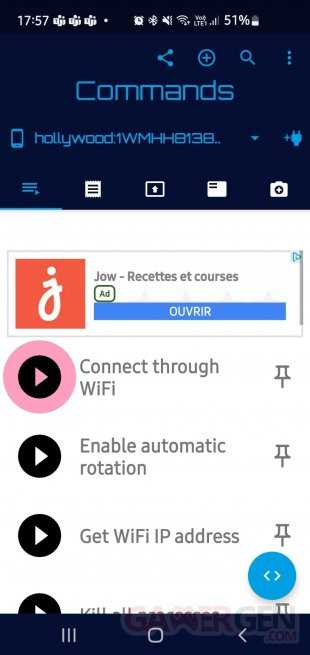
- Still in the “Commands” tab, click on “Get WIFI IP address”. This manipulation allows Bugjaeger to know the address of your headset on the Wi-Fi network in order to be able to communicate wirelessly with it. Then wait two short seconds;
- Then click on “Connect through WIFI” to establish the connection;
- At this time, the wireless connection via Wi-Fi has just been established. As you can see in the capture below, the headset’s IP address has been successfully retrieved and the device is now connected;
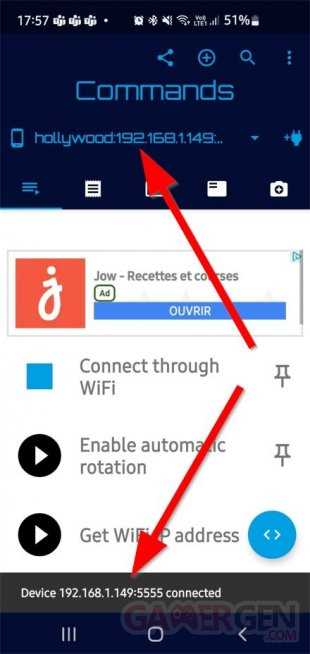
- You can now unplug your USB cable.

If the manipulation does not work the first time, consider unplugging then reconnecting the two devices and repeating the adb wireless connection procedure.
Unlike the app Side Quest on smartphones, Bugjaeger allows you to install applications. In our example, we will install Quest Games Optimizer. Before you start, make sure that the wired or wireless connection between your smartphone and your headset is established (see section above).
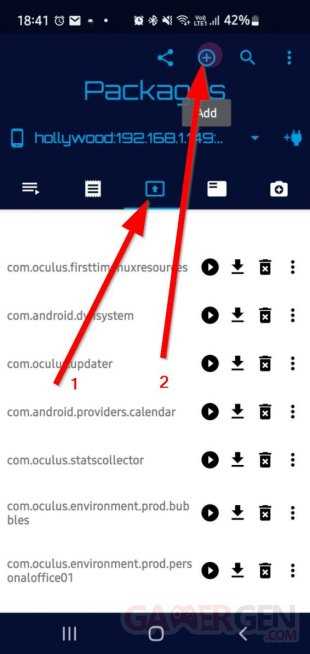
- Go to the “Packages” tab (1) then click on the “add” button (2).
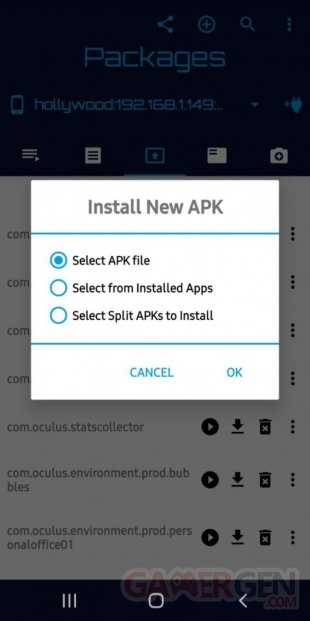
- Select “Select APK file” then click “OK”.
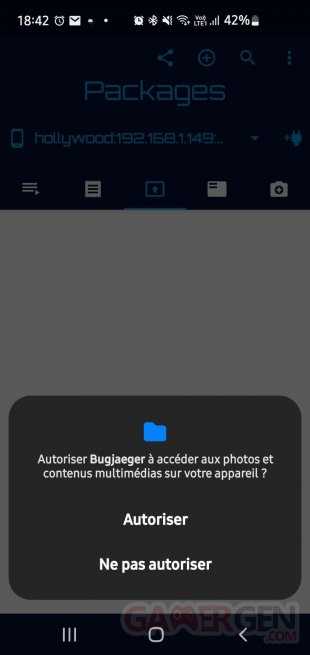
- Allow Bugjaeger access photos and media on your device.
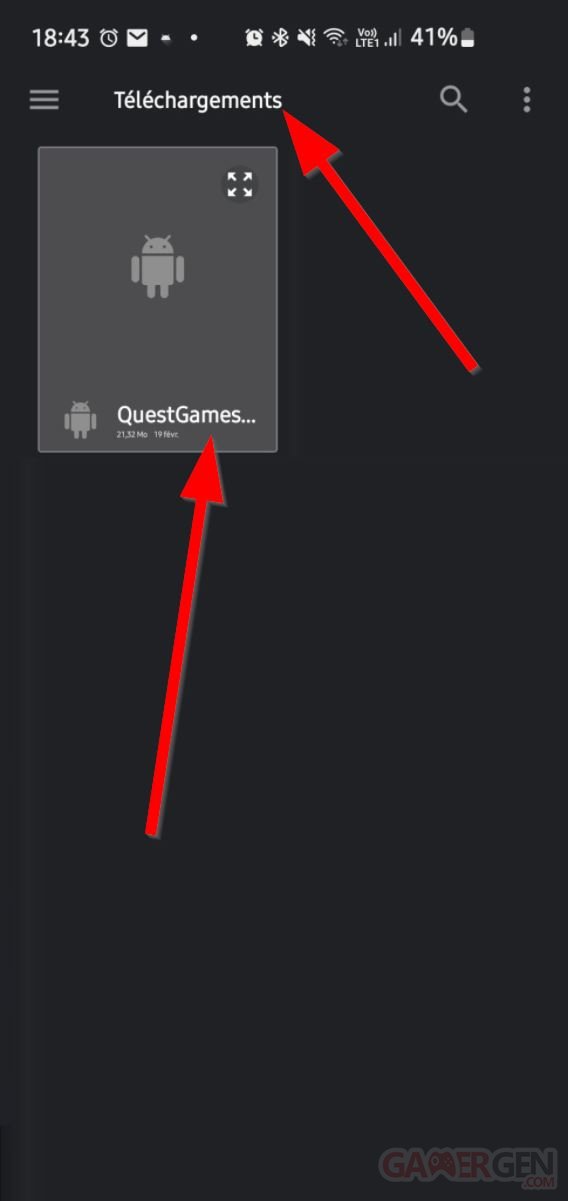
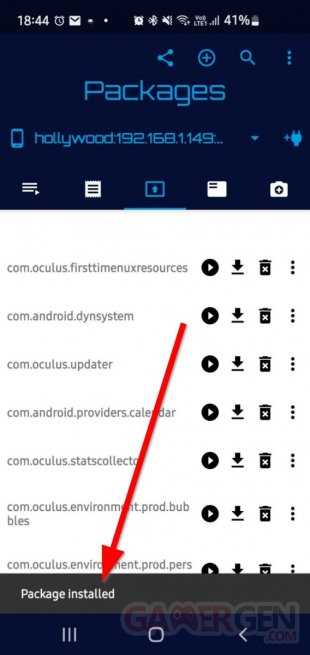
- Select file .apk of the app Quest Games Optimizer in your file explorer. In our case, the file is in the download directory of the Quest. Then install it.
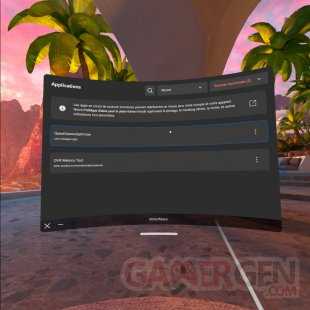
- And voila. You can now go to the unknown sources of your headset to check for the presence of Quest Games Optimizer.
By the way, the possibilities of the tool are really very numerous and it’s a real Swiss army knife of the Android system:
- Execution of commands adb of all kinds;
- Console Scripts Shells ;
- Consulting the headset logs (Logcat);
- Installing/Uninstalling/Activating/Launching applications and even downloading .apk from headset to phone;
- Consultation of ongoing processes;
- Screenshot ;
- Review system settings, device configuration, etc. ;
- File Explorer;
- Application Backup Utility (backup .apk + .obb);
- Utility fastboot ;
- And more…
We let you discover these features for yourself and if you want to know more, do not hesitate to tell us about it in the comments.
If you haven’t taken the plunge yet, you can treat yourself to a Oculus Quest 2 at the house of Bakerthe Fnac, Darty Where Amazon for €349.99.