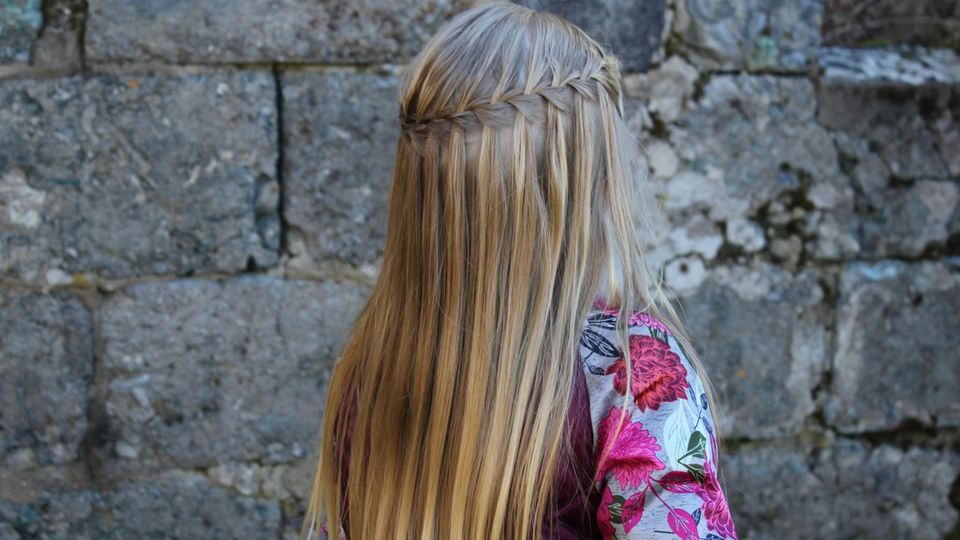
waterfall braid
This is how the casual braided hairstyle succeeds!
© oksana_bondar / Adobe Stock
Would you like a braided hairstyle that looks casual and yet sophisticated? Then our tutorial for the waterfall braid is perfect for you!
Braided hairstyles are now a dime a dozen. No wonder, after all, styles are like a A French braid or a herringbone braid is always a real eye-catcher! Do you prefer to wear your hair half-down and prefer a particularly cool and casual style? Then the so-called waterfall braid (also: waterfall braid) could be something for you!
The waterfall braid is so versatile
The nice thing about the waterfall braid is that you can braid it on just one side or on both sides of your head, just as you like. And he’s so versatile that it suits every occasion: In everyday life, it makes jeans and chucks really cool, but you can also dress it up with flowers or pearl clips to create an elegant wedding hairstyle.
Step by step instructions for the waterfall braid
Do you want to start right away? Fine! All you need for the hairstyle is at least shoulder-length hair, a brush, a hair tie and some dexterous fingers. If this is your first time styling the waterfall braid, give it some time if possible. In this way you not only prevent unsightly knots, the result is also all the better! Here comes our instructions for the great braiding:
- To make the waterfall braid as precise as possible, brush your hair well at the beginning.
- On one side of the head, separate an initially narrow section of hair from the top hair and divide this in turn into three narrow strands.
- Now start braiding the strands of hair as usual: first lay the upper strand over the one in the middle, then the lower one.
- Now add some new hair to the upper strand and braid it into the braid.
- Now comes the trick: so that the braid gets its typical structure in the form of a waterfall, let the lower strand fall instead of continuing to braid it. Instead, take a new strand from below and weave it into the braid.
- Continue like this until you get to the back of your head. Here you fix the waterfall braid with a narrow braid.
If you want, you can repeat the process on the other side of the head: So also separate a section of hair from the top hair here and start braiding as described. A middle parting is an advantage here so that both braids are of the same thickness. If you usually have a side parting, you should comb your hair accordingly before braiding. Both braids meet at the back of the head and can be tied together with a braid. Alternatively, you can gather all your hair together and tie it in a ponytail – the waterfall look on the sides makes it look particularly smart.
Here in Video you can take a closer look at the braiding technique:

Extra tips for the waterfall braid
Especially for beginners The following tips can be helpful when braiding the waterfall braid:
- The waterfall braid works best when the hair is shoulder length or longer.
- If you have very straight hair, you have to work the braid very evenly so that the result doesn’t look messy.
- If you have very skilled hands, you can braid a single waterfall braid around the entire head.
- In the beginning it is easier to braid with thin strands. The waterfall braid becomes really pretty when you braid it with thick strands.
Can I do a waterfall braid if I have curly hair?
Unfortunately, braiding curly hair is not that easy because it tends to get knotted and is difficult to separate into narrow strands. So if you have curls, you should straighten them before braiding – for example with a hair straightener. Don’t forget to apply a heat protectant beforehand to protect your hair!
Reading tips: You can find even more creative braided hairstyles here. We also show pretty Dirndl hairstyles for the Oktoberfest and reveal which short hairstyles are really popular right now!

