
Windows 11 major update 22H2 has been out for a few weeks but is hiding for some. Here’s how to force install it.
Windows 11 was a major turning point for Microsoft, which made its operating system a free access service for an OS which proved to be free for the vast majority of consumers. But here it is: such a redesign of its interface naturally goes hand in hand with many alterations to be made following user feedback.
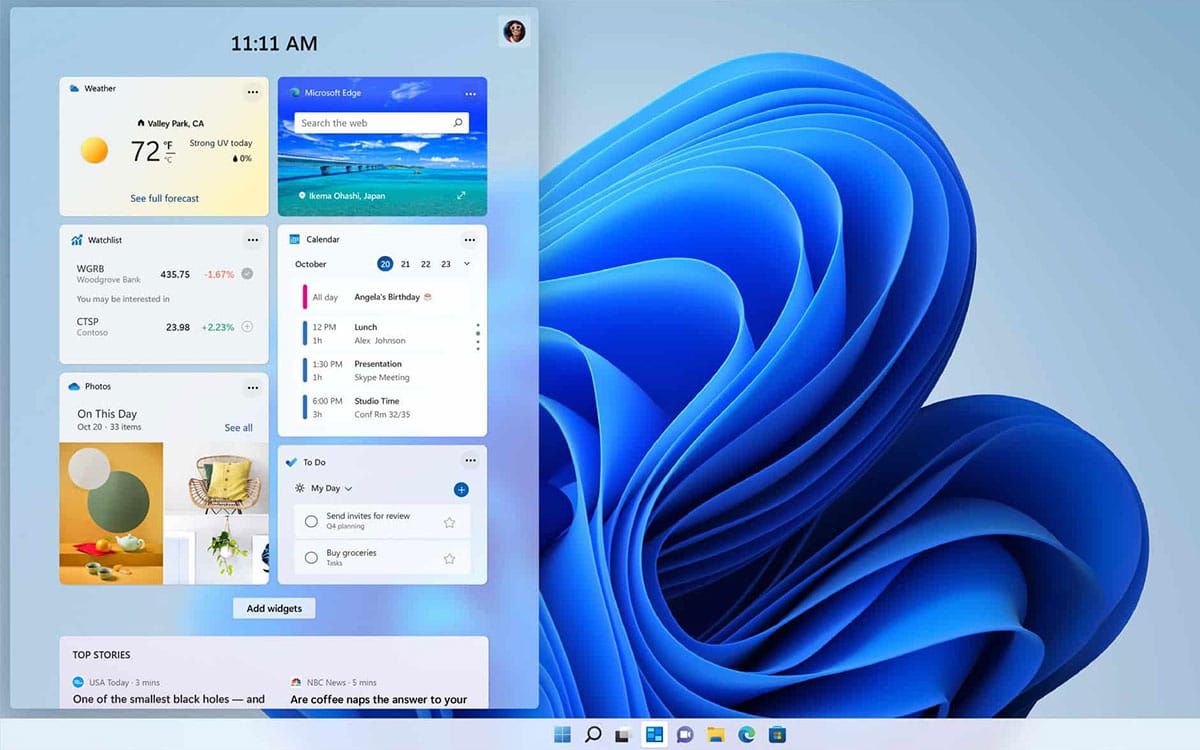
That’s why the major update 22H2, seen as a large system patch, was expected. This brings more than one modification and more than one functionality to the OS, such as the possibility of creating folders in the application launcher to personalize its experience and make the system ever more pleasant and quick to use. Problem: this update is only revealed at the moment certain configurations meeting certain criteria. However, if you want to take the bull by the horns and force its installation, there is a solution.
The principle is quite simple. If the update is not available to everyone, the new version is in installation image for new PCs. However, with a few manipulations, we can use this image to install the update on our machine without having to erase our applications and files.
For this, you will simply need an internet connection, a USB key of at least 8 GB, and a little time and cleverness. For the sake of conscience, do all the same a backup of your files to avoid any disappointment. Once you are ready, just follow this tutorial!
Install Windows 22H2 on an incompatible PC
Download Windows 22H2 ISO
The first step, and fundamentally the simplest, is to recover the image of Windows 11 in version 22H2. It can be downloaded in the simplest way from the official Microsoft website, by going to this page.

Scroll down to the “Windows 11 Disc Image (ISO) Download” category, and select from the drop-down menu “Windows 11 (multi-edition ISO)”. When you click on download, you will be able to choose the language of the product. Choose French, or any other language that interests you.
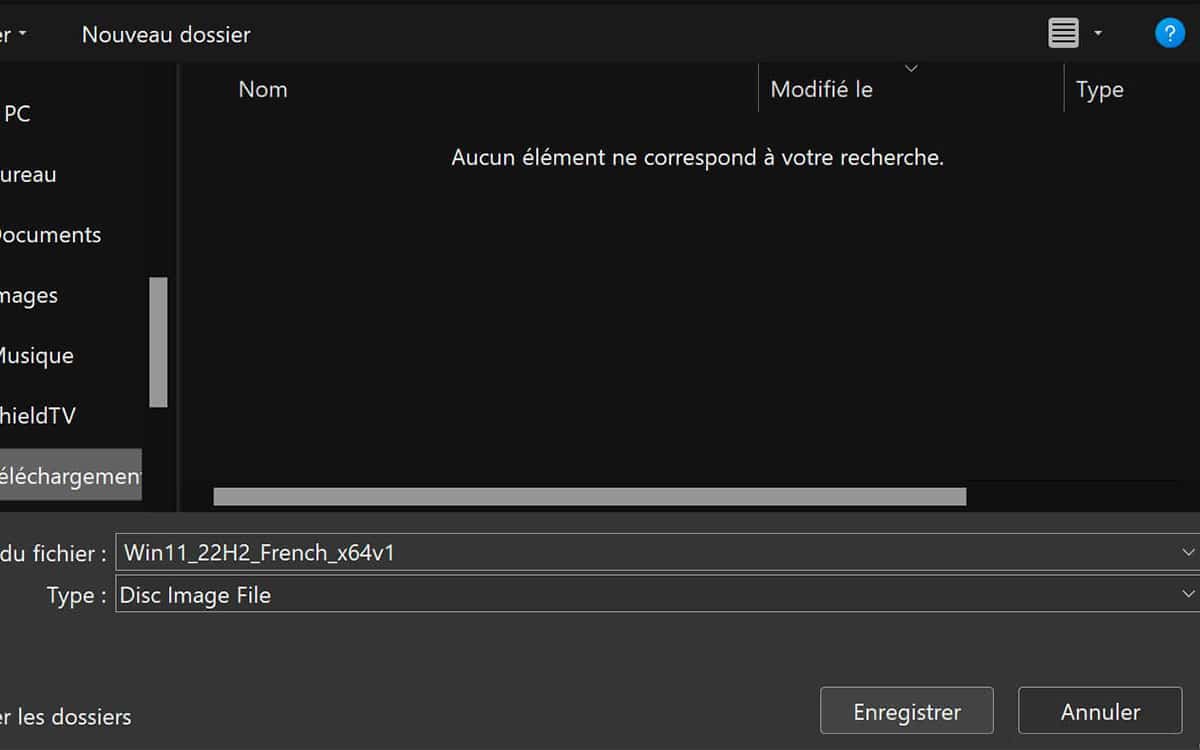
Then just click on “64-bit Download”. You can then see in the file name that you download the mention of “22H2”, which confirms that it is indeed the version which interests us. Store it wherever you want.
Create an installation USB key
The second step of this tutorial will ask you to create an installation USB key for this version of Windows 11. However, we cannot go through the official creation tool, since this will not allow us to bypass the official ISO compatibility checks. All you have to do is download the Rufus software, in a portable version so that you don’t have to install it on your system.

Once downloaded, you can immediately launch it. In the software interface, make sure “Startup Type” is set to “Disk Image or ISO” and click “SELECT” to choose the previously downloaded ISO. Then click on START.
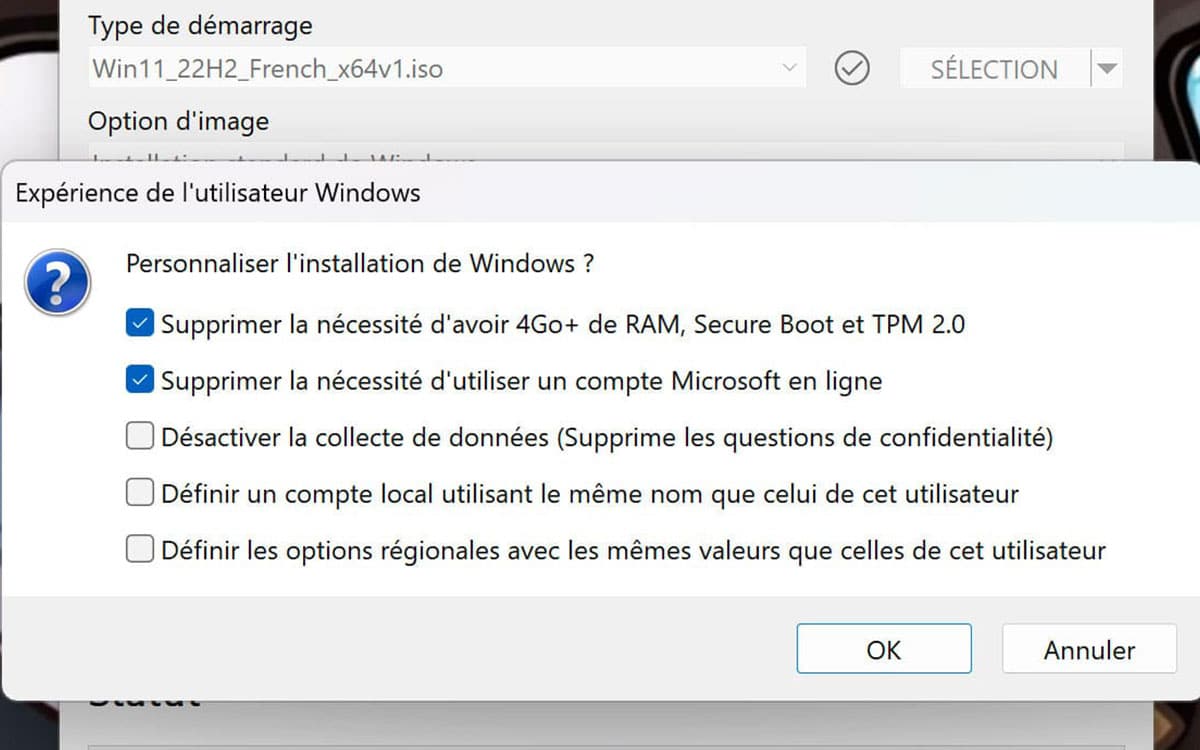
This is where the most important step is. A “Windows User Experience” window will open to allow you to modify certain elements of your installation. Make sure that “Remove the need for 4GB+ of RAM, Secure Boot and TPM 2.0” is ticked. The rest is up to you. Once you click OK, your USB drive will be formatted to create Windows 11 installation media.

Launch the installation of Windows 11 22H2
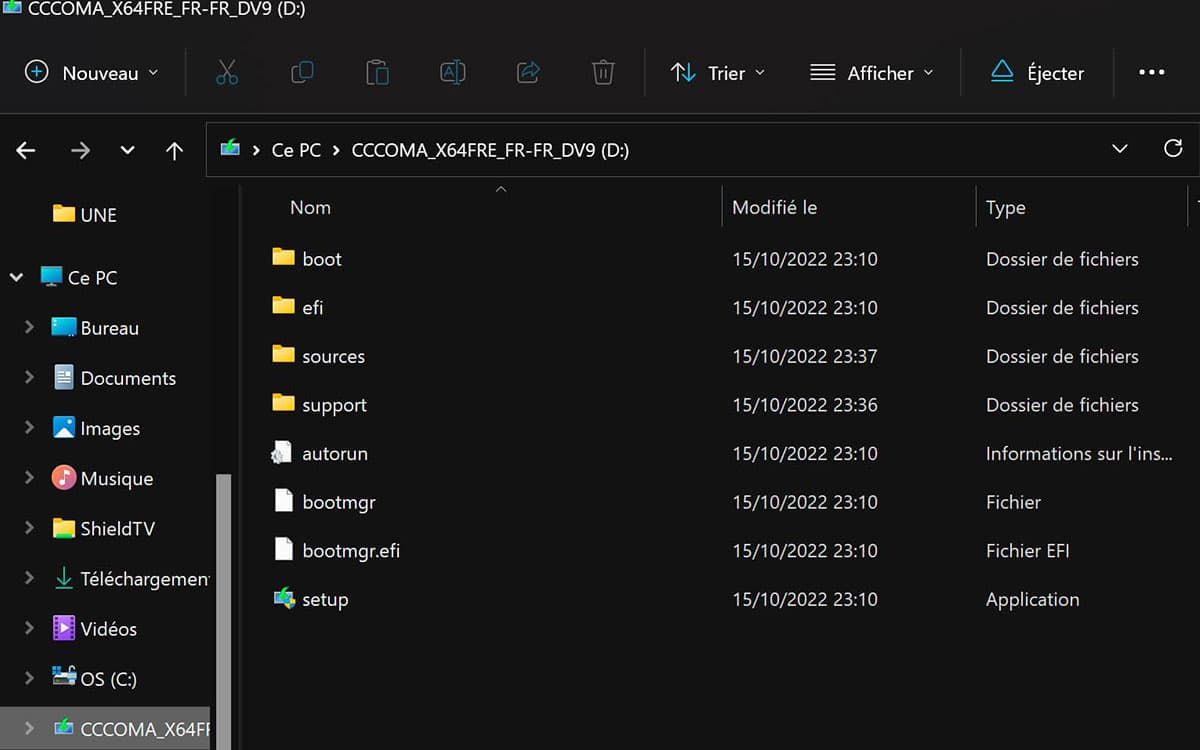
If you need Windows 11 on a brand new machine, then all you have to do is plug in this USB key and start your empty PC on it to install the OS. In our case, we don’t even need that: we just need open the USB key in File Explorer of Windows 11 then click on “setup”.
The Windows 11 version 22H2 installer launches. You can follow the normal installation steps up to the most important point: “Choose what to keep”. Here, the first choice will allow you to keep your applications and files intact. Because of this, it’s as if you were just going to install the 22H2 update.
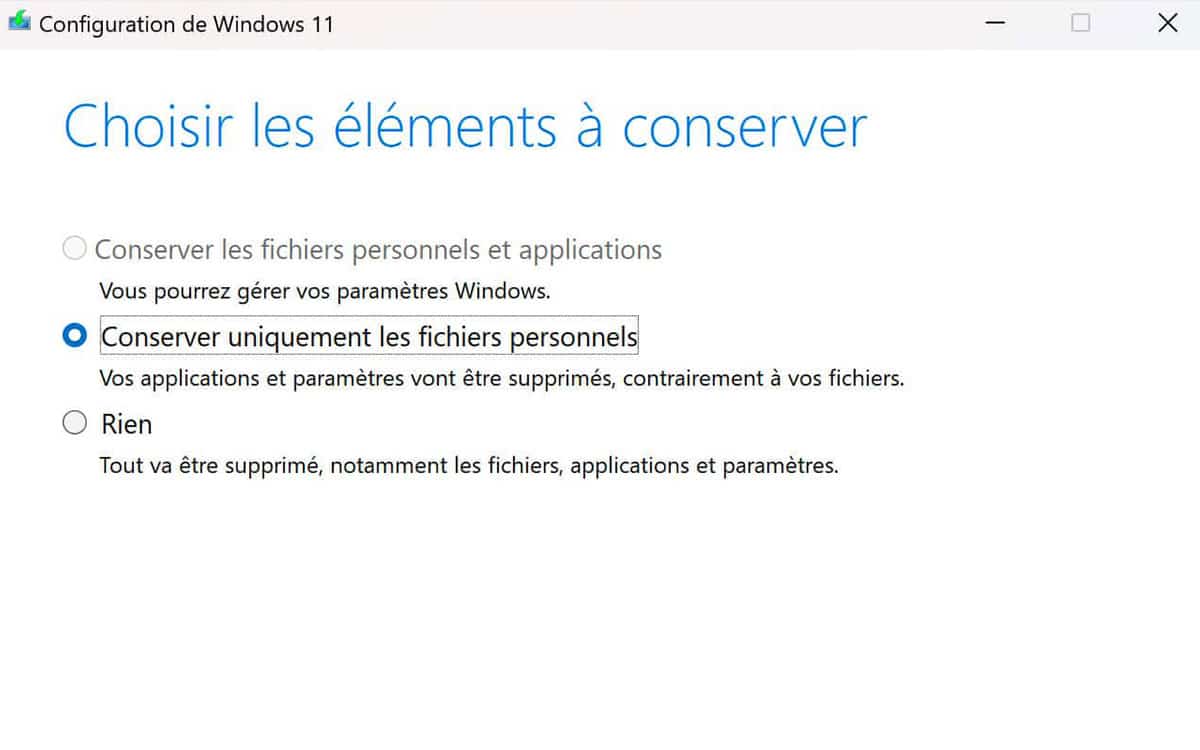
The second choice will remove your apps, but not your files. Finally, the last one will delete everything. Be careful to choose the right option to avoid unpleasant surprises! The installation will then launch and will cause your computer to restart several times. At the first restart, we recommend that you remove the USB key from your PC so that it does not start on it inadvertently.
Check your version of Windows 11
Once this installation is complete, you can check that it went well in the simplest way. In your taskbar, right click on the Windows icon which usually launches your applications, and choose “System”.
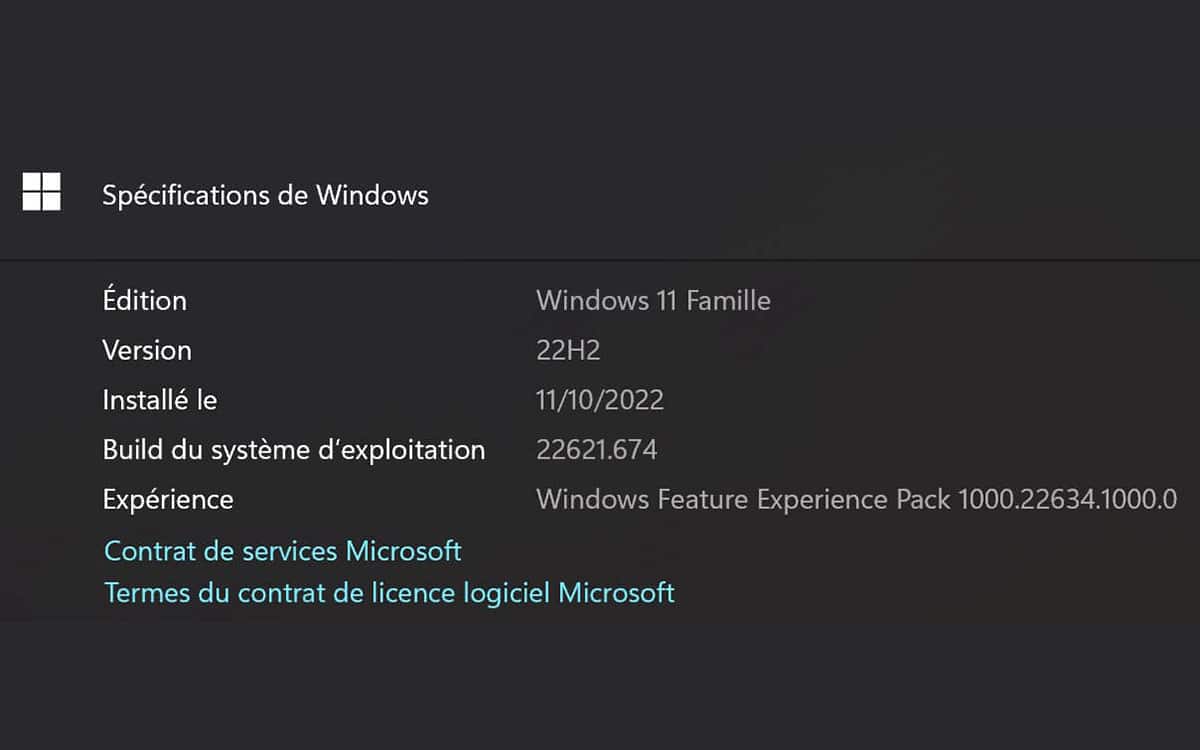
On this window, in “Windows specifications”, you can simply check your version number. If this is 10:22 p.m., congratulations. : you now have the latest major update installed!