
Setting up a new Windows 11 PC is quite simple. But it’s deceptively easy, actually. After clicking through the dialog boxes and adjusting the few settings available as part of the Out of Box experience, you find yourself on the Windows 11 desktop.
But your job is not done. Microsoft’s default settings aren’t necessarily set for you, and a default configuration comes with a handful of annoyances that you can quickly fix. When you get to the Windows desktop, I recommend taking a few minutes to do these six things before going any further.
1. Use a Microsoft account for maximum security
On a system that you personally own and manage, you have two choices for setting up your primary user account: a Microsoft account or a local account.
(If your PC is in a managed enterprise environment, you’ll have a domain account where you log in with Azure Active Directory. Either way, your admin is the boss, not you).
The old-timers will probably prefer a local account because that’s what they’ve been using for decades. But it’s the wrong choice these days, at least if you care about security.
Using a Microsoft account gives you three benefits that you can’t get with just a local account:
- You can enable two-factor authentication and Windows Hello, which lets you log in using a fingerprint or face recognition device.
- You can enable encryption of your system disk even with Windows 11 Home edition. To make sure it is enabled, go to Settings > Privacy > Security > Device encryption).
- You can recover your data if you forget your password using Microsoft account recovery tools.
And, of course, if you have a Microsoft 365 Family or Personal subscription, you get access to Office apps and a terabyte of online storage.
You are not required to use the email address provided by Microsoft for any purpose other than this. And if you create a new Microsoft account as part of Windows 11 setup, it’s not linked to an existing phone number or email address, which means there’s no tracking.
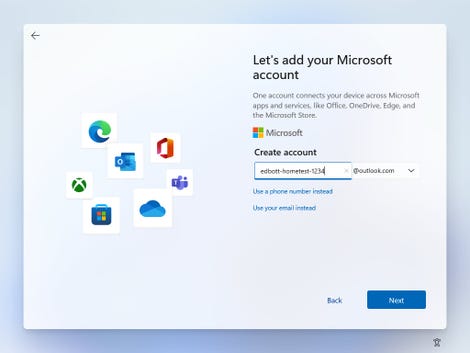
You can create a new Microsoft account when installing Windows 11.
You can read our articles to learn more about the differences between each type of user account and for step-by-step instructions on securing your Microsoft account.
2. Clean up malware and other bloatware
As on Windows 10, on Windows 11 you will find app shortcuts – which seems to be part of the Windows business model. In my last tests, candy Crush disappeared in favor of popular streaming services (Spotify, Disney+, Amazon Prime Video) and social media (TikTok, Instagram, Facebook).
The good news is that these are just shortcuts. Applications are not installed by default, so these shortcuts take up a minimal amount of disk space, and they can be removed with a few clicks from the Start menu.
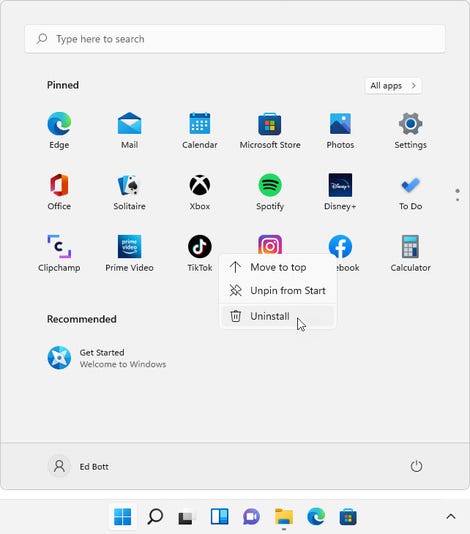
Right-click the junk icon, then click Uninstall. Then confirm your choice in the dialog box. Repeat the operation if necessary.
3. Enable Windows Sandbox
This is an essential feature if you have Windows 11 Pro, Enterprise, or Education. It allows you to instantly launch a secure virtual machine (VM) without any complex configuration. The VM is completely isolated from your main system, allowing you to visit a suspicious website or test an unknown application without risk. When you’re done, close the sandbox and it disappears completely, erasing all traces of your experience.
Although it uses the same virtualization features as Hyper-V, you don’t need to enable Hyper-V and it uses minimal system resources.
To get started, click To research and type Windows functions to find the dialog box Enable or disable Windows features. Scroll to the bottom of the list and click the box to the left of the Windows Sandbox feature. After restarting, you will find a Windows Sandbox shortcut in the Start menu.

Note that a Windows Sandbox session contains almost no Microsoft applications. She is completely stripped. You can use the Windows clipboard to paste a URL into Microsoft Edge or copy a program file to the sandbox for further exploration.
4. Add Folder Shortcuts to Start Menu
The Windows 11 Start menu is very simplified. It has a section for pinned icons at the top, and below, a section for shortcuts to apps and documents you’ve used recently. At the bottom of the menu are your profile picture and a power button. And that’s all.
Unless you dig into the Settings menu to make some customizations. Go into Settings > Personalization > Start > Folders, and you’ll find a menu that lets you add shortcuts to the bottom of the Start menu, giving you easy access to some common folders. These shortcuts are the equivalent of the shortcuts found in the left column of the Start menu in Windows 10.
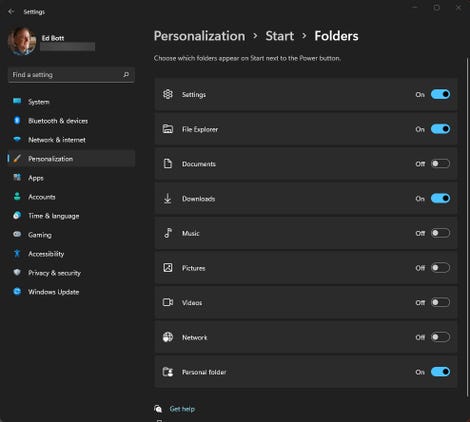
You will also notice that I enabled dark mode for this system. It’s much easier on the eyes, especially if you’re working in a dark or dimly lit room. You will find this option in Settings > Personalization > Colors > Choose your mode.
5. Remove Widgets and Other Unwanted Taskbar Items
With each new version, Microsoft finds a new way to clutter the taskbar. Luckily, the tools you need to declutter things are also included. In Windows 11, the default taskbar configuration includes these four superfluous additions:
- A search button. You don’t need a search box. Just press the Windows key and start typing to search.
- The task view button. You don’t need this button either. Use Windows Key + Tab to get to the same place.
- Widgets. Ugh.
- Cat. Microsoft continues to try to get people to use Teams even when they’re not at work.
If you want any of these things, good for you. But the rest of us can make those four shortcuts disappear by quickly going to Settings > Personalization > Taskbar. Slide these four switches to the left and return the taskbar to its original function.
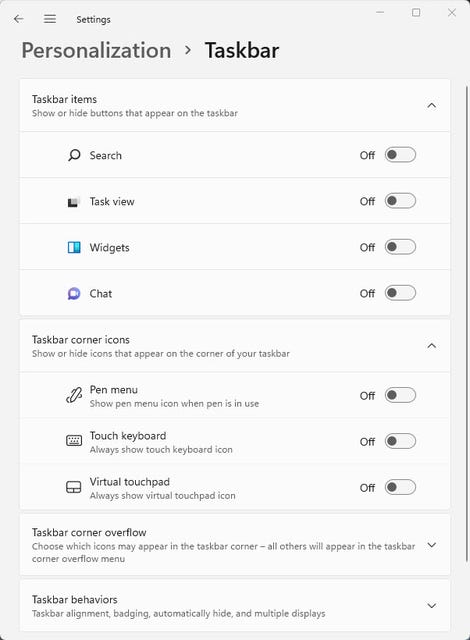
There are also some goodies at the bottom of this settings page. Expand the “Overflow” section from the corner of the taskbar to control which icons appear by default on the right side of the taskbar. And if you have multiple monitors, be sure to click “Taskbar Behaviors” to review options for how the taskbar works on a second monitor.
6. Configure OneDrive backup
You get at least 5 GB of free storage in Microsoft’s OneDrive service when you sign in with a Microsoft account. This feature includes a setting that can be confusing if you’re not careful.
If you click on the default options, Microsoft will redirect your Desktop, Documents, and Pictures folders to OneDrive, which has the effect of backing up anything you place in any of those folders. If you already have a strong backup strategy, it’s best to disable this feature. If you like the idea of having cloud-based backup, you can check out these settings.
To do this, open File Explorer, right-click the OneDrive shortcut in the folder pane on the left, and click OneDrive > Manage OneDrive backup. This takes you to the dialog shown here. Note that the options will be disabled if you are using a system managed by your company using an Azure AD domain or account.
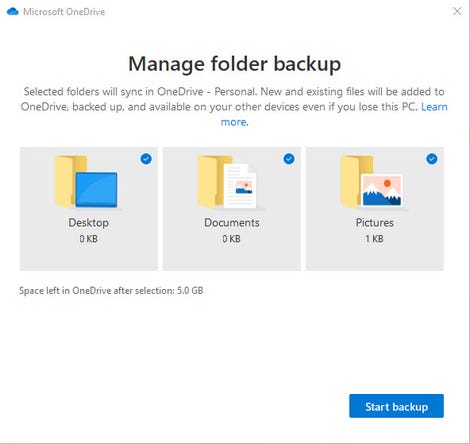
When folder backup is enabled, these three folders are automatically relocated to OneDrive.
You can disable backup for each of the three folders with a single click. The blue tick in the upper right corner means the folder is backed up and synced.
Source: ZDNet.com