Screenshot by Lance Whitney/ZDNET.
Many AI-powered image generators offer to create images from the descriptions you submit to them. But if you haven’t yet taken the plunge, know that there is one more at your fingertips than the others: the image generator integrated into Paint.
If you use Paint on Windows 11, you can take advantage of the Co-Creator tool to generate images using artificial intelligence: describe the image you want to generate, then choose your style (watercolor or photorealistic, for example) . Cocreator then offers you three different images, which you can then modify or save.
Here’s how to take advantage of the Cocreator AI image generator on Paint.
1. Update Windows 11
The AI image generator was integrated into Paint with the Windows 11 September 2023 Update. So first of all, you need to make sure you have a fairly recent version of Windows.
To update your version of Windows, go to Settings > Windows Update, then check for available updates. Then click on Download and install everything to install the latest version of Windows 11.

2. Update Paint
Next, make sure you’re using the latest version of Paint. The easiest way is to update all apps from the Microsoft Store.
To do this, open the Microsoft Store, go to Library (left), then click Get updates.

3. Launch Paint
Open Paint. You can find the application in the Start menu, displaying All appsor by typing “Paint” in the search bar.
A new document appears on the screen, blank. Click on the button Co-creator :

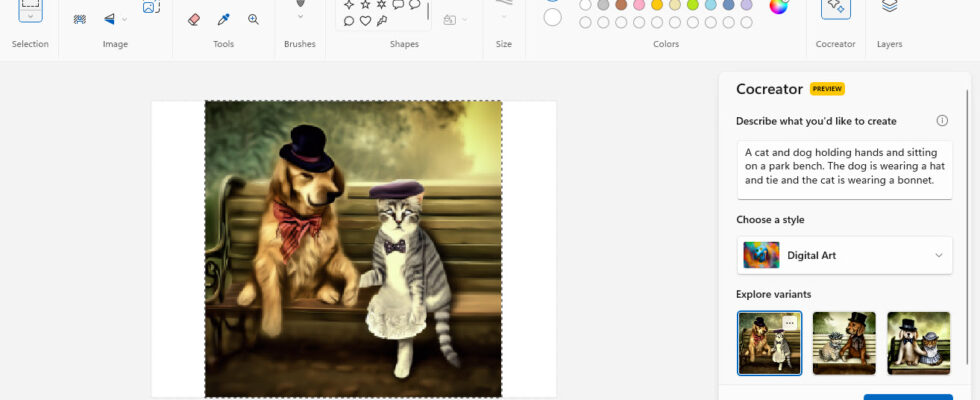
4. Enter the description of the image to generate
A Co-Creator pane opens on the right. Enter the description of the image you want to generate in the text box, trying to be specific and descriptive, without overloading with details.
Don’t worry: if you want to add things later, you can always edit your description.

5. Choose a style for the image to generate
Click on No selection. A menu appears, where different styles are offered: Anthracite, Handwritten Sketch, Watercolor, Oil Painting, Digital Art, Photorealistic, Animation or Pixel Art.
Choose the one you want to apply to the image that will be generated.

6. Generate images
Once you have entered the description and chosen a style, click Create to generate your images.
Paint then offers you three thumbnails. Click on the one of your choice to display it in the center of the document. You can then use the menu Display to zoom in or out to fit the image in the window.

7. Generate new images
You can generate new images by editing your description or changing your style.
Once you have made your changes, press again Create. Paint displays a new series of three images.

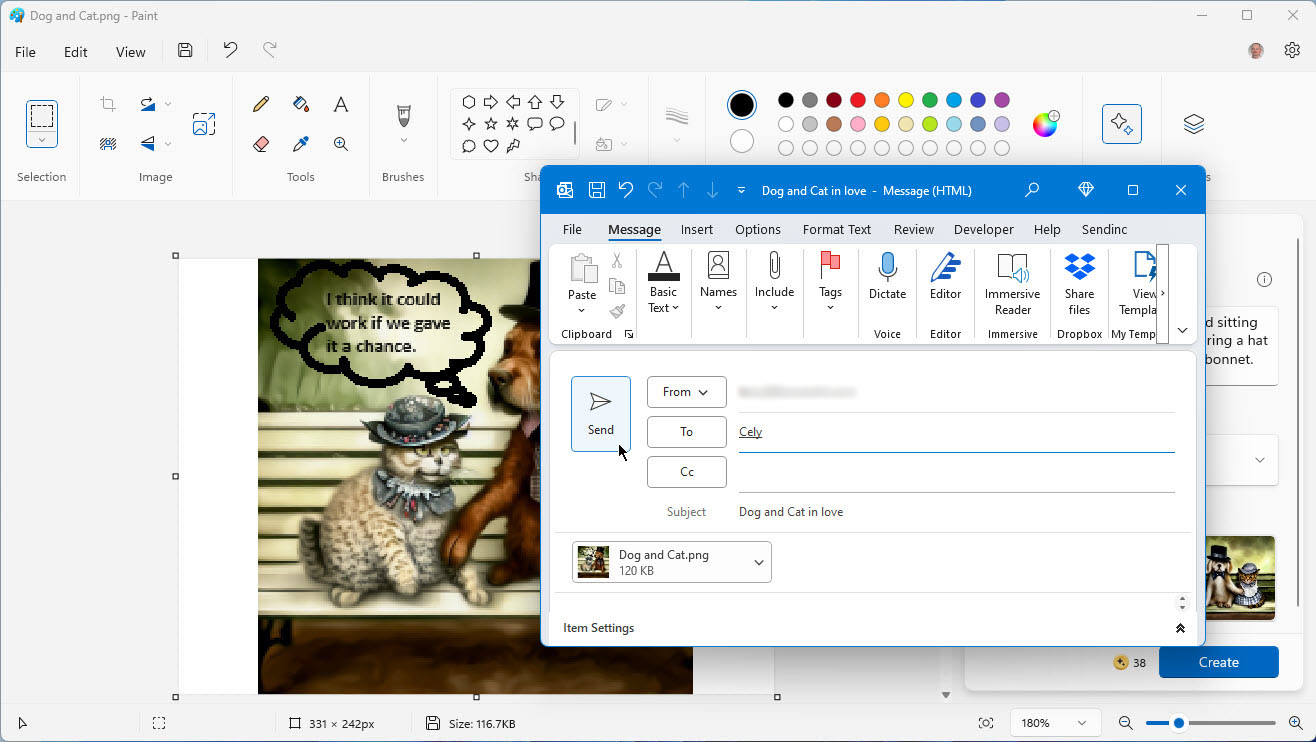
8. Edit one of the generated images
Click on the image you want to keep to display it in the center of the screen.
Then use Paint’s editing tools to modify it – if you wish: for example, you can change a color, draw shapes or add text to the image.

9. Save one or more images
To save one of the generated images, modified or not, go to File > Save As, then choose the image format you want between PNG, JPG, BMP, GIF or other. Then choose the folder where you want to save the image.
To save multiple images from the same series, repeat the operation with each selected image.

10. Email an Image
To share one of the images you generated with Paint’s AI tool by email, go to File > Send.
Your email application will then open to a new email, with the image attached. Fill in the necessary fields (recipient address, subject, etc.), then click Send.
Screenshot by Lance Whitney/ZDNET.
Source: ZDNet.com