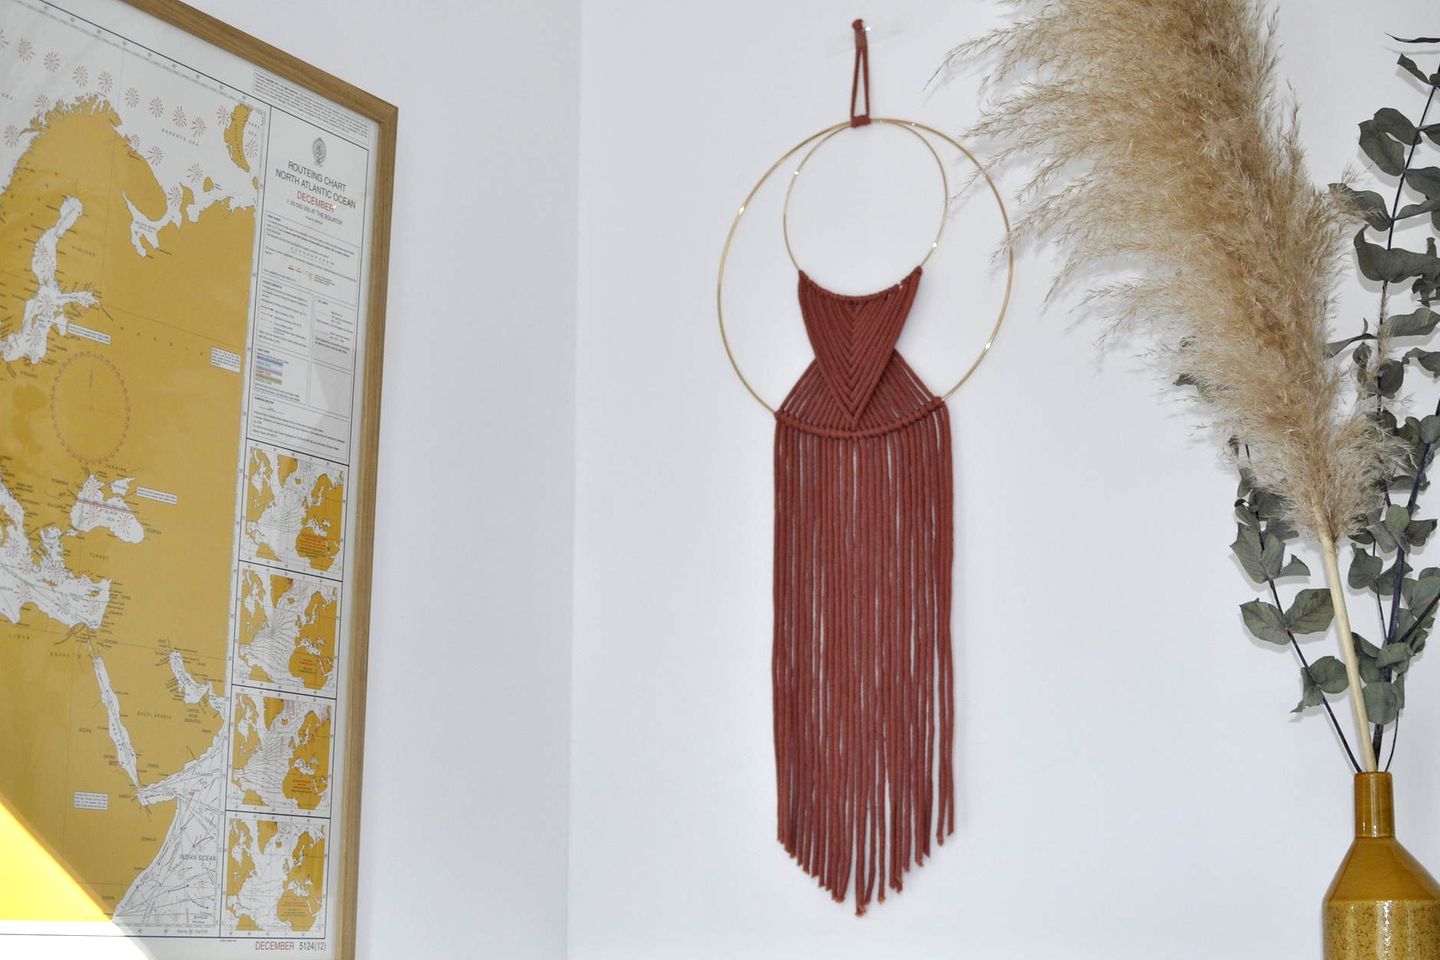
DIY wall decoration
We love boho! Instructions for a macrame loop
© SELFMADE

DIY wall decoration immediately makes every apartment more comfortable. Here we explain how you can make a pretty, easy-peasy boho wall hanging yourself.
We love wall decorations
Art prints, photos, wall plates and so on – chic Luckily, there are many wall decoration ideas! The decoration makes our home cozy and gives it our very own personal touch. If you want to make your latest favorite piece yourself, this wonderful guide is for you SELF-MADE-Stores from Berlin – which we are proud to introduce to you here – are DIY-loving!
Material for homemade wall decoration
For your DIY wall decoration in boho style you need:
- 2 different sized metal rings
- Wool in your desired color (seen here: “Cheerful FRAYA”, old pink, 50 m)
- Tape measure
- Scissors
- duct tape
- possibly painter’s tape

© SELFMADE
DIY wall decoration: step by step instructions
Macrame is more popular than ever – no wonder, we definitely want to have this delicate weaving technique on our walls. You can now find out step by step how you can make such a chic boho-style decoration yourself. Let’s go!
Step 1 – Cut and knot
Cuts the wool 13 strips to, each one should be about 1.5 to 2 m long. Fixes the two metal rings, e.g. B. with an adhesive strip. The smaller ring is on the inside.

© SELFMADE
Do this for all wool threads. Try to tie the knots and threads as evenly as possible.

© SELFMADE
Step 2 – Arrange threads
Now divide the middle strand of wool in the middle again and lay it down right over the left and then the strands to the side.

© SELFMADE

© SELFMADE
Step 3 – Make macrame
Same thing, right over left, with all the other strands!

© SELFMADE
This is what it looks like when they are all laid out like this:

© SELFMADE
Step 4 – Knot the pretzels
Now it’s about connecting to the large metal ring; you work from the inside out.
Grab the lowest thread, pass the bottom end through the large metal ring, place the strand to the right to the side so that a loop is created. Then pull the end through the loop – it now looks like a small pretzel. Tighten.

© SELFMADe
Now grab the lower thread on the side and proceed in the same way and now alternately knot the pretzels – until they are all knotted:

© SELFMADE

© SELFMADE

© SELFMADE
The result is impressive!

© SELFMADE
Step 5 – Hanging loop
Now you can fix the two rings at the top and at the same time attach a suspension for your DIY decoration. To do this, make another loop, like the initial knot, and pull it tight:

© SELFMADE
Step 6 – Final touch-up
To make the bottom end look nice and even, cut it to size. Lay the threads straight next to each other and in an orderly (!) manner. Whether you want a straight or diagonal finish is up to you. It is best to fix the threads with a strip of painter’s tape and cut along them.

© SELFMADE
Even tapering looks really stylish with DIY wall decoration – and is ready to decorate your wall with a touch of boho!

© SELFMADE

© SELFMADE
Are you looking for more ideas for wall design? There is great inspiration for every room here: