
Data privacy has become absolutely crucial for businesses. Some of them go to great lengths to protect their data, files and communications.
But individuals and small businesses seem to think that adding extra security isn’t worth the extra work required. The problem is that those who refuse to take further action risk being the victim of a data breach.
You may have sent sensitive information in a simple email, only to find out that a malicious actor intercepted the message and was able to easily read the contents of that email and extract the information.
You don’t want such a situation, do you? Even if it takes a little more work for you, then it’s better to be safe than sorry.
So what to do? You encrypt your email.
What is Email Encryption?
Email encryption is a way of restricting access to an email so that only the recipient can read it. This works through encryption key pairs, as follows:
- The recipient creates a GPG key pair (composed of a public key and a private key) and sends you the public key.
- You import the public key into your keyring.
- You then send a message to the recipient’s email address (associated with the new imported key).
- The recipient receives the message and can read it because they have the private key corresponding to the public key you imported.
If the email is intercepted en route, it cannot be read without the corresponding private key. Of course, this raises a crucial question that cannot be stressed enough: never share your private key with anyone.
Sure, using email encryption adds extra steps to your process, but when it comes to sensitive information, those extra steps are well worth it.
Since every email client works differently, I’m going to demonstrate using the open-source Thunderbird application. I’ll also show you how to create your GPG key (using GnuPG), so you can help your recipients generate the necessary key pairs so they can send you their private keys.
Here’s how it works.
How to encrypt your email
1. Generate a key pair
I will demonstrate on Pop!OS Linux, but it will work the same on any platform that supports GnuPG (Linux and MacOS). For the Windows operating system, you will need to use Gpg4win.
To generate a key pair, open a command prompt window and issue the following command:
gpg –full-generate-key
You will be asked the following questions (answer by default):
- Please select the type of key you would like:
- What key size do you want?
- The key is valid for ?
When prompted, validate and verify the key creation. You will then need to add a real name, an email address associated with the key, and an optional comment. Finally, you will need to enter and verify a password for the new key pair. After that, your key is created and ready to be exported.
2. Export the public key
Next, we need to export the public key so that we can send it to the person who will need to send you an encrypted email.
To export the key run the following command
gpg –export -a “EMAIL” > public_key
EMAIL is the email address associated with the key you just generated. Once you have generated the file (named public_key), send it to the person who will encrypt the email to you.
3. Importing a public key
Next, we need to import the public key sent to you. Open Thunderbird, click the Menu button and go to Account Settings. In the left sidebar, select End-to-End Encryption, then OpenPGP Key Manager.
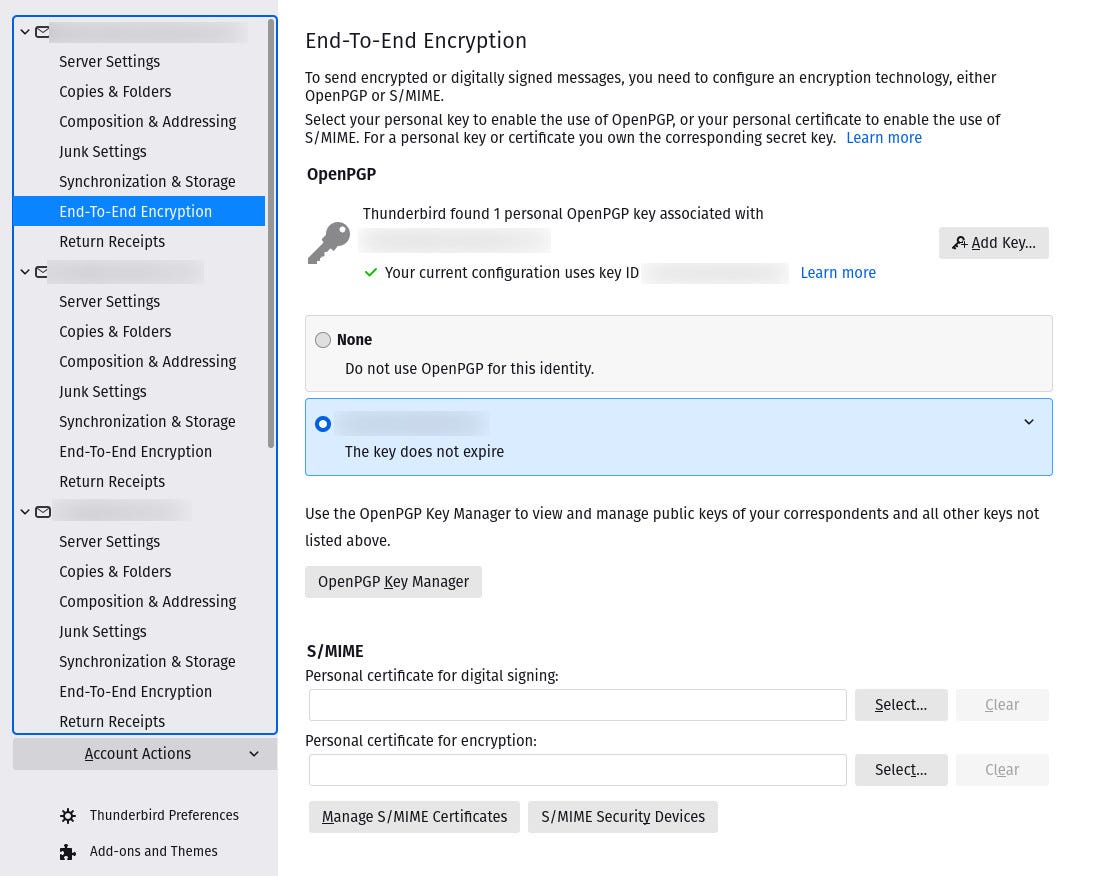
Access to OpenPGP Manager from Thunderbird. Screenshot by Jack Wallen/ZDNET
4. Select All Files
In the menu, in Fileimport a public key from a file, then make sure to select All the files from the drop-down list in the lower right corner of the window.

Importing the public key from the OpenPGP key manager. Screenshot by Jack Wallen/ZDNET
5. Locate the key
Locate the file you saved (the public key of the recipient who will receive your email) and click Open. In the window that is displayed, accept (choice not verified) and validate. The key is imported and ready to use.
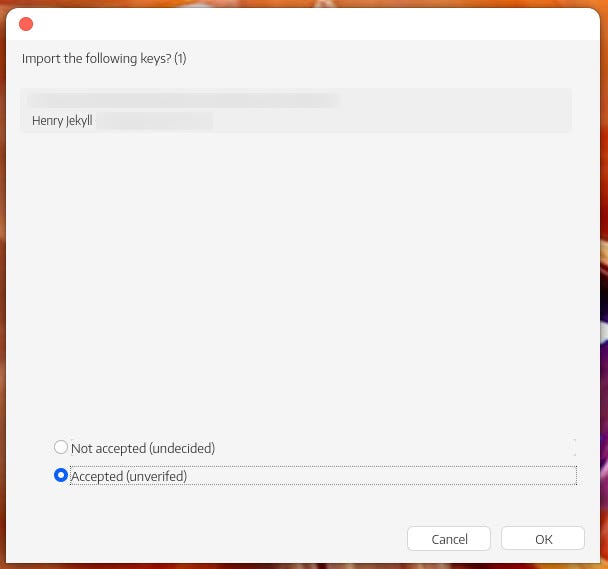
Importing Henry Jekyll’s key might not be the best idea, but I’m going isn’t Mr. Hide? Screenshot by Jack Wallen/ZDNET
6. Close the key manager and compose a new message
Close the Key Manager and return to the main Thunderbird window. Compose a new message to the email address associated with the encryption key, then (in the message composition window) click the drop-down menu Security and require encryption and digitally sign this message.
Send the message as normal, and it will be encrypted so that the only person who can decrypt it is the owner of the private key that matches the public key you imported.
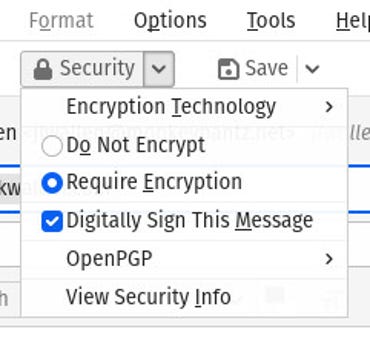
Encrypt and sign your new email. Screenshot by Jack Wallen/ZDNET
This is how email encryption works. I hope you find this a lot easier than you think and it inspires you to use that extra layer of security in your email communications.
Source: “ZDNet.com”