Even if your Internet Service Provider’s (ISP) DNS (Domain Name System) is working correctly, it can be modified to make your browsing faster and more secure. Regardless of your ISP, remember to check the DNS servers used on each of your devices. Indeed, most of the time, their default settings are not optimal.
For example, it is possible to use secure DNS to browse the internet in complete confidentiality and security, thanks to a DNS that encrypts all your searches. Therefore, these cannot be read, even if someone manages to spy on your browsing data. Additionally, third-party providers generally offer much faster DNS servers than ISPs.
If you think that setting up a DNS server on your Chromebook is too technically complex for you, I’m going to prove you wrong. Here’s how to do it.
1. Open your Chromebook Settings
Before you begin, make sure your Chromebook has the latest Chrome OS update. Updating your device regularly allows you to have the latest features, but also and above all to apply security patches.
Turn on your Chromebook and log in. Then go to Settings by clicking on the gear icon in the system tray (in the lower right corner of the screen). In Settingsclick on Networkthen select your Wi-Fi connection.
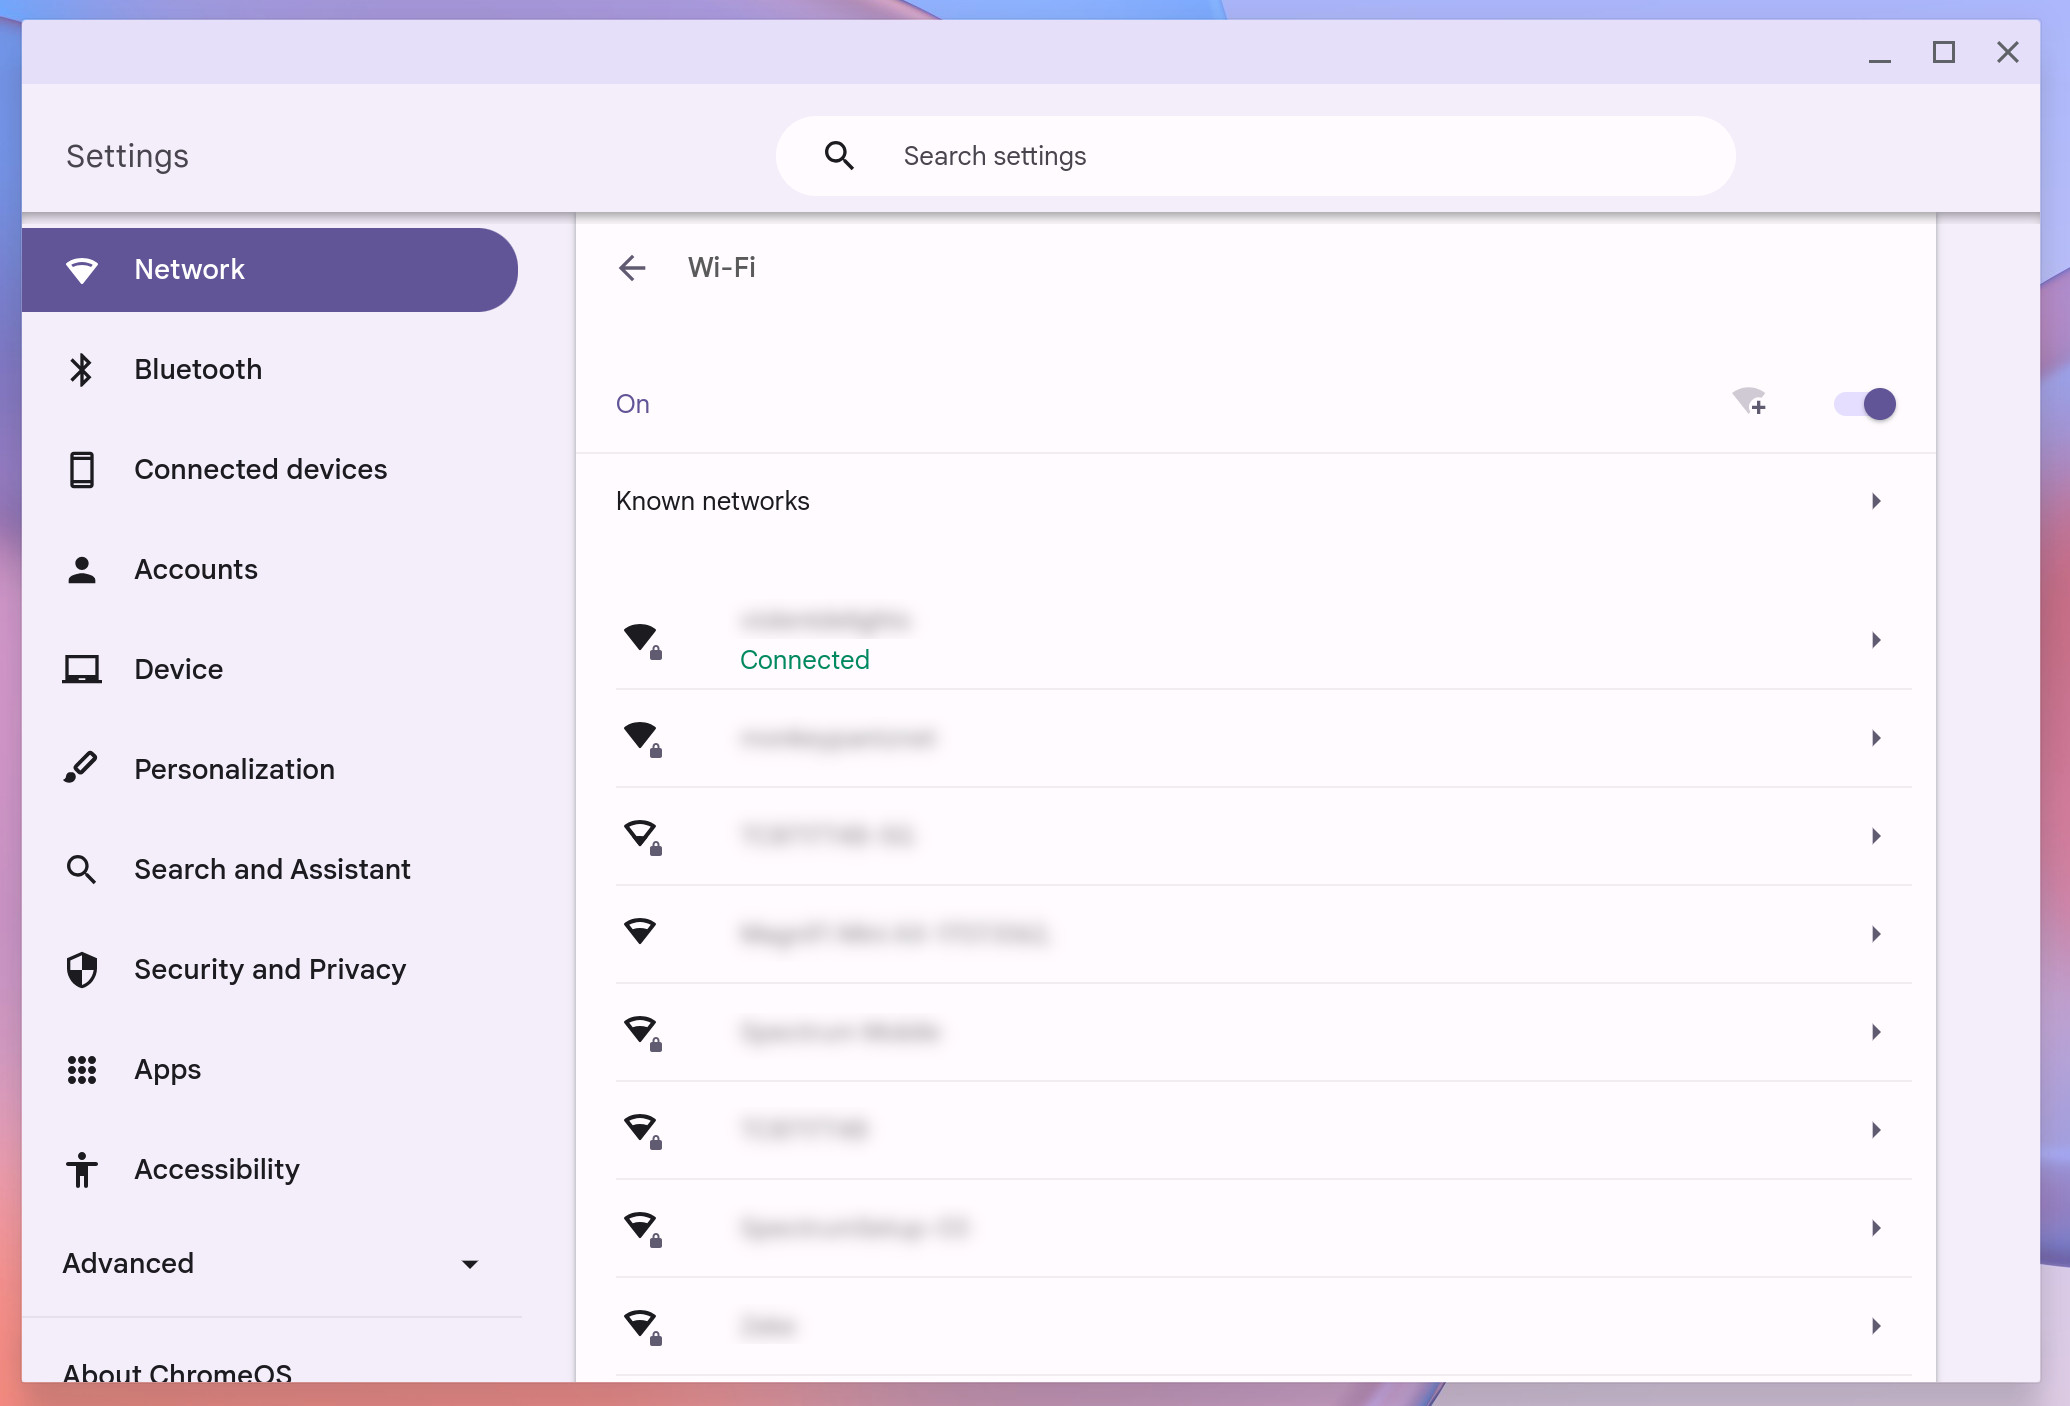
Screenshot by Jack Wallen/ZDNET.
2. Disable automatic IP address configuration
On the page that appears, click Networkthen turn off the option Configure IP address automatically by clicking the switch.
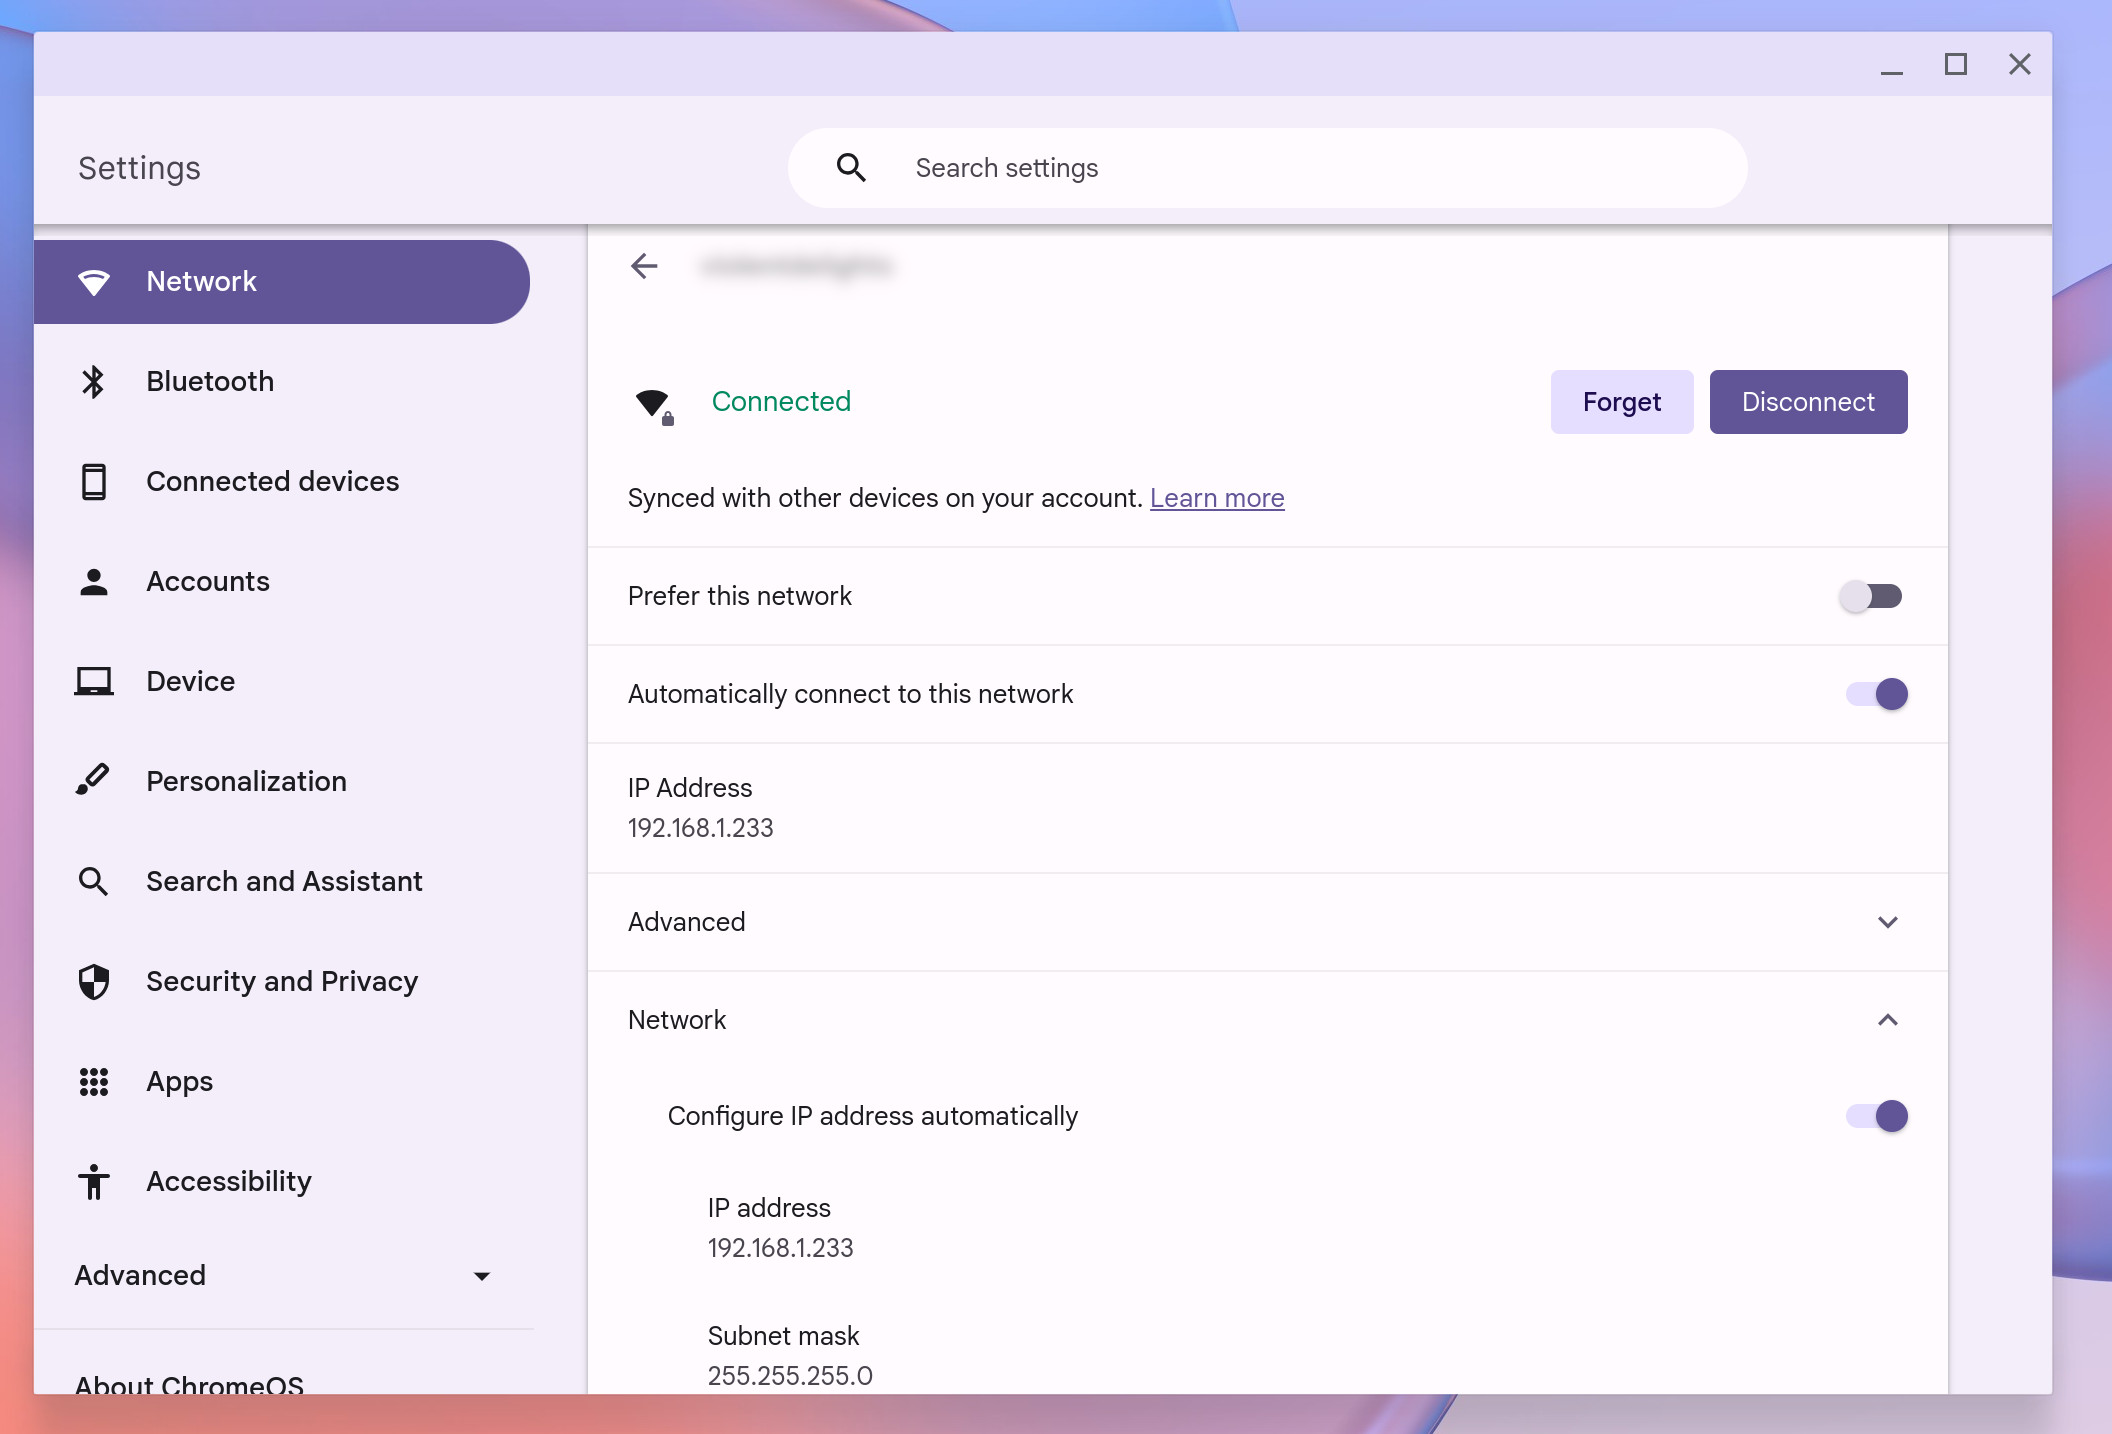
Screenshot by Jack Wallen/ZDNET.
3. Change Name Servers
Leave everything as is except the option Name servers. Instead of using the default option, you can opt for Google servers (8.8.8.8 and 8.8.4.4) or click Custom Name Servers and enter a primary and secondary server address (like 1.1.1.1 and 1.0.0.1 from Cloudflare).
I prefer to use Cloudflare’s nameservers because I find them faster and more secure than the default or Google options.
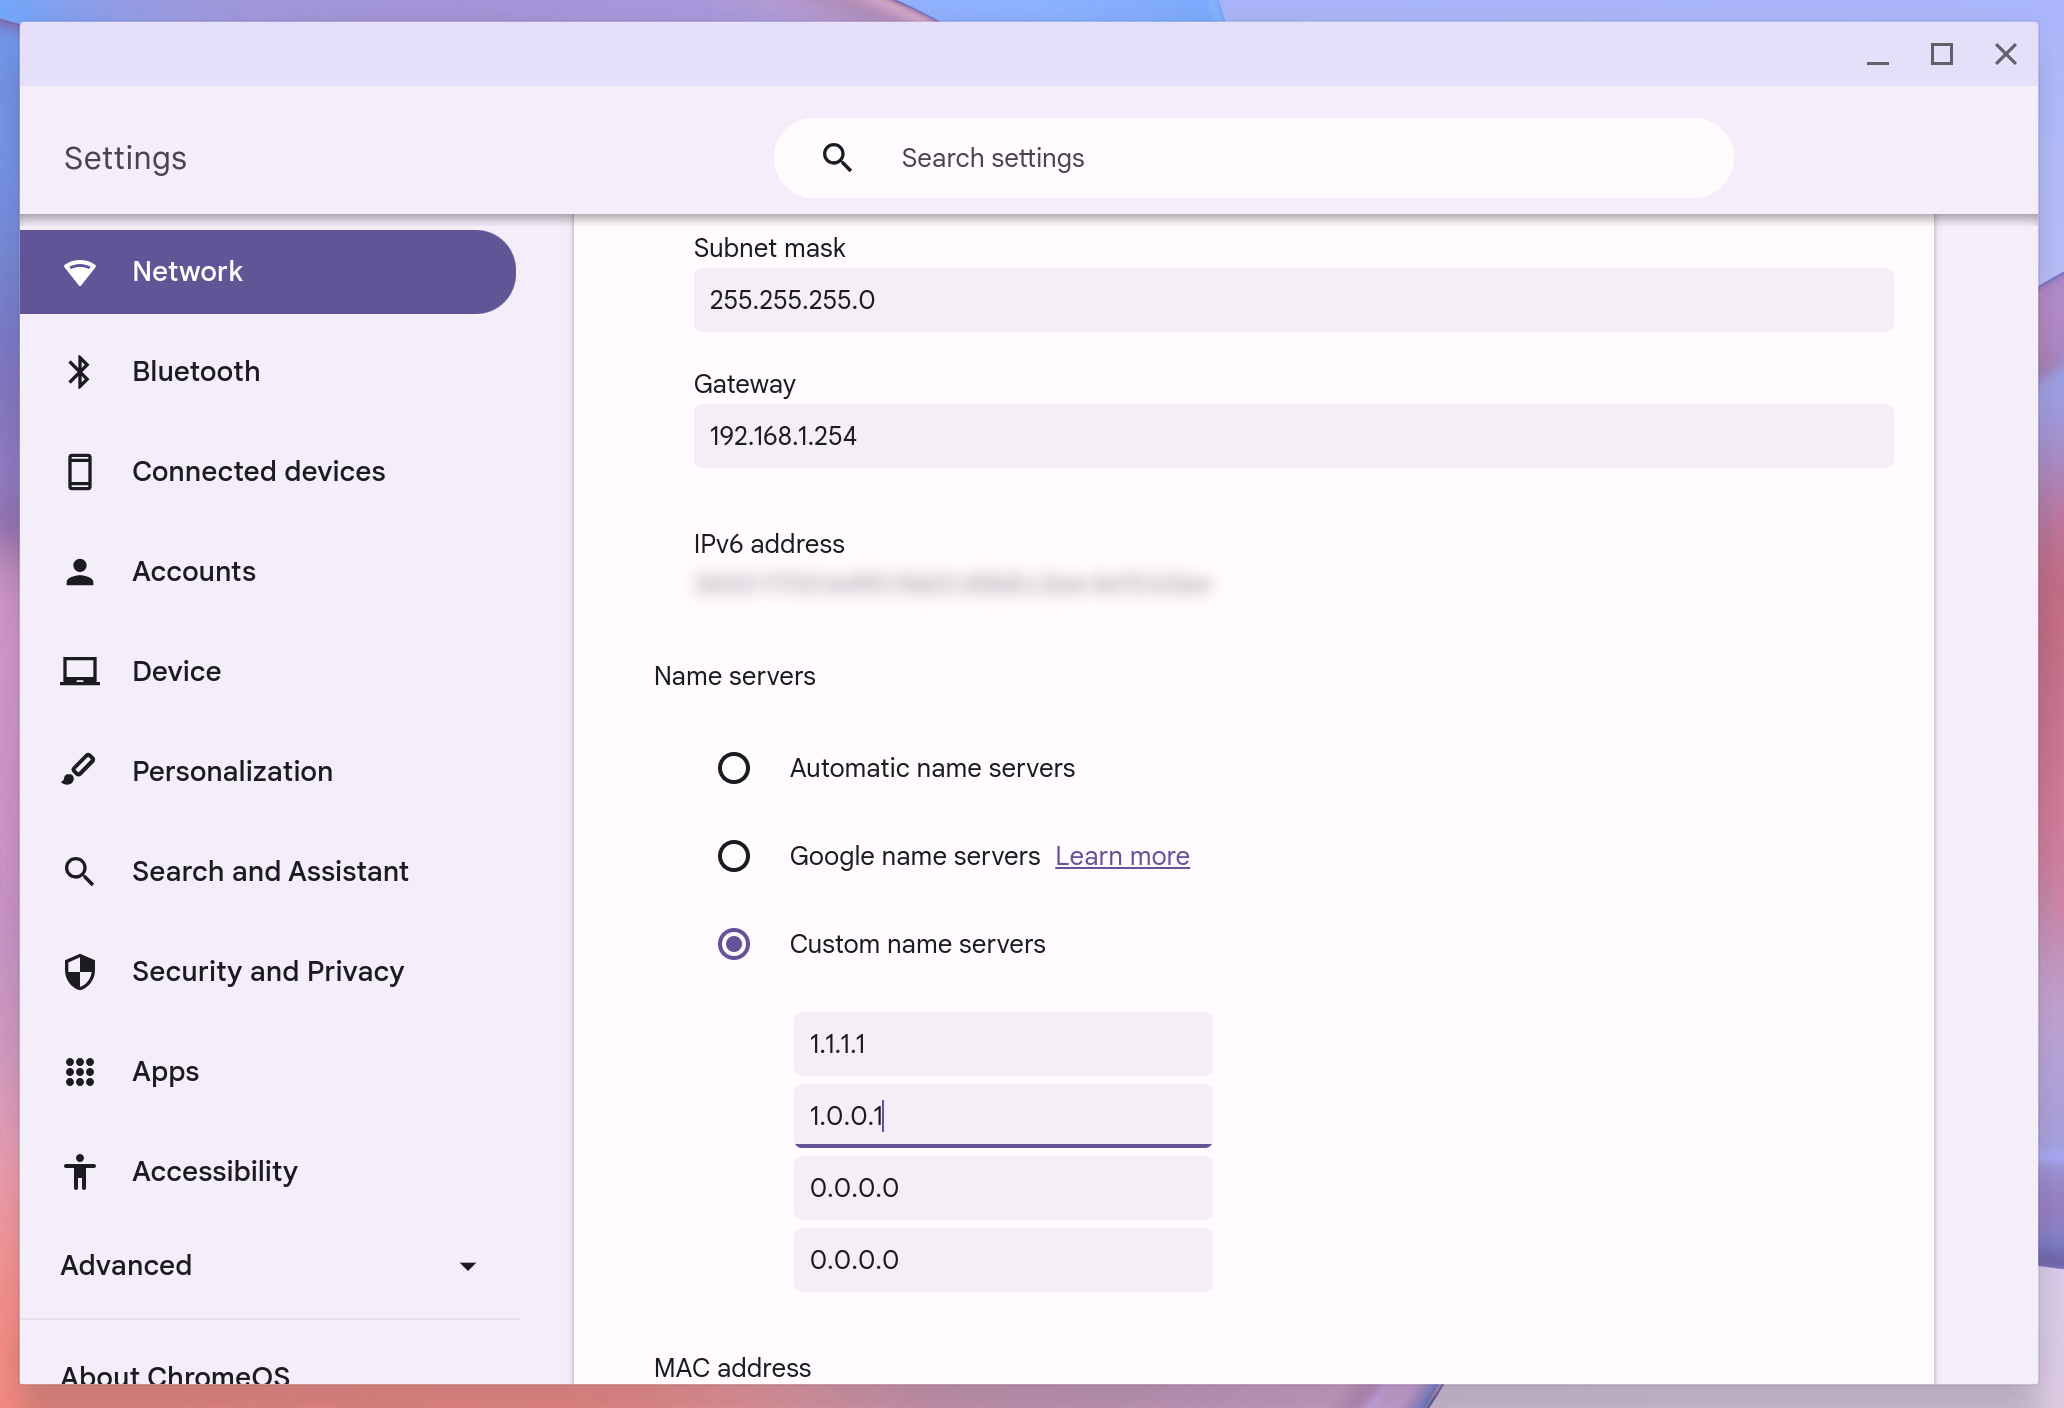
Screenshot by Jack Wallen/ZDNET.
Once you have configured the nameservers, you are done. You can close Settings and now enjoy faster, safer searches on your Chromebook.
Source: ZDNet.com