
Image: lechatnoir/Getty Images.
Would you like to be able to protect certain files or folders on your Mac, to ensure that anyone with access to them cannot modify or delete them?
Good news: macOS has a feature that allows you to lock folders or files of your choice. Once the lock is activated, you can only edit or delete a document after entering your password.
I can already see you snickering about the low security level of the feature. But in reality, its goal is not to secure your most sensitive documents: its main aim is to prevent you from accidentally deleting a document that you need. Obviously, it will not prevent you from accessing your documents. On the contrary, it is very easy to unlock data protected by this feature.
To illustrate the benefit of this feature, let me give you an example. You have just finalized a new presentation video. You have not yet published the file in question, awaiting validation. When you want to move it, you accidentally drag it to the trash. If you had previously locked the file, Finder will notify you directly that the file is locked, and ask you to enter your password to continue. Phew, you realize you were about to make a mistake and you undelete the video.
Below you will find instructions on how to use the Document Lock feature on macOS. It is available on all Macs. To fully understand how it works, you can start by practicing with a test document.
1. Open Finder
To get started, open Finder and find the document you want to lock.
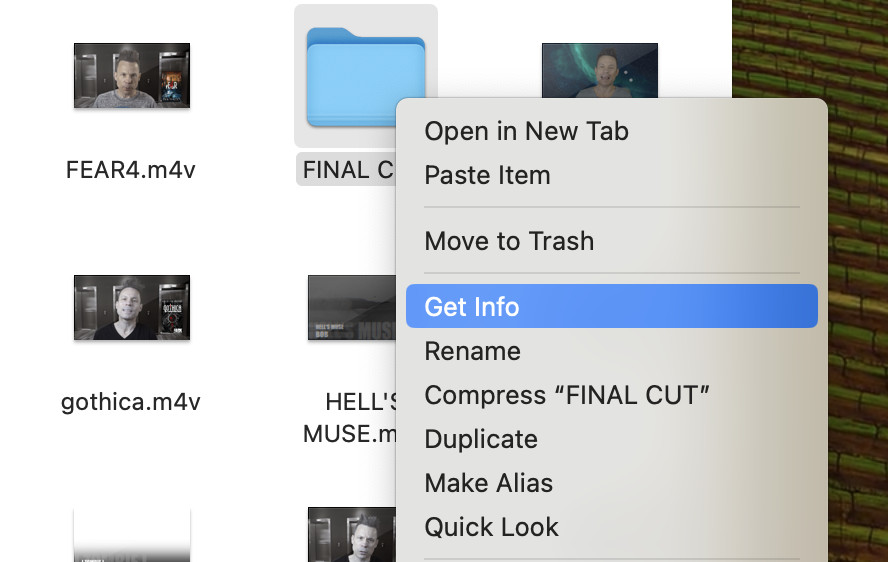
2. View document information
Right-click the folder or file (or double-click), then select Read the information. A window with the folder or file information is then displayed.
Screenshot by Jack Wallen/ZDNET.
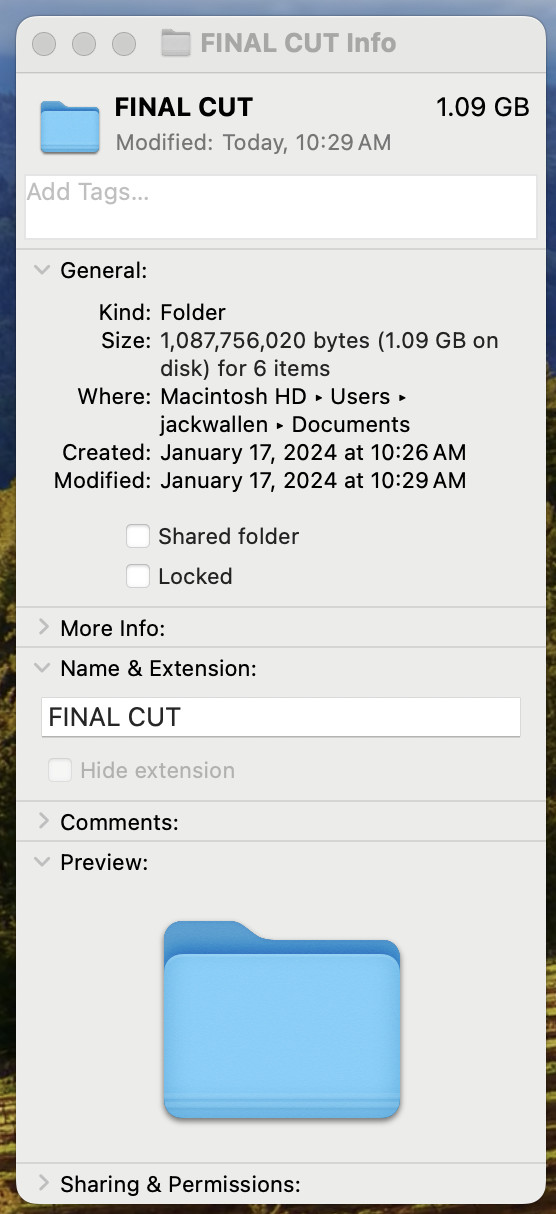
3. Lock the document
In the tab Generalcheck the box corresponding to Locked.
A lock icon then appears on your file (or folder): it is now locked. You can then no longer add files (if it is a folder) or modify or delete files without first unlocking the locked document.
Screenshot by Jack Wallen/ZDNET.
4. Unlock the document
To unlock a document, for example to be able to delete or modify it, reverse the process: Read information > Generalthen uncheck the box Locked.
Source: ZDNet.com