
I was always looking for a good note taking app. Until I discovered Tot, I hadn’t found exactly what suited me. My needs are simple: the application must be easy to use, efficient and without frills. I’ve tried many and often found them to be too bulky, offer more features than needed, or don’t work as expected.
Tot is an easy-to-use app that lets you collect notes and text across macOS, iOS, iPadOS, and WatchOS devices. It displays a single window for interacting with your notes, in dark or light mode, with iCloud synchronization, and support for markdown (text formatting) and shortcuts.
To be honest, I only use Tot on macOS because I don’t have any other Apple mobile devices.
What sets Tot apart from the competition? The app doesn’t claim to be anything other than a way to take and edit notes! One thing to keep in mind: Tot limits the number of “views” displayed on homepage. There are seven of them. A view is actually a tab that you can use to compile and organize your notes.
From there, you can do whatever you want with these views. For example, one view might be a shopping list, while the others might be project notes, snippets you want to keep, notes for yourself, a list of websites to check out later, or anything else. type of notes you want to keep. Ultimately, I like the idea of viewing views as categories that I keep as many notes in as I need.
With Tot, you can add lists, emojis, basic formatting (only italics and bold), and not much more. You can work with plain or formatted text (you can switch between them by clicking on the “a” located in the lower right corner of a window).
The app on macOS is free and installs from Apple’s App Store. There is no premium version of the app, so you have everything you need right away. That’s why I love Tot. Not because it’s free on macOS (because it’s paid for on iOS), but because it doesn’t try to be more than it is. It is not a collaboration tool, project or task management tool.
Below I show you how I use Tot.
How to configure Tot
You have two choices: use Tot from the desktop dock or the menu bar. I prefer to use the option Toolbar, because I configured my dock to auto-hide and I want Tot to be as easy to access as possible. To set this option, open Tot and click the gear icon in the upper right corner of the window. You will see a drop-down menu labeled “Control with”. From this drop-down menu, select Menu Bar Iconwhich will place a small circle on your menu bar (which you will need to click on to launch the application).
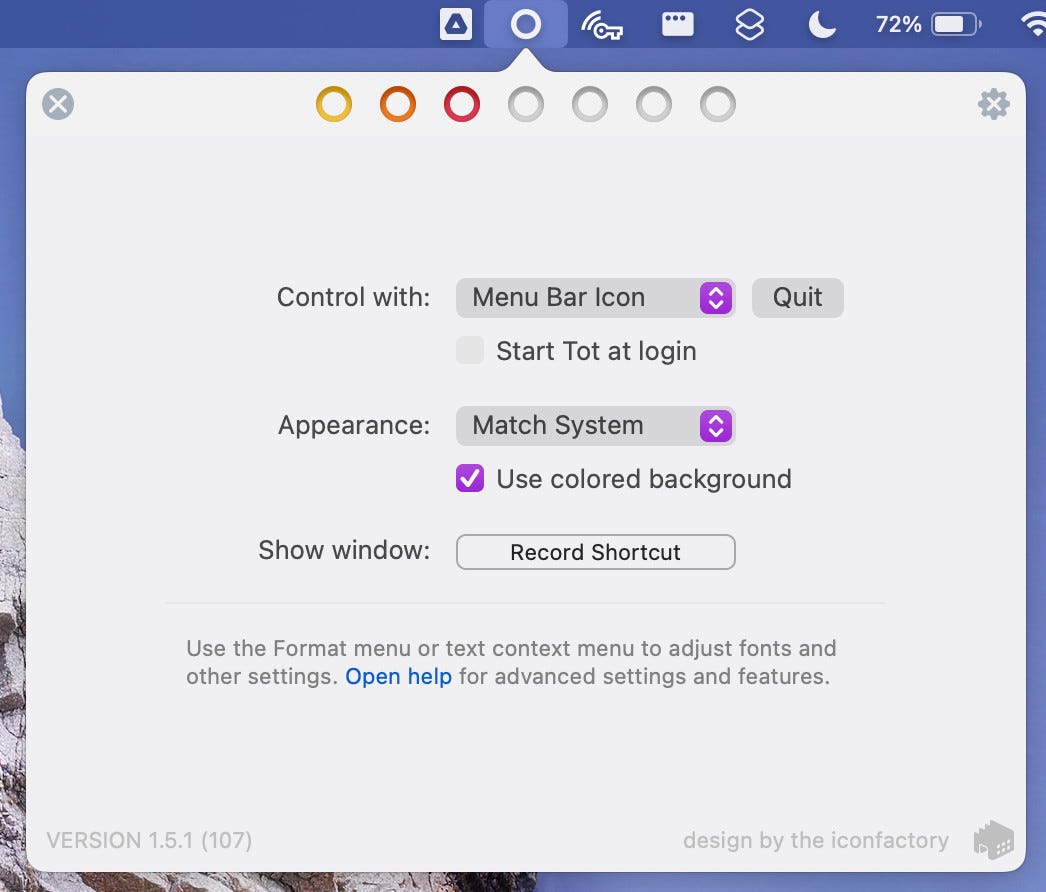
Image: Jack Wallen/ZDNET.
In this same settings window, you can set the theme of Tot, between Match System (in keeping with the theme of the system), Light (bright theme) and Dark (dark theme). You can also create a keyboard shortcut to open the Tot window, so you don’t have to click the Tot icon in the menu bar.
That’s it for the setup. Tot really is that simple.
How to use Tot
Click on the circle icon in the menu bar and the main window will open, where you will see the seven different circles, each representing a view. Click on the leftmost view and read the text “Welcome to Tot”. Click on the next view, which shows you the functions of Tot. Finally, the third view, which gives access to Tot’s tutorial.
Once you’ve read these welcome views, you can delete all the text in them and start filling out each view as you see fit.
Create lists
As you fill in your views, you will definitely want to create lists. To create a list, click on the asterisk at the bottom right of the window. A pop-up window appears, where you can select the type of bullet you want to use for your list. Once you select the chip, it will appear in your view. Type an item from the list and press the Enter key on the keyboard to activate the next item. Do the same until your list is complete. At the end of the list, press the Enter key twice to exit it.
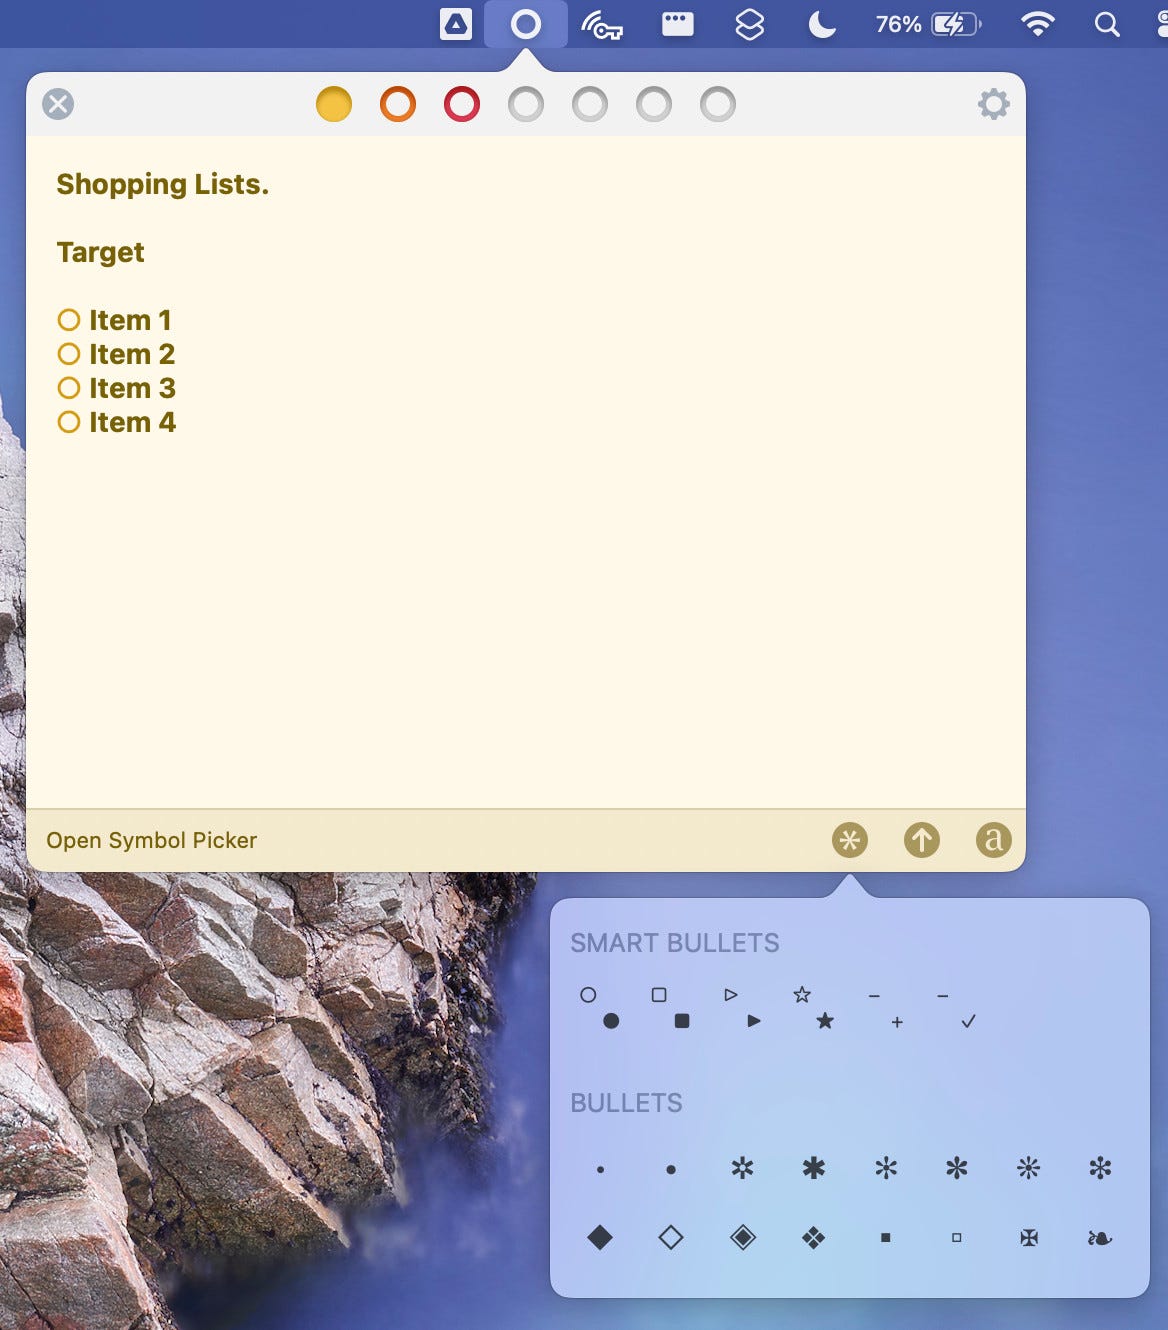
Image: Jack Wallen/ZDNET.
Share views
You can also share a view. To do this, click on the arrow pointing up in the lower corner of the view you want to share, then select one of the following options: Mail, Messages, Notes, Reminders or any other supported and installed application.

Image: Jack Wallen/ZDNET.
When you share a view, it does not create a link and does not allow you to add collaborators. For example, if you are sharing via email, Tot will simply paste the view content into the mail.
So that’s Tot. If you’re looking for a note-taking app that gets straight to the point, you can’t find much better. Tot is simple yet very effective at what it does.
Source: ZDNet.com