The trick with the metered connection
This also works with normal DSL or cable connections: Windows then assumes that the PC user has a data contract with a volume limit and only loads what is absolutely necessary from the network. This will create apps that Downloading data from Windows Store, possibly paused, live tiles no longer updated and only security-relevant updates are transferred. Unlike “crowbar tricks” that force the complete shutdown of the Windows Update function, security is not neglected here.
With these settings you ensure that Windows only downloads security updates.
Disable Windows updates
Read here how to declare your active Internet connection as a “metered” connection and stop the flood of updates. Perform the process on all networks used, such as at home and in the office:
- For example, to open the Windows settings, press the shortcut key Windows key + I. Then click on network and internet.
- If you don’t already see the Status page, click status. Then click under (Windows 10) or next to (Windows 11) your active network properties.
- In the next window, set the “Metered connection” switch to “On”.
- Complete! Unlock Windows settings with one click X. If you want or need to update Windows, turn the switch back to “Off” or allow updates via metered connections. To do this, switch to the menu windows updateClick on Expanded options and activate the switch “Download updates via metered connections”.
Important: The change also stops synchronization of the Microsoft cloud OneDrive. To turn it back on, just click the cloud icon in the notification area of the taskbar and then click the pause icon that appears.

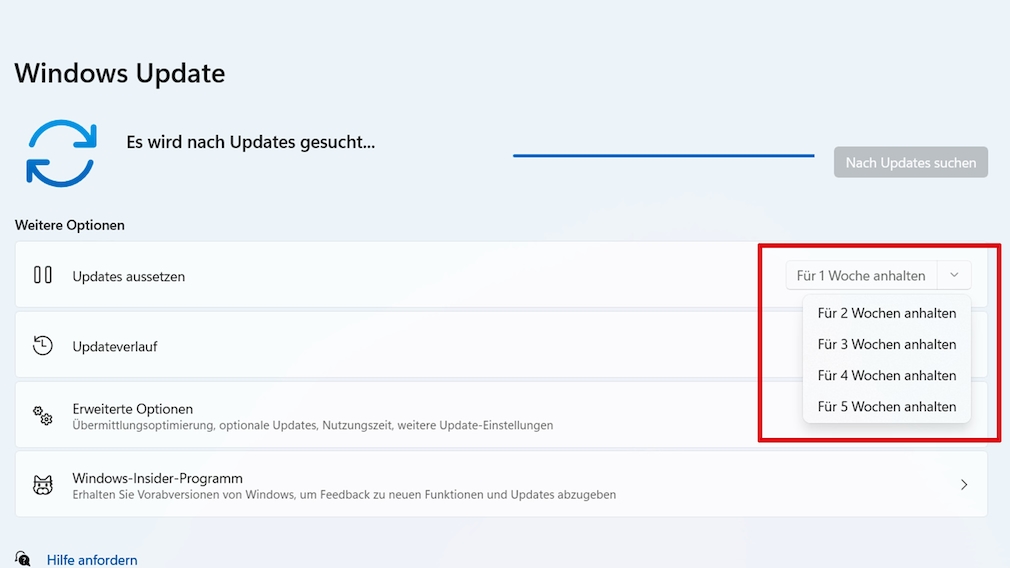
In the Pro version of Windows 11, the update block can be extended to up to five weeks.
Suspend Windows updates
- Open the Windows settings with the keyboard shortcut Windows key + I.
- Click Windows Uupdate.
- If a week’s rest is enough for you, click on Update pause for 7 days (Windows 10) respectively on Stop for 1 week (Windows 11). By clicking continue updates you can interrupt the break at any time.
- Under Windows 10, the break can be extended to 35 days. To do this, click Expanded options and below “Suspend updates” select the date on which the updates should continue.
- Unfortunately, this does not work in Windows 11. There, however, you can extend the update pause to up to five weeks if you switch to the Pro version. To do this, click on the arrow next to “Stop for 1 week” as in the image above and select the desired period
Customize Windows usage times
If you still feel disturbed by updates and the associated restarts, you should also adjust the usage times. You will then have peace of mind from annoying updates for up to 18 hours a day. Set the desired time period as follows:
- Open the Windows settings with the keyboard shortcut Windows key + I.
- click on windows updates, in Windows 11 additionally Expanded options.
- click on change usage time (Windows 10) respectively usage time (Windows 11).
- Now Windows shows the set usage time. If this is not enough for you, click in Windows 10 To changeset the start or end time, confirm with Save on computer and then set the switch to “On”. On Windows 11, on the other hand, click Automaticallythen up Manually and set the period. No switch needs to be activated there.

