design Easter eggs
Fresh ideas for DIY Easter decorations
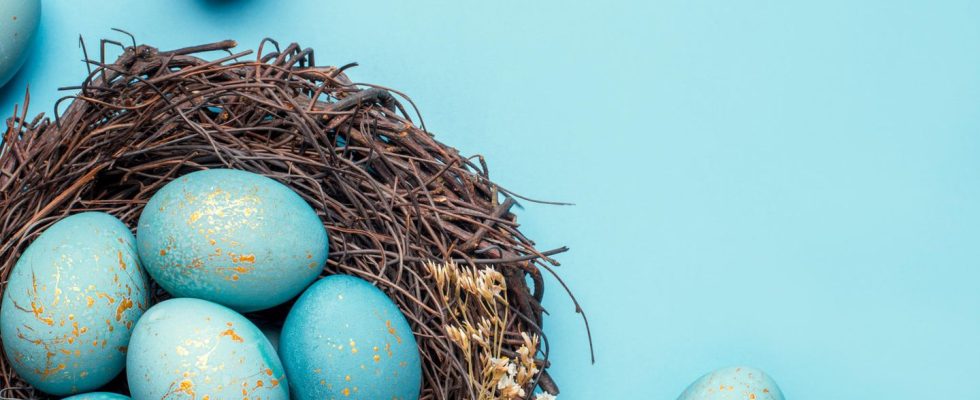
© Anna / Adobe Stock

Do you want to design Easter eggs? These methods and materials make them really chic – and original!
When Easter approaches, we like to give our apartment an Easter touch. You can make Easter decorations yourself, such as making an Easter wreath, sewing egg cosies or decorating eggs! For the latter, we have a few tips ready…
Design Easter eggs – but how?
Beautifully decorated eggs make a great impression on the buffet, as decoration or when looking for (or finding) eggs at Easter. The spectrum of imaginative variations is huge! We show you creative ideas that you can recreate, change or add to your taste.
These techniques are perfect for creating Easter eggs – an overview:
- Paint
- pasting
- marbling
- Grow
- generate omissions
- Stamp
- Gilding with gold foil
- Dyeing with silk cloth
- decoupage techniques
- hand lettering
There is also a large selection of materials – here is a selection:
Decide according to taste whether you want to prime the Easter eggs beforehand or decorate them in their natural state. Here we explain how to dye Easter eggs and dye Easter eggs naturally.
5 tips before designing
- Clean the eggs in a vinegar bath before decorating: Mix a liter of water with a teaspoon of vinegar essence and clean it gently. A good side effect: the eggshell is roughened by the vinegar, which means that the color is better absorbed.
- Blown-out Easter eggs are a better choice for most decorations, because ingredients could get inside hard-boiled eggs. If you want to use boiled eggs, put on natural colors!
- If you’re dyeing hard-boiled eggs for the buffet, skip the post-cooking quenching. This makes it easier for germs to penetrate through the eggshell, causing eggs to spoil faster. If you want to keep them longer, they should be used up within four weeks when refrigerated.
- Only use fresh eggs and make sure the eggshell is undamaged before blowing it out. More tips about Blow out eggs.
- Put blown out Easter eggs on a wooden stick, so they are easier to paint. It is best to attach a rubber band under the egg so that it does not slip down.
Inspiration for designing Easter eggs
We present you with a selection of beautiful ideas with instructions. Which ones make it into your Easter decorations?
1. Glue on buttons © Jenny Storm / Adobe Stock
The perfect idea for anyone who can’t (or doesn’t want to) draw and still wants an original presentation for their Easter decorations.
You need this:
That’s how it’s done:
- Coat the buttons with glue and carefully press onto the desired areas.
- They can be distributed on the egg or glued around the whole Easter egg as a border.
- To make the decorative eggs even more colourful, you can prime them in a cheerful color beforehand.
2. Dried flowers © sonyachny / Adobe Stock
Flowers, fresh or dried, are part and parcel of a beautiful Easter celebration, so why not have them on an Easter egg?!
You need this:
That’s how it’s done:
- Position the dried flower on the egg and make a note of roughly where it will rest.
- Put some glue on these spots.
- Gently press the flower onto it. Let dry.
3. Decorate Easter eggs with borders © Peti / Adobe Stock
Little effort, big eye-catcher! With borders or wool yarn, the eggs get a romantic, elegant look.
You need this:
That’s how it’s done:
- Apply some glue to the lace border on the back and then carefully wrap it around the egg.
- Lightly press.
- Let dry.
- It gets a bit more complex if you glue on a pattern (as in the picture on the right) made of thin threads.
- Each variant can be further decorated with half pearls, for example.
Tip: Self-adhesive ribbons and lace borders are also available in stores!
4. Last minute decor with Labelmaker © emmi / Adobe Stock
Of course, priming is only optional: if you want the decoration to go as quickly as possible, a label maker is the perfect method. How about names of family members, guests or just the words “Happy Easter”?
You need this:
That’s how it’s done:
- Set and print the desired lettering on the Labelmaker.
- Glue onto the egg.
5. Glamor for Easter eggs © ink drop / Adobe Stock
With such highlights you set classy highlights!
You need this:
- Blown out chicken eggs
- Glue
- Paint brush
- glitter
- Peel
That’s how it’s done:
- Put glitter in a bowl.
- Apply the glue to the egg with the brush.
- Gently rotate the egg through the glitter until completely covered.
- Let dry.
6. Transfer napkin pattern © Jan Schuler / Adobe Stock
A classic among the design methods is the serviette technique.
You need this:
That’s how it’s done:
- Separate the top layer of the napkin and tear into small pieces, paying attention to the motifs you want (e.g. flowers).
- Lubricate the egg with napkin glue.
- Glue a piece of napkin to the Easter egg and smooth it out with the brush.
- Do this until the egg is completely covered.
- Finally, coat the entire egg again with the napkin glue.
Works with newspaper too!
7. Gild Easter decorations © ksu_ok / Adobe Stock
The egg decoration with gold foil is beautifully elegant – and it’s also super easy!
You need this:
That’s how it’s done:
- Brush some of the eggs with glue.
- Press the gold foil carefully onto the egg and smooth it out with the brush. The film sticks to the splices.
- Remove the remaining gold foil.
8. Easter egg with wool decoration © martinsl73 / Adobe Stock
Simple decoration idea for everyone who likes things minimalist but sophisticated.
You need:
That’s how it’s done:
- Wrap the yarn around the center of the egg once, leaving the beginning of the yarn sticking out on the side.
- Now continue to wrap around the egg to the desired width of the decoration.
- Finally cut off the yarn and tie a knot with the starting yarn.
9. Masking tape pattern © Atelier Miriam / Adobe Stock
Just as simple as it is beautiful: design with masking tape. Also ideal if you want to decorate Easter eggs with children – guaranteed without mess.
You need:
- Blown out (dyed) Easter eggs
- masking tape as desired (various widths and designs)
That’s how it’s done:
- Stick the masking tape as a border or criss-cross over the egg.
- For a special effect, cut the tape into small pieces and stick them onto the egg from top to bottom.
10. Original paper bunnies © Ira_Shpiller / Adobe Stock
Guaranteed not to hop out of the Easter nest.
You need:
- chicken eggs
- Craft paper
- sisal tape
- Small cotton ball
- Glue
- Scissors
That’s how it’s done:
- Wrap the fine paper around the egg and secure it at the top with the sisal ribbon.
- Use the scissors to cut two ears out of the excess paper.
- Glue the cotton to the Easter egg.
You like it more conspicuous? Then take a look at this tutorial for unicorn Easter eggs:
6 images
Crafts with children: 3 simple instructions
Most children not only enjoy looking for Easter eggs, but also designing the eggs. With the following simple instructions, Easter handicrafts are guaranteed to succeed.
1. Happy bunnies © Photocreo Bednarek / Adobe Stock
These cute egg bunnies also want to be there at Easter.
You need:
- Craft cardboard in two colors
- Glue
- Pen
That’s how it’s done:
- Draw two ears on the cardboard and cut them out.
- Now draw two smaller ears again, which you then cut out.
- Glue the small ears into the big ears.
- The pair of ears is now attached to the back of the egg.
- Now paint the face.
2. Faces with flower hats © Sabine Schoenfeld / Adobe Stock
Spring is here with these Easter Eggs!
You need this:
- Blown Easter Eggs
- Glue
- Pencils)
- Flower
That’s how it’s done:
- Draw faces on the eggs with a pen (or several colors).
- Attach the flower to the top of the egg with some glue.
3. Egg in sheepskin © M.Dörr & M.Frommherz / Adobe Stock
The cute sheep are quick to make and sweeten the Easter decorations in no time.
You need:
- eggs
- Cotton balls of different sizes
- white felt fabric
- Glue
- felt pen
That’s how it’s done:
- Cover the egg with small cotton balls, except for a small area for the face.
- Below two larger balls are glued for the legs.
- Draw a face with the felt pen.
- Cut out two small ears from the felt fabric and glue them to the left and right of the face.
Are you looking for more inspiration? Then browse through our Pinterest board with great Easter decoration ideas.