Are you not at the office or simply on vacation and would like to let your colleagues or acquaintances know? Gmail makes it easy to schedule an out of office message. Here’s how to do it.
For people who struggle to find work or who have the anxiety of not being able to respond to professional or personal messages, a simple manipulation of your Gmail can save you anxiety and hassle.
The latter simply consists of setting up an automatic response when one of your contacts sends you a message and you are not able to respond. This message can take several forms depending on your unavailability. We are thinking in particular of warning of an absence linked to leave or a temporary absence.
But this can take other forms, such as better managing your workload by notifying senders of a delay in processing your emails and that you will get back to them as soon as possible. You can also use auto-replies to direct senders to other people or resources in case of emergency or immediate need, which can help you manage requests effectively. Finally, and we don’t think much about it, it is sometimes necessary to protect your privacy by limiting communication with certain people or by filtering unsolicited emails. An out-of-office message can serve as a temporary barrier to prevent certain senders from contacting you.
Here is the procedure to follow to set up an automatic absence message on your Gmail inbox.
How to set up an automatic absence message (or other) on your Gmail box?
On browser
- Open Gmail and log in to your account.
- Click on Settings at the top right (notched wheel) then on See all parameters.

- In the tab Generalscroll down to auto reply then select Auto-reply enabled.
- Select the start and end dates for activating your automatic email.
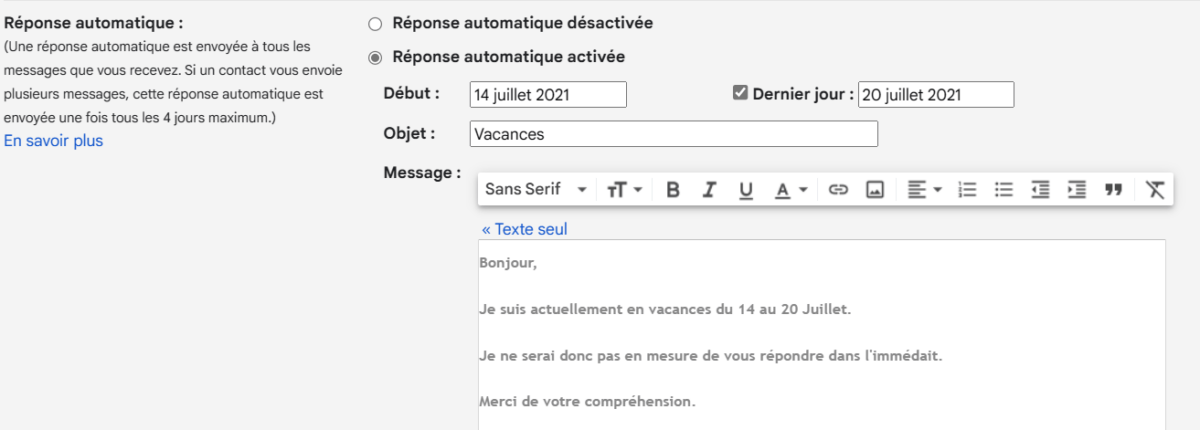
- Enter the subject of your automatic email as well as its content. You can customize it however you want.
- Then click on Save Changesat the end of the page.
Note that if you want to send the automatic response only to your contacts or your work area, you can check the box below. Also note that your Gmail signature is also displayed at the bottom of the automatic reply if you have defined it beforehand.
On mobile
- Open the Gmail app connected to your account.
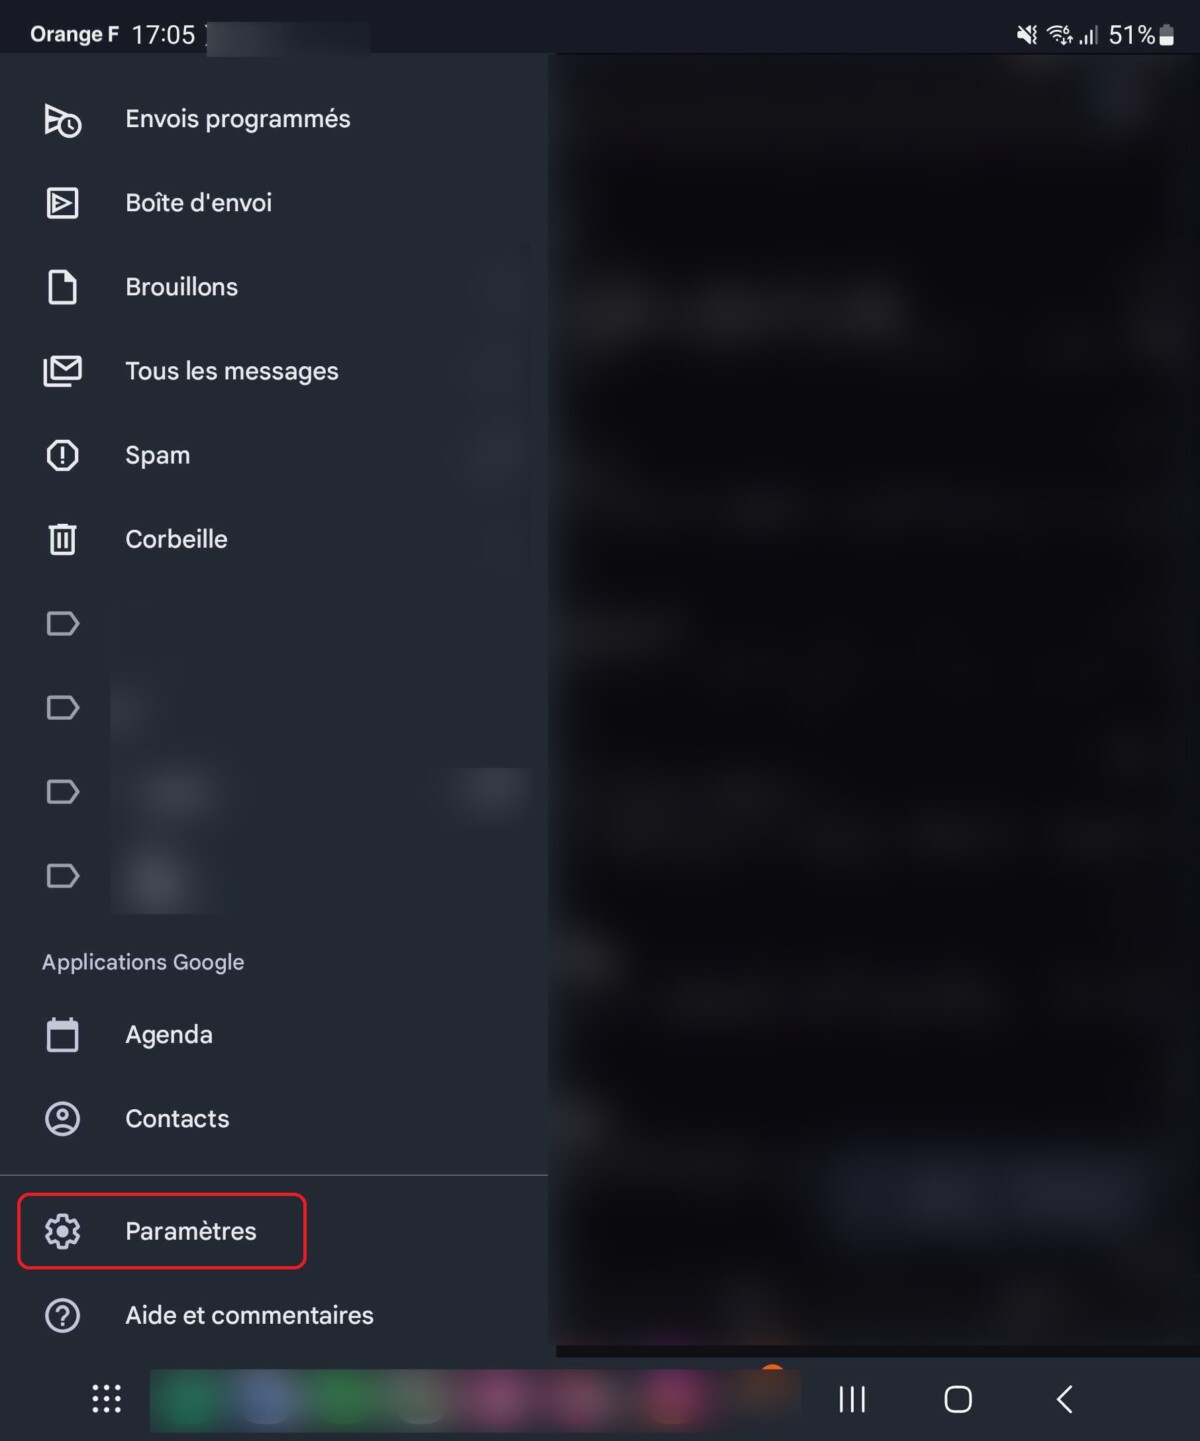
- Tap the menu shaped like three horizontal lines in the upper left corner to open the side menu. Scroll down and tap Settings.
- Select the account for which you want to set the automatic message.
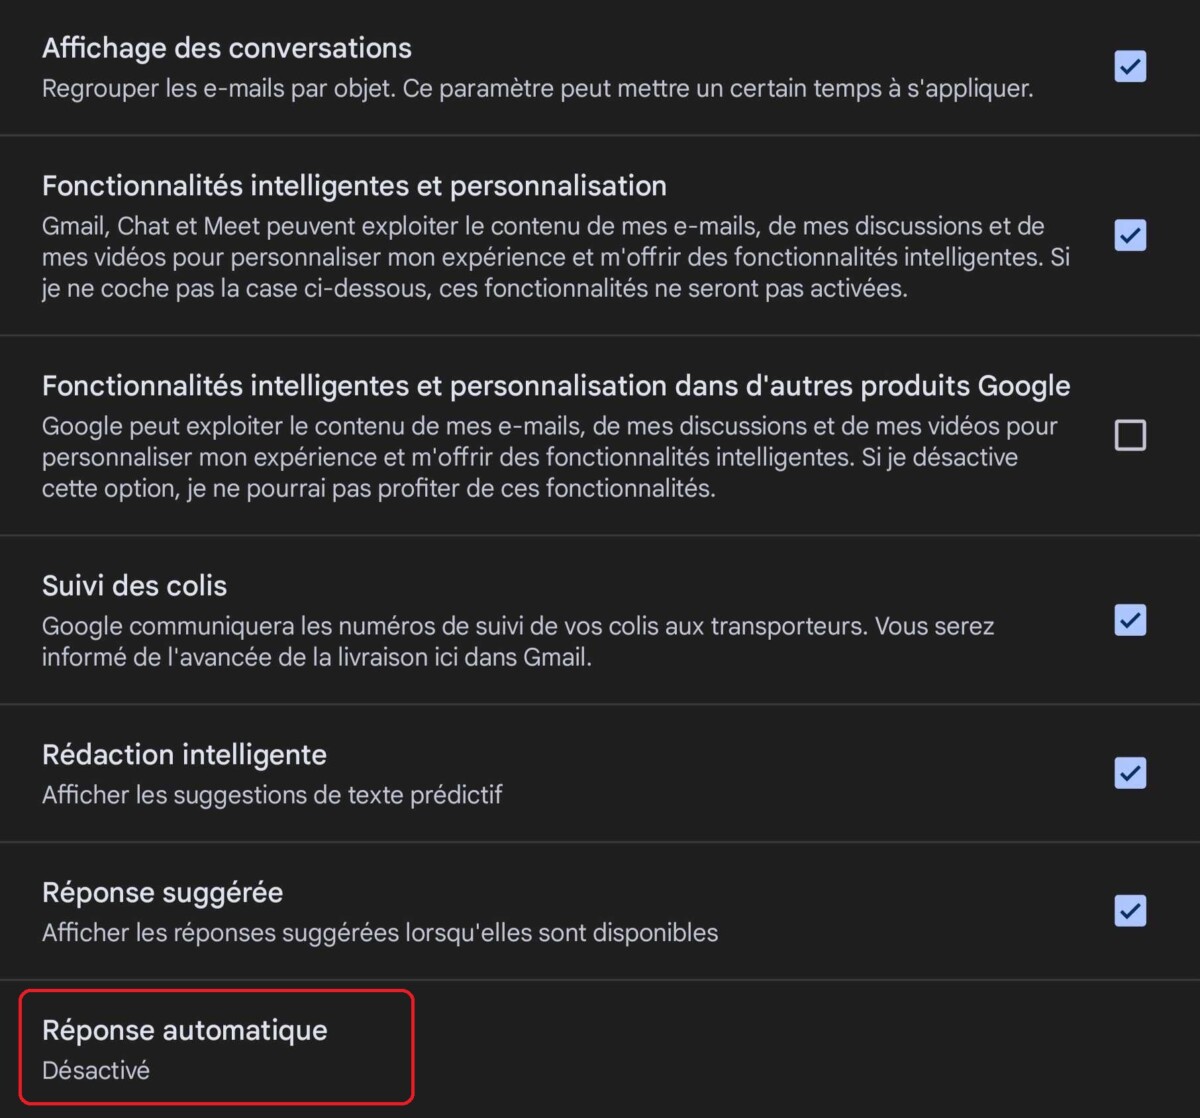
- Scroll down until you get to the option auto reply.
- Enable the option, select the start date and end date of the message, then write your message. Note that the signature will not be taken into account from the application.

- Validate by pressing OK to register.
Want to join a community of enthusiasts? Our Discord welcomes you, it is a place of mutual help and passion around tech.