
I really like the Raspberry Pi 5’s Active Cooler. It’s the best way to protect the operation of the Raspberry Pi 5, whatever the workload imposed on it.
But after testing this cooling system, several of you asked a question about the official Raspberry Pi 5 case. They wondered if this case would be enough to keep an overclocked Raspberry Pi 5 cool.
The test of the official Raspberry 5 case
I have a Raspberry Pi 5, components to customize it, and of course time to waste. And besides, I’m ready to sacrifice this Raspberry Pi 5 in the name of science!
And I got the official box to put the Raspberry in it. This case is equipped with an integrated fan and a heat sink glued to the processor of the Raspberry Pi 5. But it is as difficult to find this case as the Raspberry Pi 5 on the market at the moment. I hope that changes soon.
Note: if you want how to overlock a Raspberry Pi 5, you can find out here.
Assembling the Raspberry 5 case
Okay, I managed to get my hands on the official case, so let’s see what it’s all about.
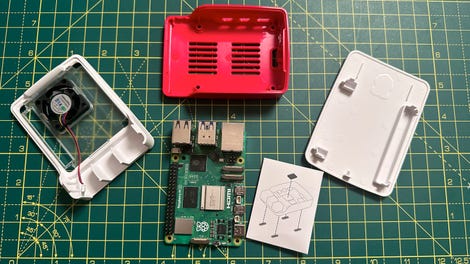
Everything that comes with the official Raspberry Pi 5 case, and a Raspberry Pi 5. Adrian Kingsley-Hughes/ZDNET.
First point, it is easy to place the Raspberry Pi in the box. Let’s see the next steps.
1. Install the heat sink
Firstly, find the heatsink, remove the sticker on the back. Then stick the heatsink onto the Raspberry Pi 5 processor.
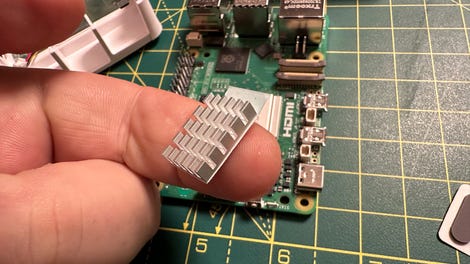
The heat sink. Adrian Kingsley-Hughes/ZDNET.
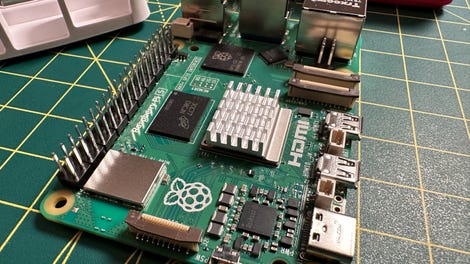
The heat sink placed on the Raspberry Pi 5 processor. Adrian Kingsley-Hughes/ZDNET.
2. Place the Raspberry Pi in the case
At this point I recommend removing the small plastic cover on the fan connector.
Trying to remove it after putting the card in the case will be tricky and you usually end up having to remove the card (so don’t make the mistake I made).
Remove the fan connector cover. Adrian Kingsley-Hughes/ZDNET
Then slide the card into the case. The card is held in place by small tabs. You’ll know it’s in the right place if the screw holes on the Raspberry Pi 5 line up with those on the bottom of the case.
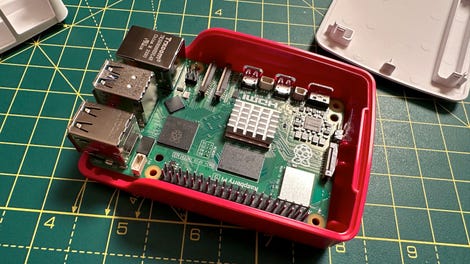
Slide the Raspberry Pi 5 into the case. Adrian Kingsley-Hughes/ZDNET
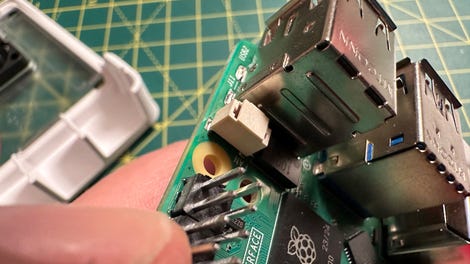
3. Install the fan
The next step is to connect the fan to the board. The connector only fits one way (the yellow wire should be closest to the edge of the board).
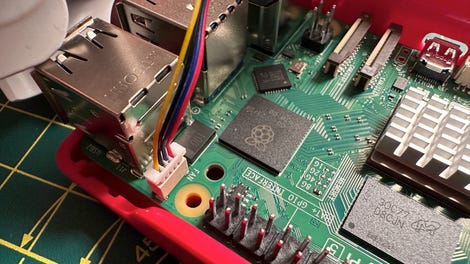
Installing the fan connector. Adrian Kingsley-Hughes/ZDNET.
Next, secure the top cover in place. It fits into a pin on the case, opposite the ports of the Raspberry Pi 5.
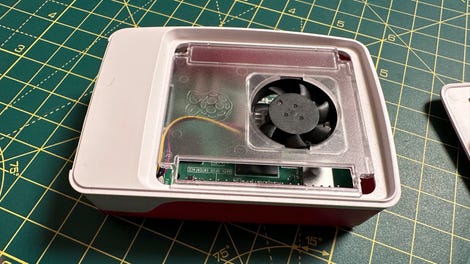
Clip the fan cover into place. Adrian Kingsley-Hughes/ZDNET
4. You are ready to start the Raspberry Pi 5
There are a few small tasks to complete, such as putting the white cover in place, gluing the rubber feet to the bottom of the case (these not only help keep it from sliding around, but also reduce noise and vibration ), and insert a microSD card into the slot (yes, there is a slot in the case for this).

Installing the microSD card. Adrian Kingsley-Hughes/ZDNET
5. Ready to operate
All that remains is to plug the Raspberry Pi 5 into the mains and turn it on.

That works ! Adrian Kingsley-Hughes/ZDNET.
Can the official case prevent an overclocked Raspberry Pi 5 from overheating?
I wouldn’t run an overclocked Raspberry Pi 5 without sufficient cooling. And I tested the Active Cooler and found the system to be excellent at keeping the Raspberry Pi 5 cool.
But what about this official case? It has a fan and a heat sink. Will this work?
Using the Active Cooler and the Raspberry Pi 5, then running the Hashcat password cracking tool in benchmark mode, I was unable to get temperatures above 55ºC. And without the active cooler, Hashcat would have pushed temperatures up to 71ºC.
With this official case with its heatsink, using the same test software, I pushed the temperatures up to… 80ºC, which is hot. But not enough to blow up the processor. So in conclusion, it’s really not bad.
Source: “ZDNet.com”