advent Calendar
Sew a calendar from a roll of fabric
© makerist
Should it be a special advent calendar this year? Then you are exactly right with the roll of fabric. Find out how to sew the calendar out of a roll of fabric here!
If you are looking for a very special Advent calendar, you will find it with these instructions: The calendar consists of a long sewn roll of fabric that can be easily separated into 24 individual sections with twine. In the sections there are small surprises and gifts that sweeten the waiting time for Christmas and guarantee a surprise every day. Here you can find out how you can easily sew the advent calendar in just a few steps:
Sewing an advent calendar from a roll of fabric: material and instructions
You will need the following materials for the advent calendar:
- 2 x different cotton fabrics, each measuring at least 0.30 x 1.50 m
- Cutting mat
- Fabric scissors or rotary cutters
- Pins, sewing thread
- sewing machine
- Cord or ribbon
- 24 small signs with numbers
Instructions:
1. From the two different fabrics you sew a tube of fabric that should be at least three meters long and 15 centimeters wide – but of course you can adjust the dimensions individually beforehand.
2. To save yourself work when cutting the strips, first fold the fabric wide on your cutting surface (1.50 m), fold it in the middle (0.75 m) and then again in the middle (37 , 5 cm).
3. For a thinner tube, cut two 15 cm wide strips from both cotton fabrics. You now have two strips of 0.15 x 1.50 m from each cotton fabric. If, on the other hand, you want your hose to be wider, simply cut two wider strips (you will then also need 2 x cotton fabric with the dimensions 0.35 m or larger x 1.50 m).
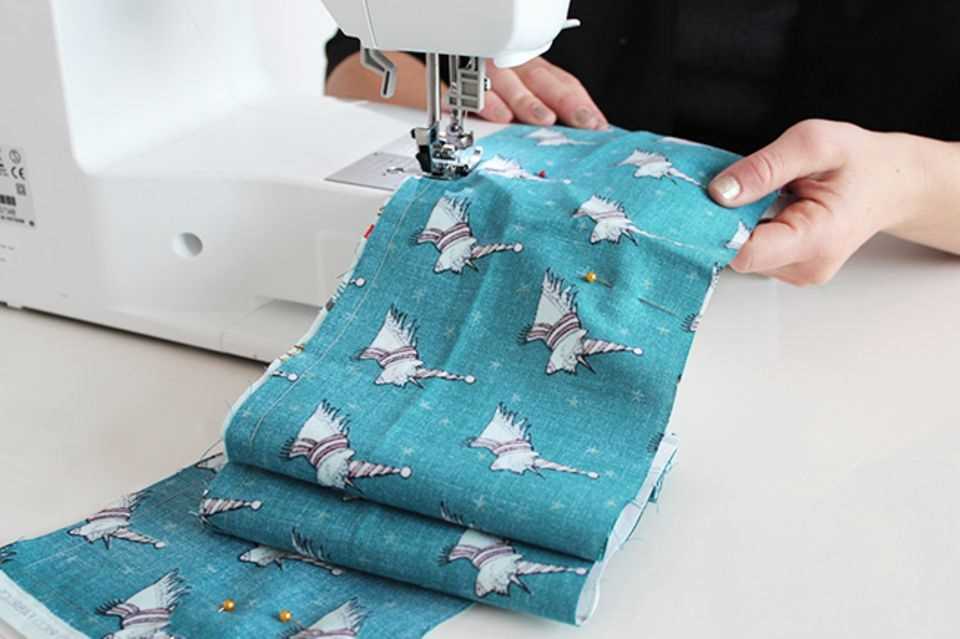
4. Lay the stripes for each cotton fabric right sides together. Make sure they are flush. Pin one of the short edges in place with pins and then stitch them down with a straight stitch. Now you have a long strip of fabric (3 m) per fabric.
5. Now lay the two different strips of fabric flush right sides together, pin them in place with pins and stitch the tube around once with a straight stitch, except for a short side that remains open. The open side then serves as a turning opening and opening of the advent calendar.

© makerist
6. Turn the hose through the opening and iron it.
7. Fold the opening inwards (approx. 1.5 cm) and stitch it down.
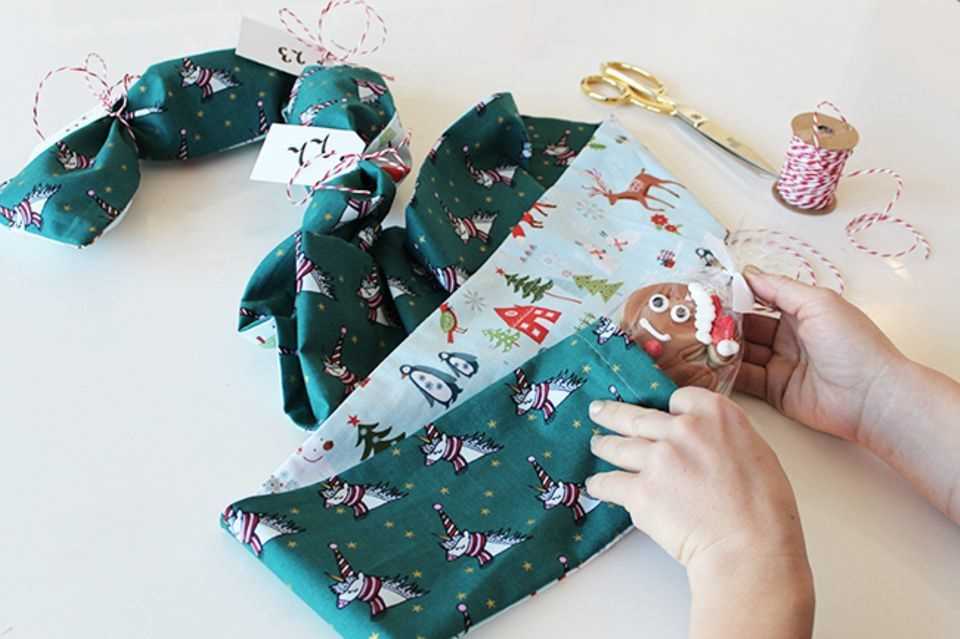
8. Now it’s time to fill: Fill in the little surprises one by one and separate them from the next Advent calendar door with a cord. You can hang the respective label with the corresponding number on the cord. But be careful: This advent calendar goes backwards chronologically, ie you start at the very back of the tube with the 24 and then work your way up until you get to the 1. So nobody has to look for their little door here – the surprise still succeeds, bet?

© makerist
You can find 22 great ideas for filling an Advent calendar here: Sustainable Advent Calendar
Looking for more ideas and DIY projects for the Christmas season? Here you can find our route to make your own Advent calendar and tinker an Advent wreath. And if you still need ideas for Christmas, you will find our tips on sustainable gifts here.
Source used: magazin.makerist.de
